Expedite Service Requests with Google Forms + Transposit
Using a Google Form connected to Transposit via webhook, a user can easily submit a form and kick off an approval workflow


Provisioning services can feel like a never-ending task. Luckily, there are ways to expedite the process and put the heavy lifting onto the shoulders of automation, bringing humans in only to choose whether or not to approve or decline a request.
Using a Google Form connected to Transposit via webhook, a user can easily submit a form and start a Transposit workflow. With one click, the approver can approve and let Transposit automatically fulfill the request (whether it’s creating a new repository, adding a user to a service, or creating new instances) and email the requester. If declined, Transposit can also email (or any other action, like send a chat in Slack) the requester.
While some workflow automation tools enable you to build approval workflows, the automation lives outside of a system of record. A human still needs to update a ticket with data from the fulfilled request (i.e. the GitHub repository created). On the flip side, you could have an approval step or field in your ticket, but this usually means the fulfillment is entirely manual. By using Transposit Activities as the container for this approval workflow, both the request and automation are automatically documented in a way that provides a historical record and enables data output from actions to be used in downstream actions in the workflow (i.e. sending an email with the results of the request).
In the example for the video and steps below, we’re provisioning a GitHub repository. You could use this same flow for any service with an API, from creating accounts in Atlassian to creating new ECS instances to adding users to a service.
We all want the best experience for our users, and Google Forms is a simple way to provide that. It removes the complexity from submitting requests, as requesters do not need access to Transposit or even to know it exists. The approver also gets a great experience by enabling automation to do a significant portion of the work and reducing manual toil (no need to manually login to GitHub and create repositories).
See it in action [video]
How to set up a Google Forms approval workflow
Follow these steps to create this approval workflow for any number of service requests.
Create Google Form
Create your Google Form with the fields you need, like:
- Name
- Desired repository name
- Repository privacy
- Reason for repository
Create a webhook
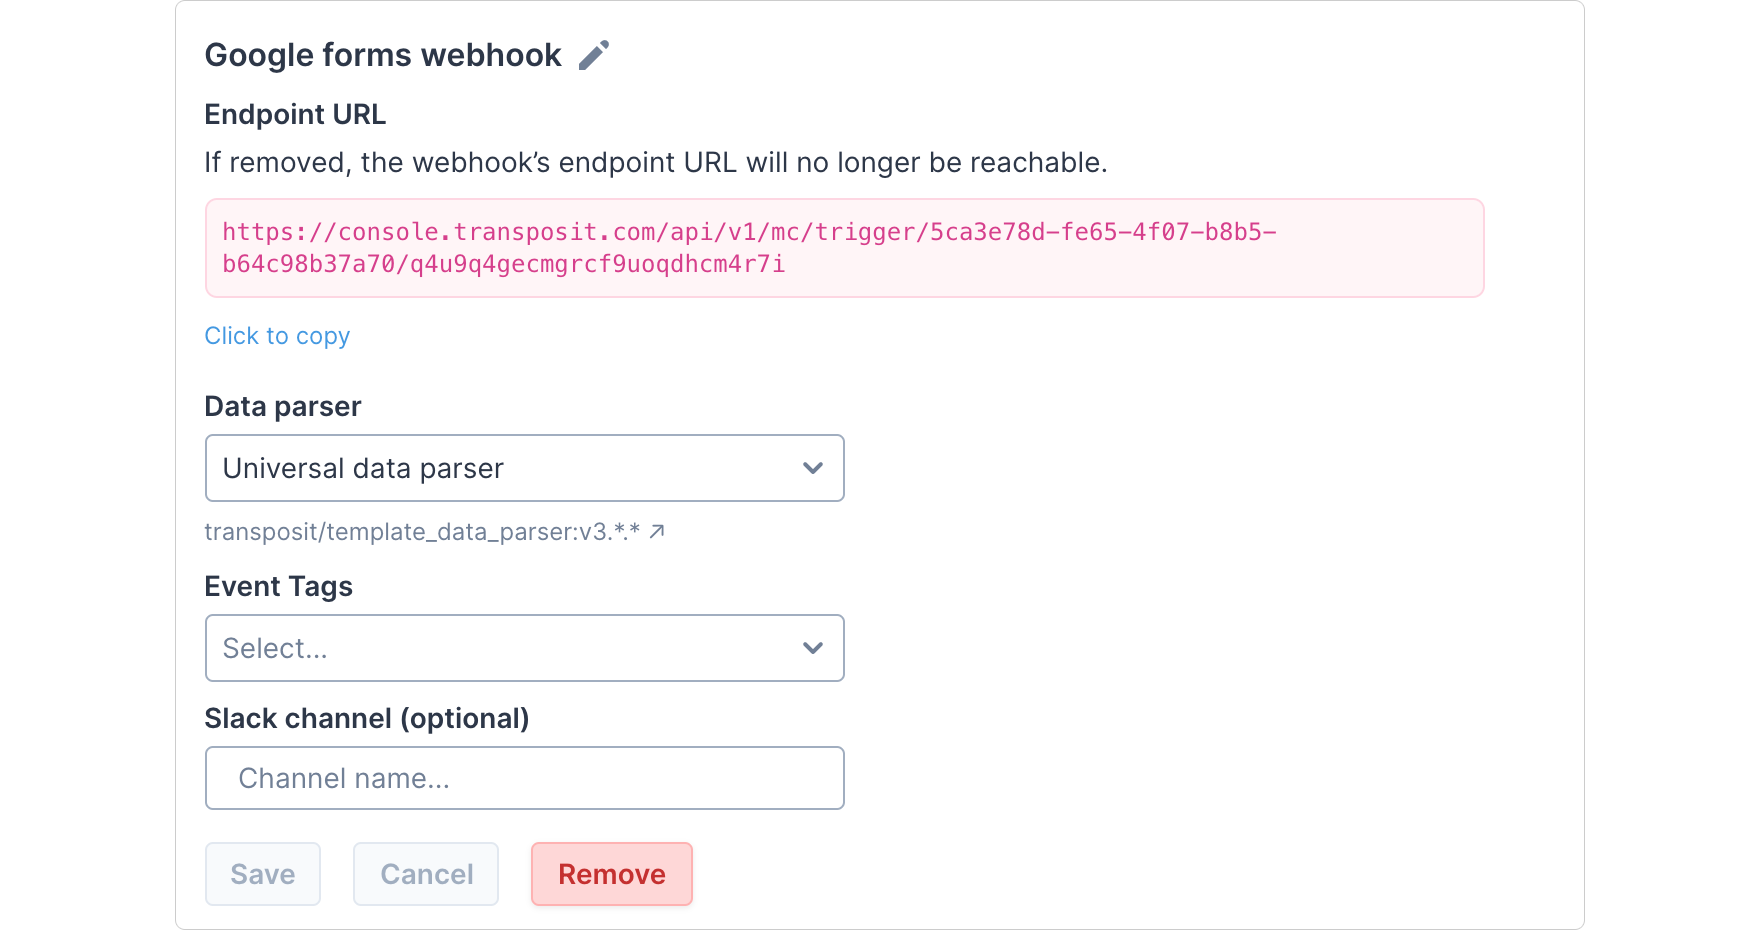
Go to your Webhooks page and click “Add webhook”. Select the Universal data parser, enter in a Slack channel if you’d like to see the requests in Slack, and click “Add”. Rename your webhook something you’ll recognize, like “Google forms webhook”
Connect Google Form to Transposit
Now you’ll need to create a Google Forms submission webhook. Learn how to send a webhook for each Google Forms submission. Paste the Transposit-provided Endpoint URL into your Google Apps script.
Create new activity type
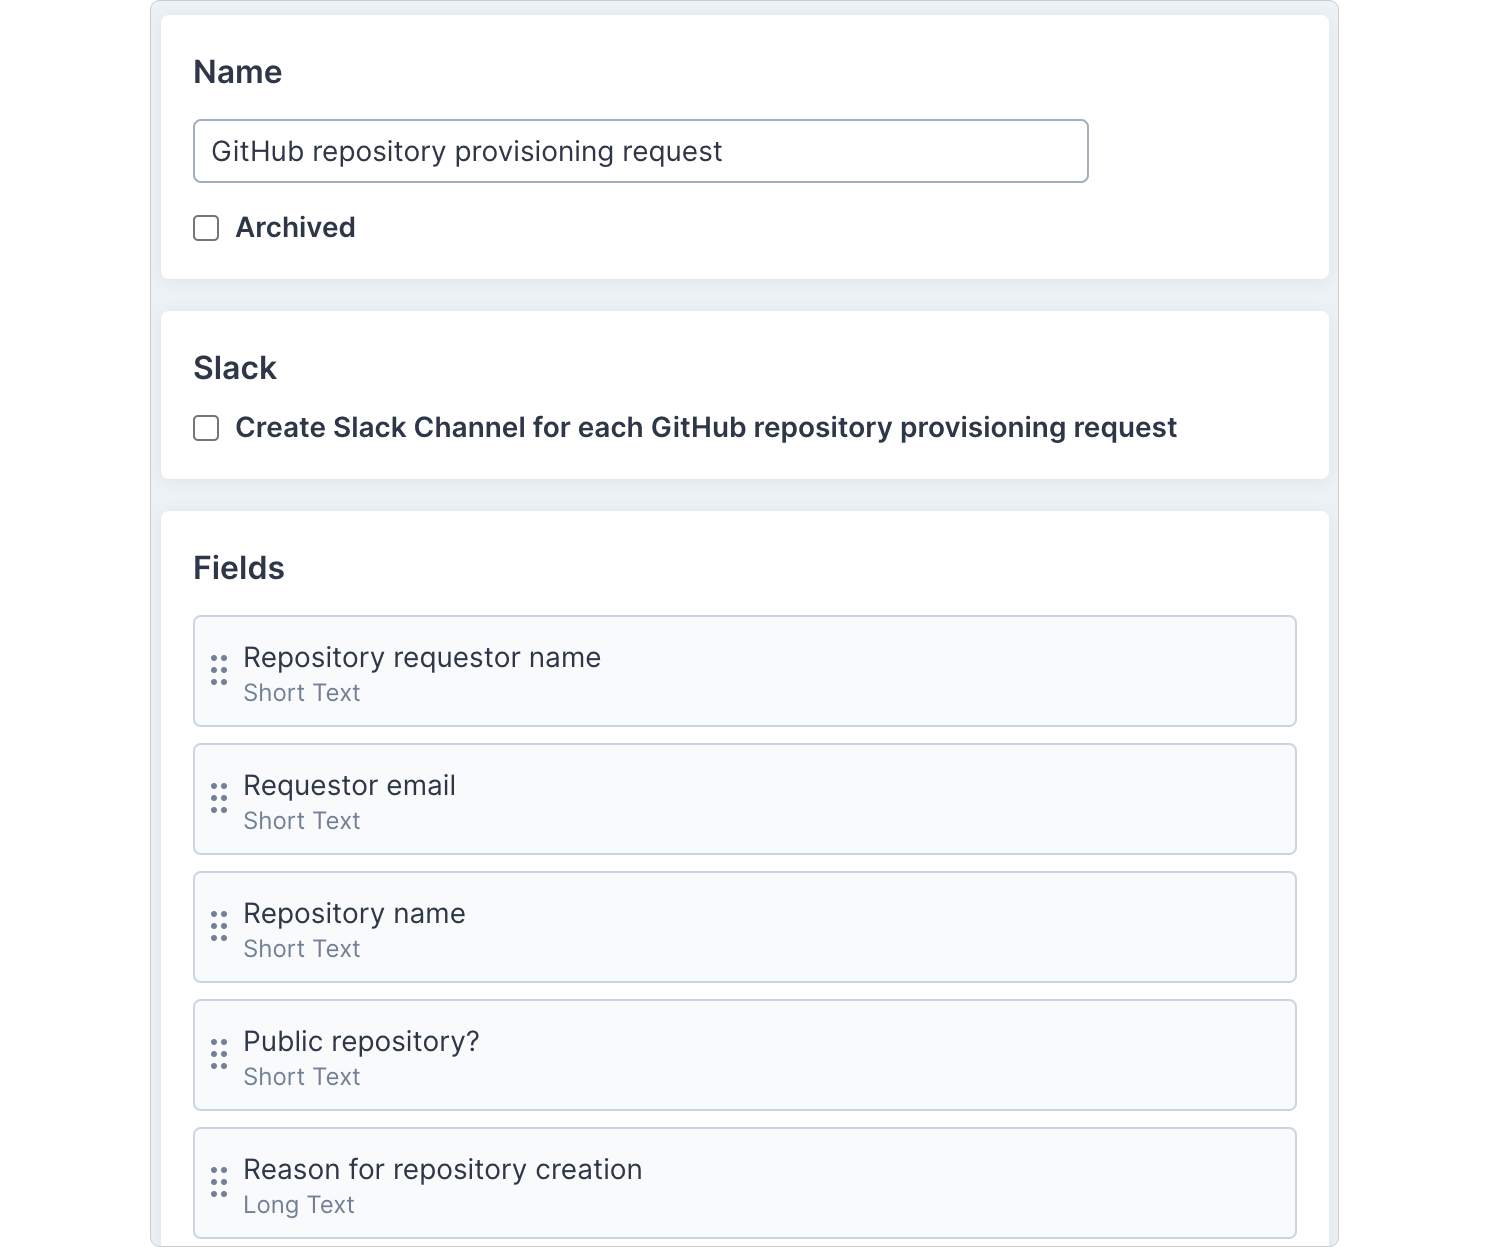
Go to Settings > Activity Types and create a new activity type in Transposit. You may call it something like “GitHub repository provisioning request.”
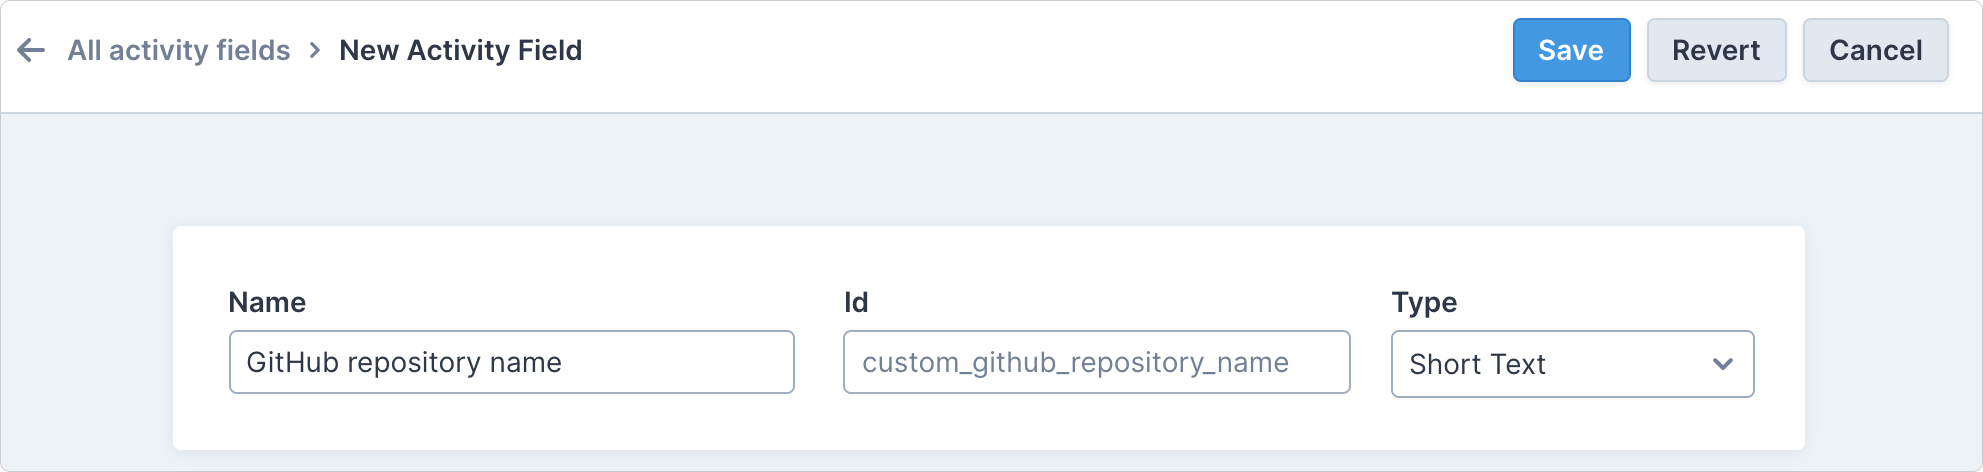
You’ll then create one activity field to correspond to each of your form questions. Head to Settings > Activity Fields to create these fields, then back to your Activity type to add them.
In the end, your activity will look something like this:
Create a runbook
Now let’s create the runbook. This runbook will automatically create the Transposit Activity and enable the approver to approve (and create the new repository) or decline the request with a single button.
Runbook trigger
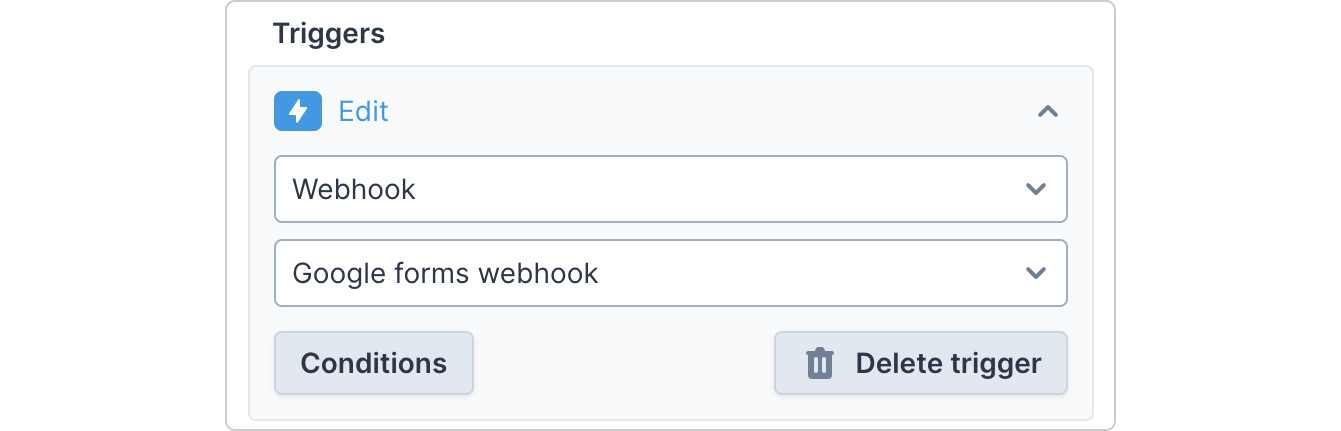
First, create a runbook trigger so this runbook is automatically run when your Google Form webhook payload is sent to Transposit.
Creating the activity
This runbook section creates the Transposit activity and inputs the Google From data to the correct Activity Fields. In the end, it will look like this:
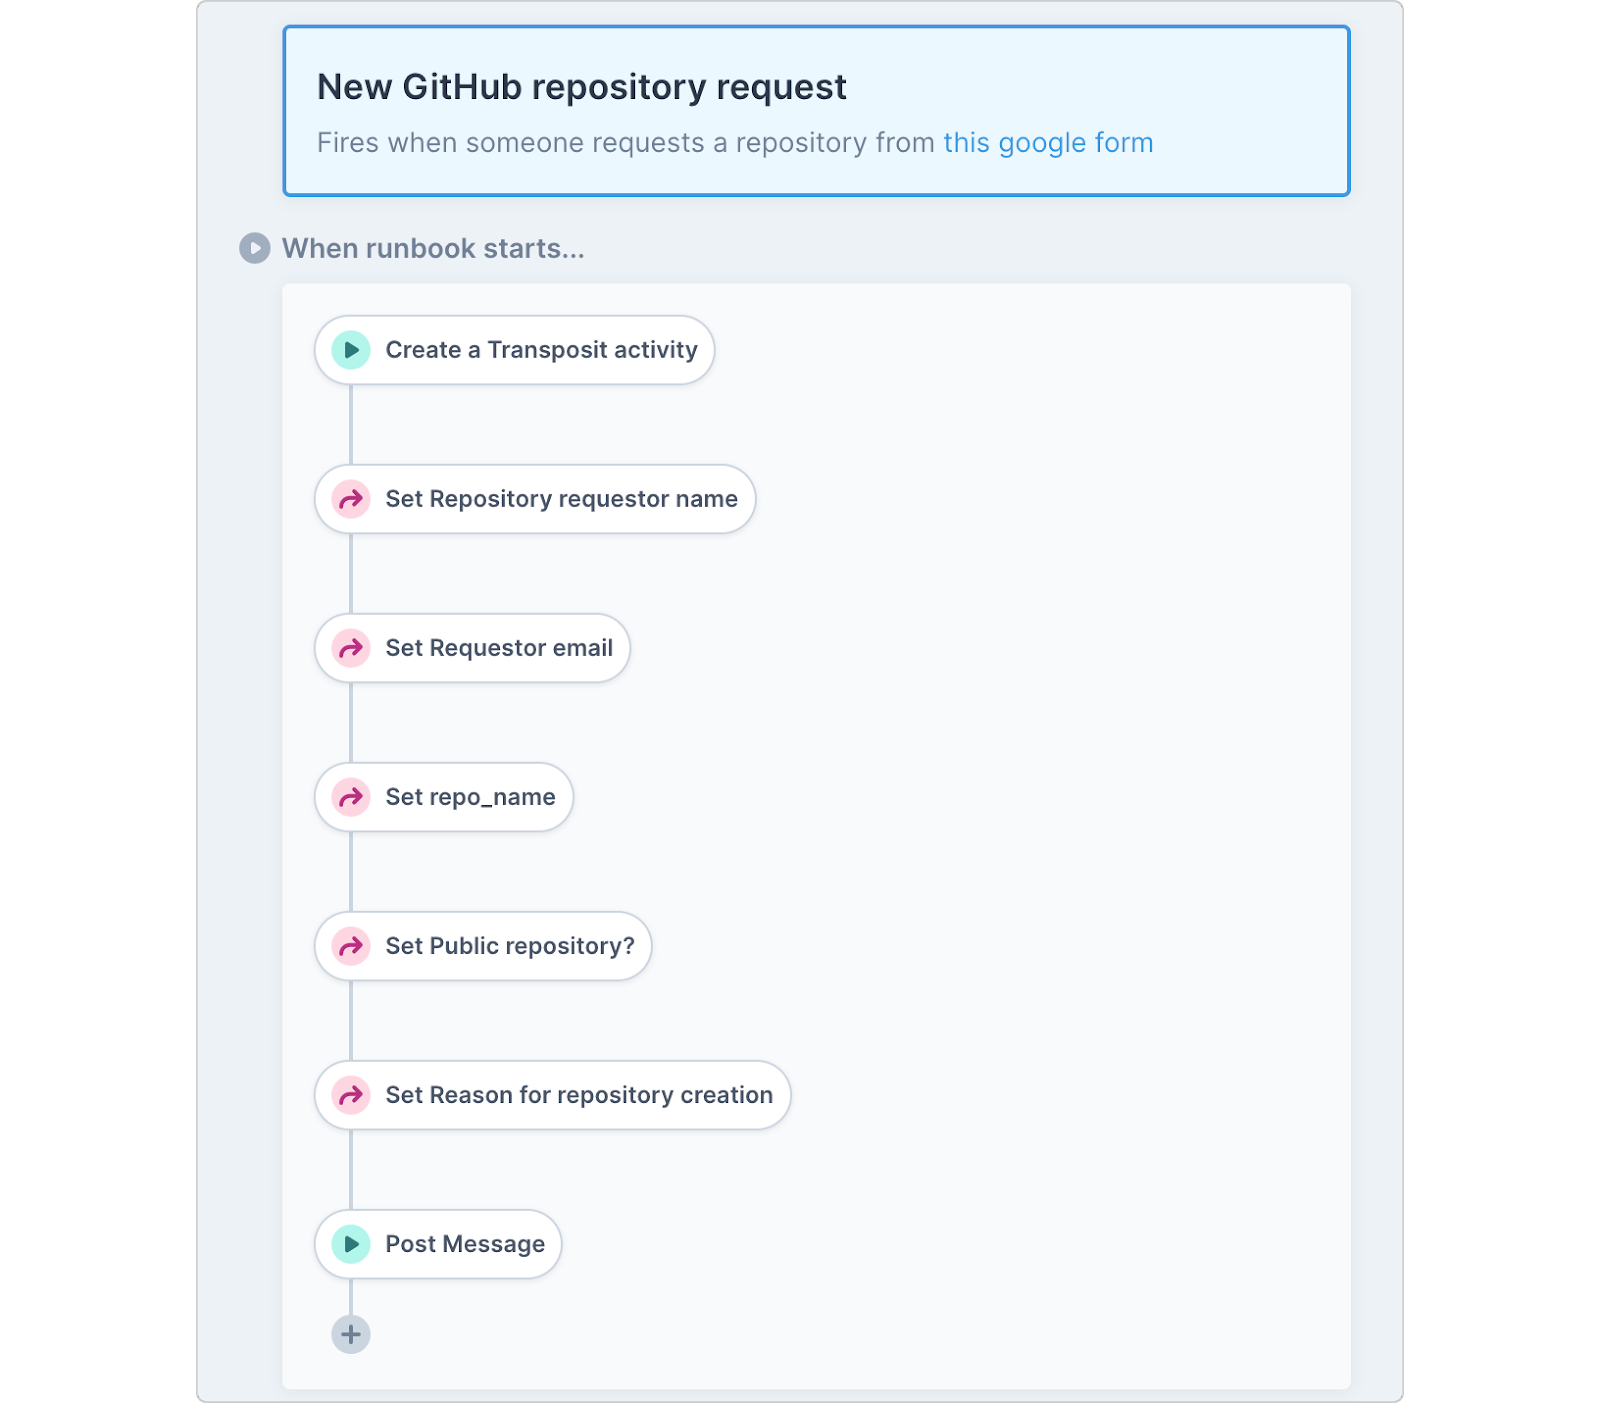
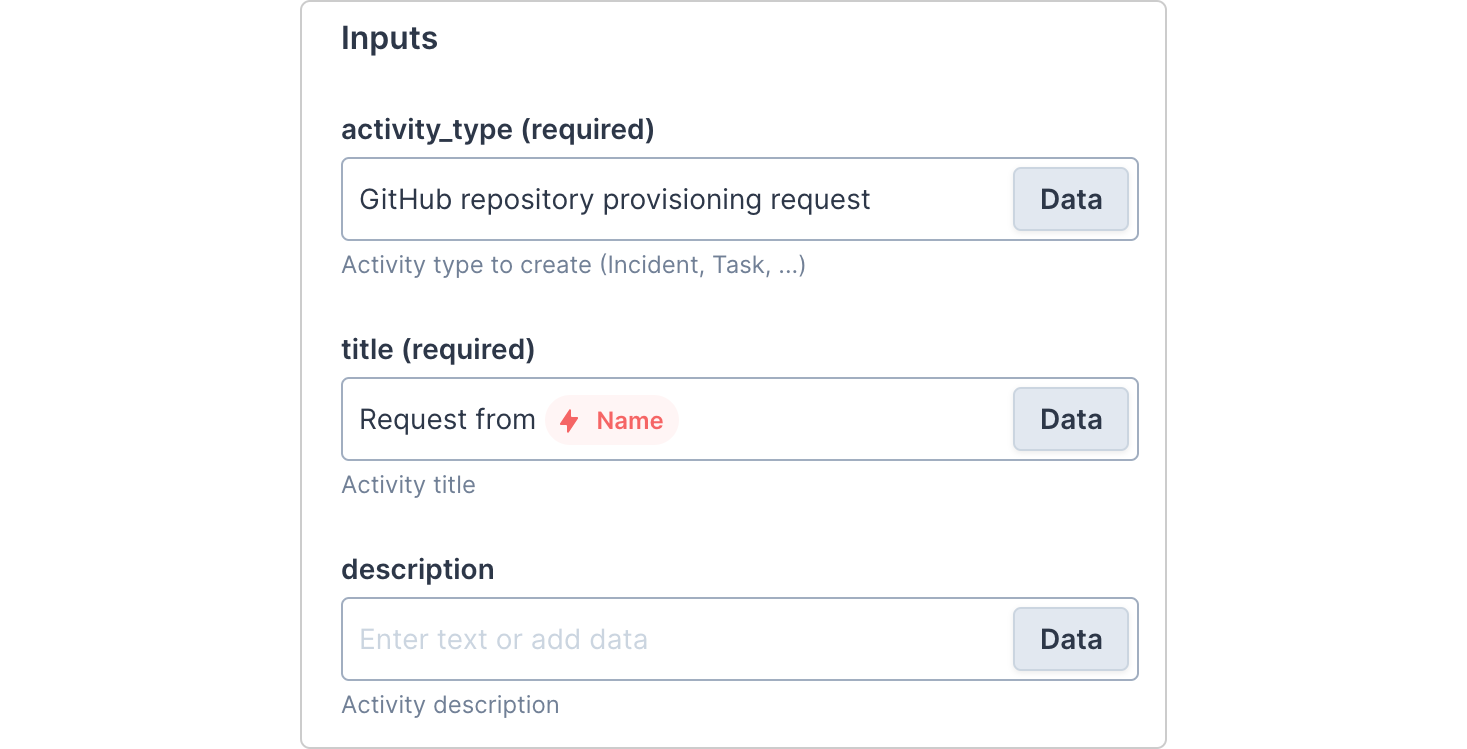
First, add the action, Create a Transposit activity. Fill in the activity type you just created in the “Activity type” input. You can use Data to form the Activity title, pulling in the Name submitted in the Google Form (see below) to create a title like “Request from Sarah”.
Next, add some activity field bindings to pipe the data from the Google Form into the corresponding Activity Fields.
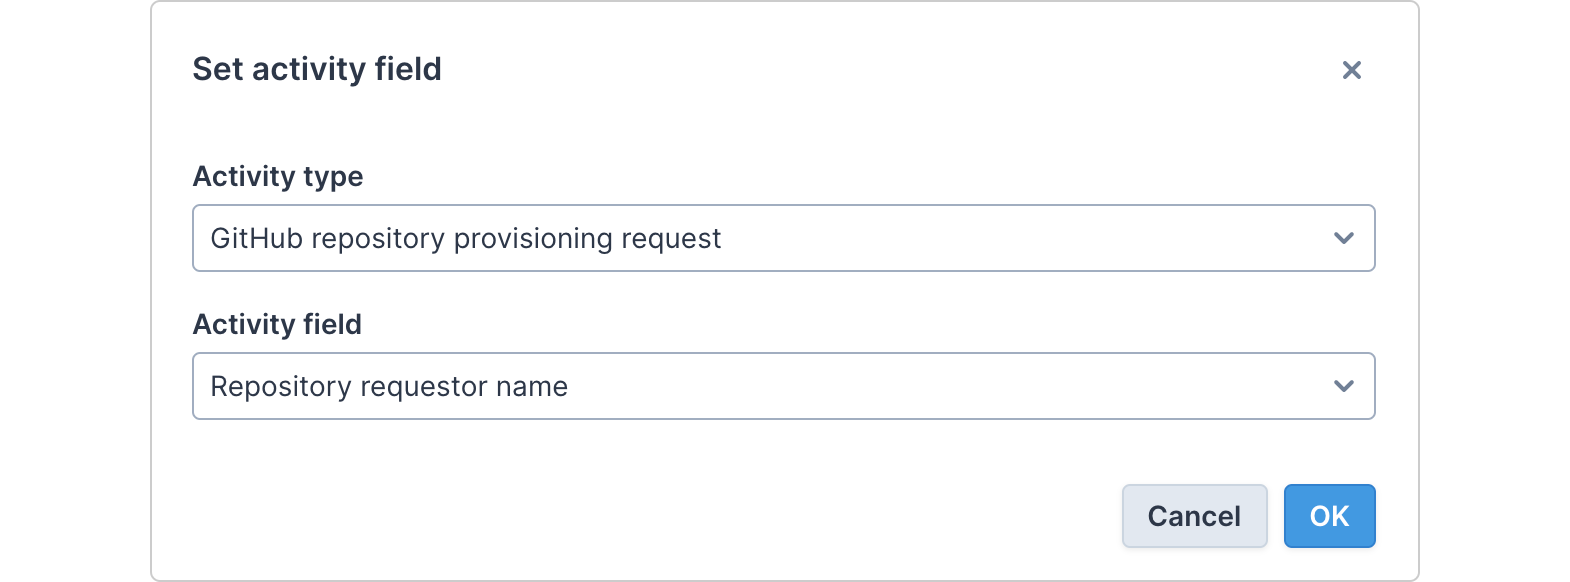
First, click “Set activity field.” Then choose the Activity Type you’ve created and the Activity Field you want data from the Google Form to go into.
Now, on the right-hand side, in the Data field, add this text… {% raw %}
{{Trigger.Webhook.Google forms webhook.Name}}{% endraw %} …where “Google forms webhook” is the name of your webhook you created and “Name” is the title of the prompt in your Google Form.
Do this step for every Google Form field. You should now have all your Google Form fields linked to your activity’s corresponding field.
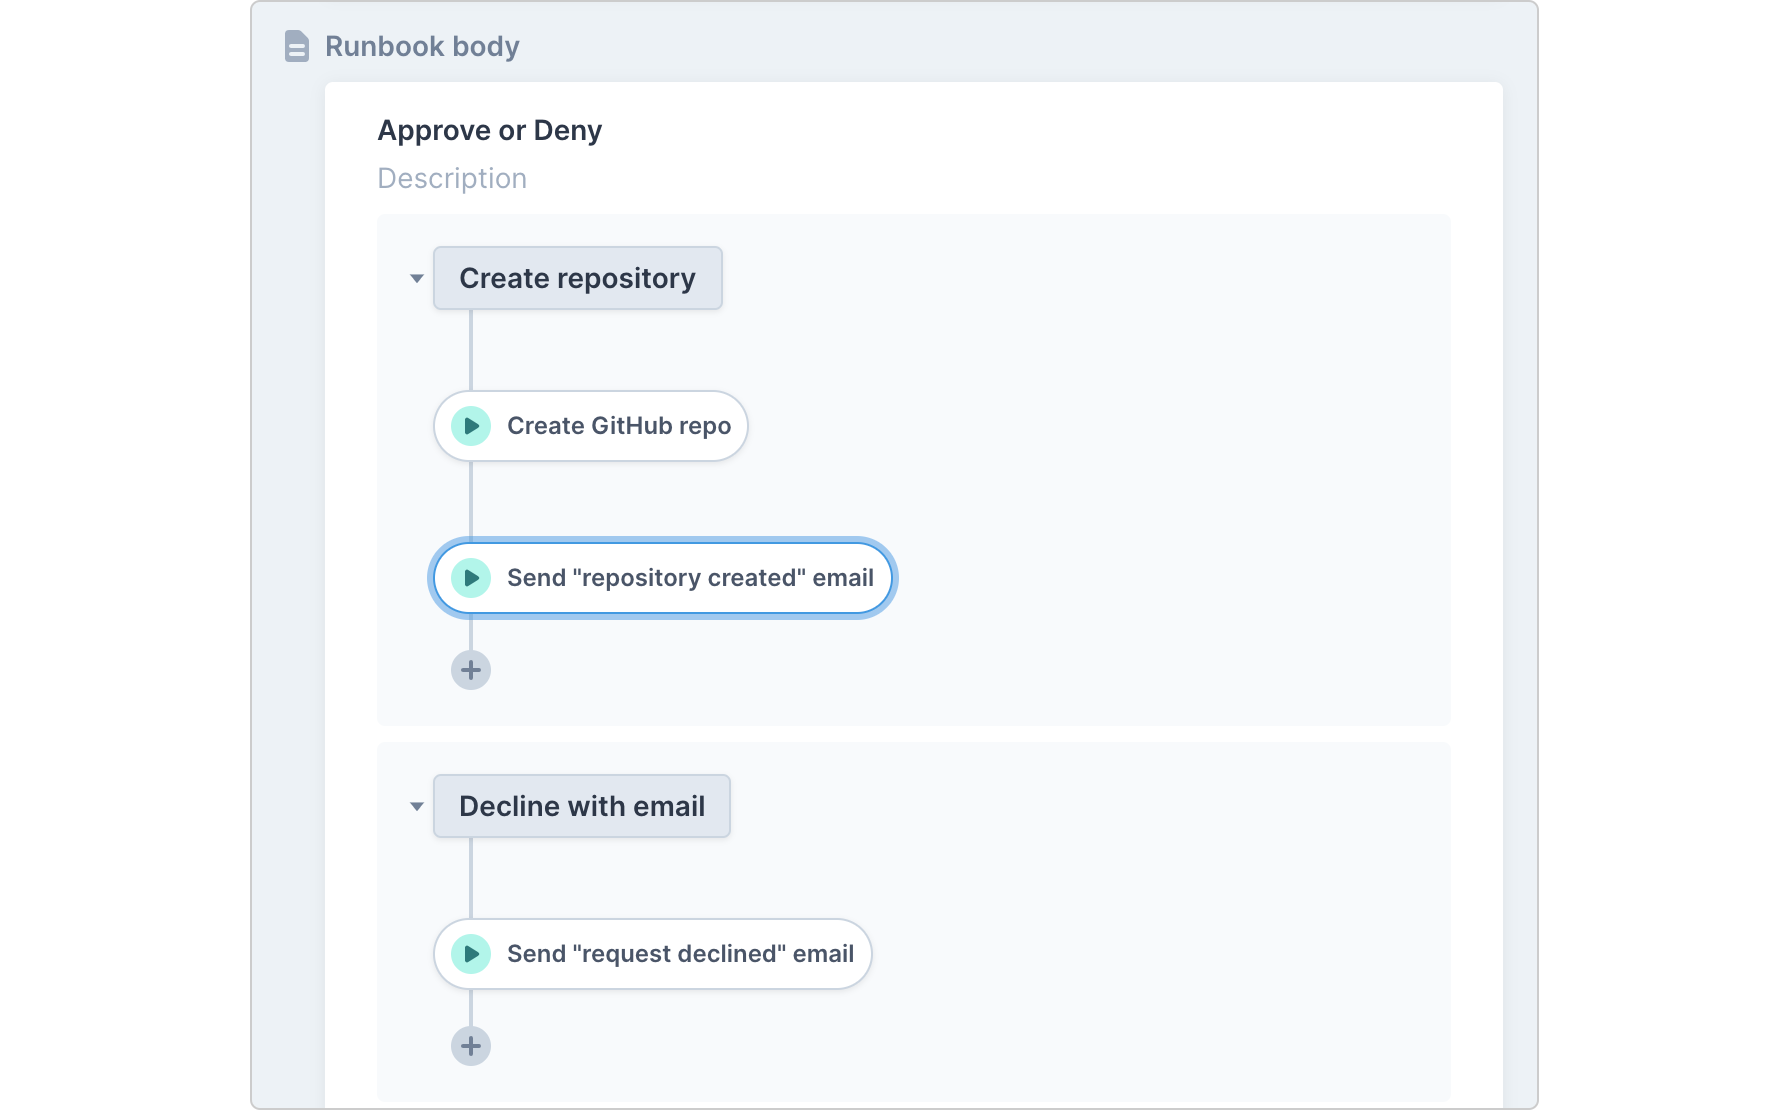
Runbook body
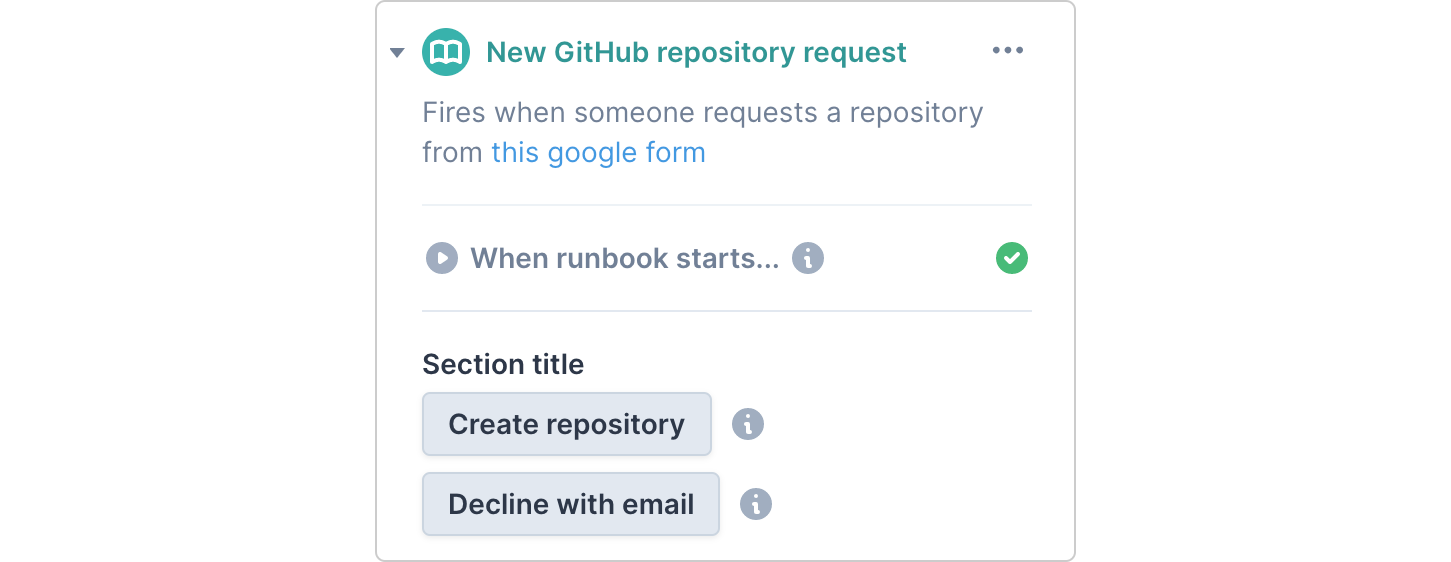
Now, we’ll head to the runbook body to add human-in-the-loop automation — asking an approver to approve or decline the request.
Here you’ll create two buttons: one to approve the request and one to deny the request. In this example, we’re making use of two of Transposit’s pre-built actions: Create GitHub repo and Send an e-mail with SendGrid. Add the actions to your runbook and rename as necessary.
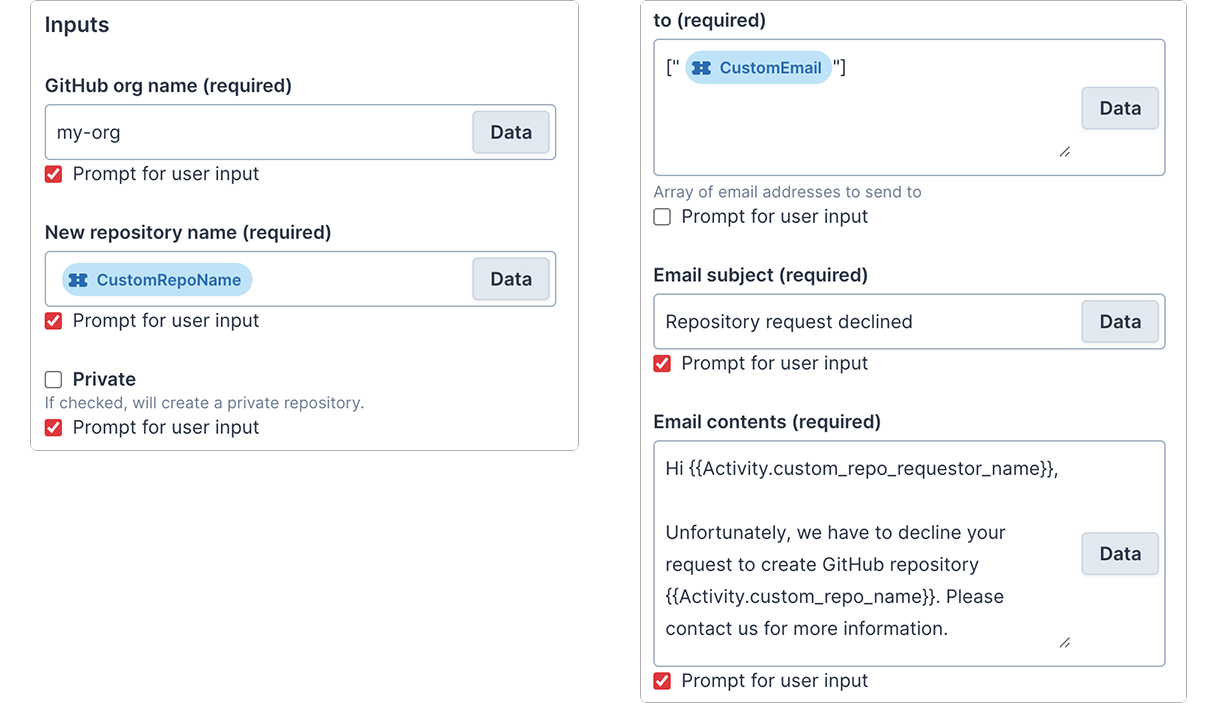
For these actions, you can pre-fill the inputs with values from the request using the Data button. You can also click the “Prompt for user input” checkbox on any input to allow the approver to override the value. See inputs we added for the GitHub action and the email actions below:
Using the workflow in action
Now, anytime a user submits a GitHub repository provisioning request via Google Forms, a runbook will run and automatically create your activity and fill out its fields. You’ll see events for this in your Activity tab, be notified in Slack (if configured), and can navigate to the created activity from there.
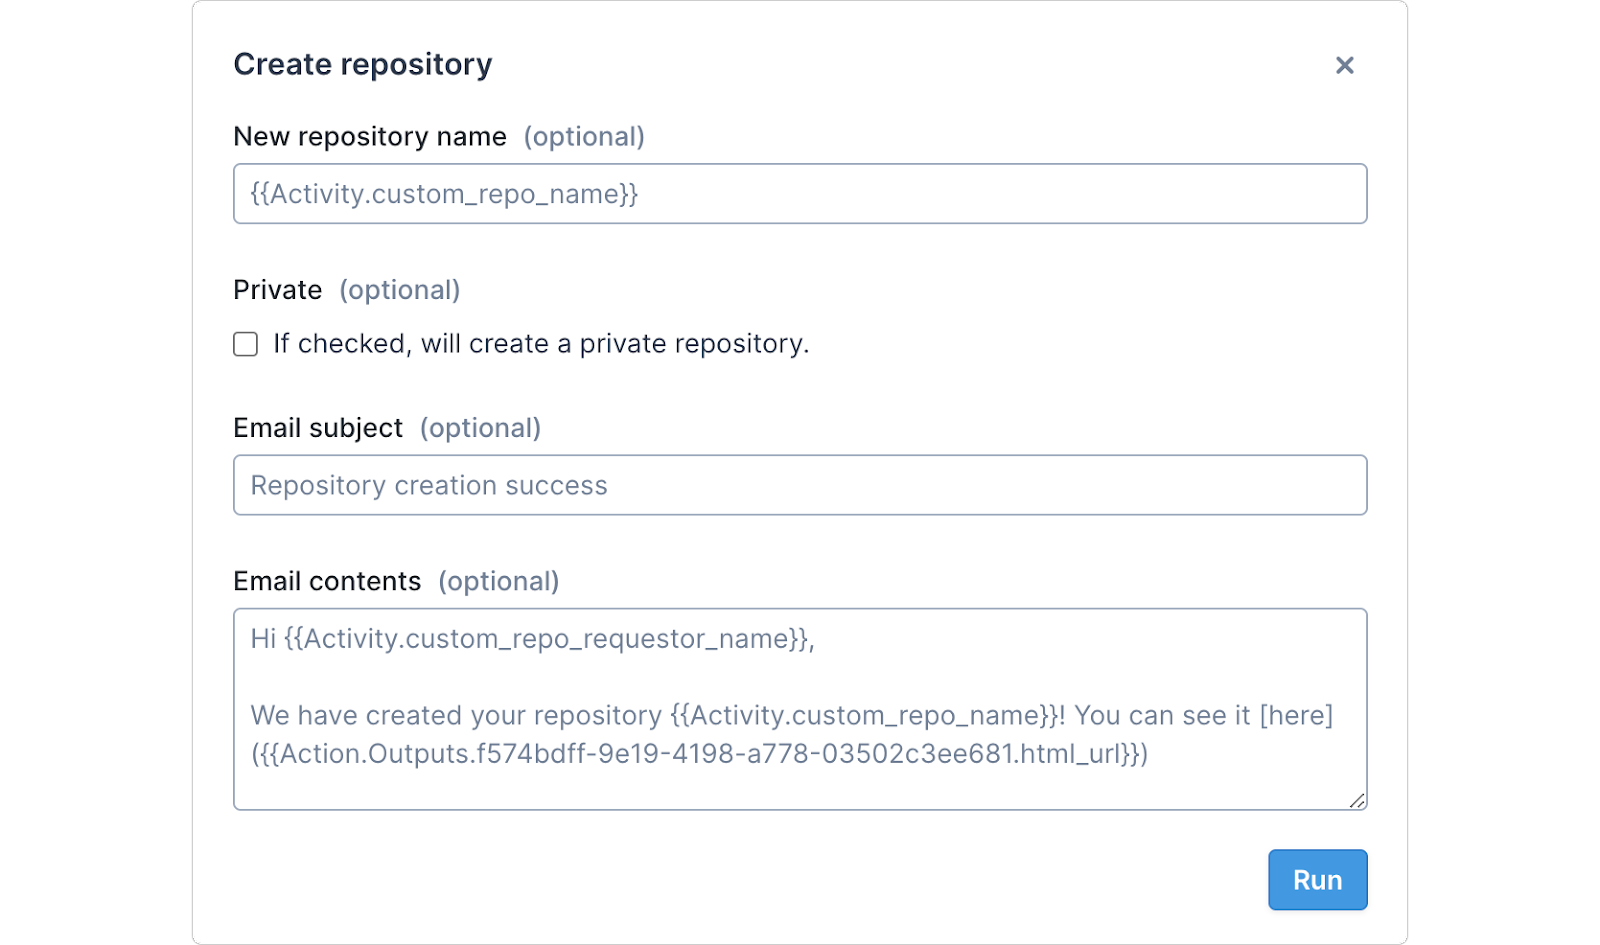
Within the activity, go to the Timeline and open the attached runbook.
Approve or decline the request, modifying any information in the form as necessary.
Once run, you’ll see in the timeline that the necessary action following your decision was taken.
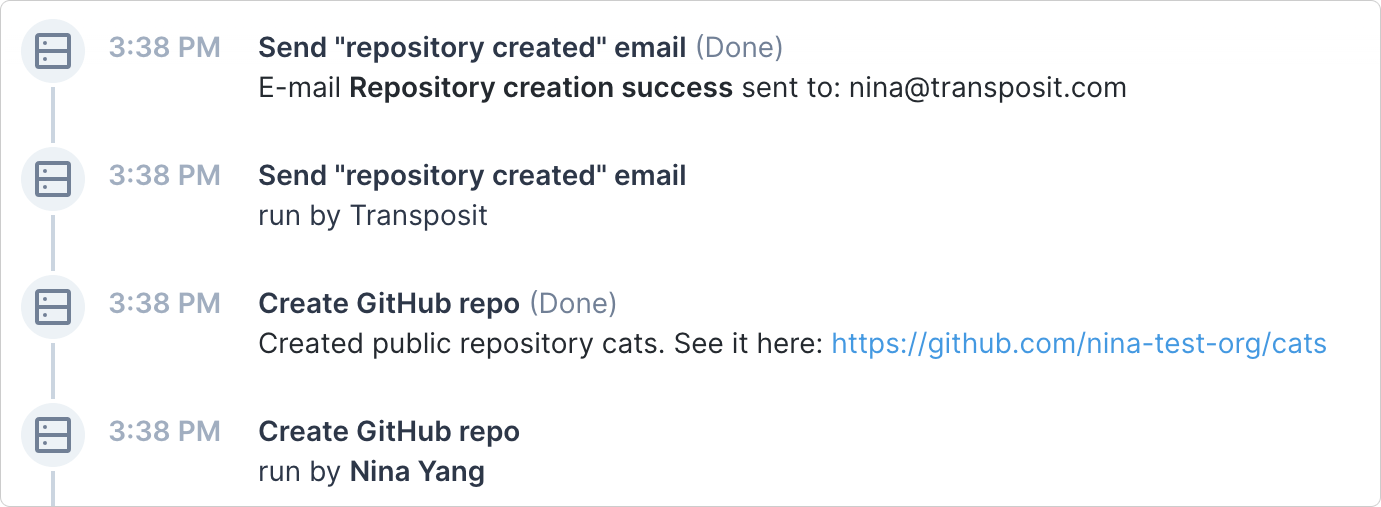
All done! Automation has taken the brunt of the work so the requester gets what they need faster and the approver is able to reduce the toil of each request.
As mentioned above, this type of workflow can apply to a broad set of tasks, like requesting access to a service or provisioning a new infrastructure instance. Try it out and let us know what you think on Twitter.