You set up webhooks to enable data to be pushed into Transposit from external services.
Webhooks help you identify and respond to incidents, requests, or any other operational event.
You can receive events from any external service, such as Datadog, PagerDuty, BigPanda, and CircleCI, that provides support for webhooks.
Overview
Watch these quick screencasts for an overview of the steps you'll take below.
In the first video, you see how to integrate New Relic with Transposit, while the second is focused on ServiceNow.
For detailed steps on working with New Relic, see Connect to New Relic.
For detailed steps on working with ServiceNow, see Connect to ServiceNow.
Create the Webhook
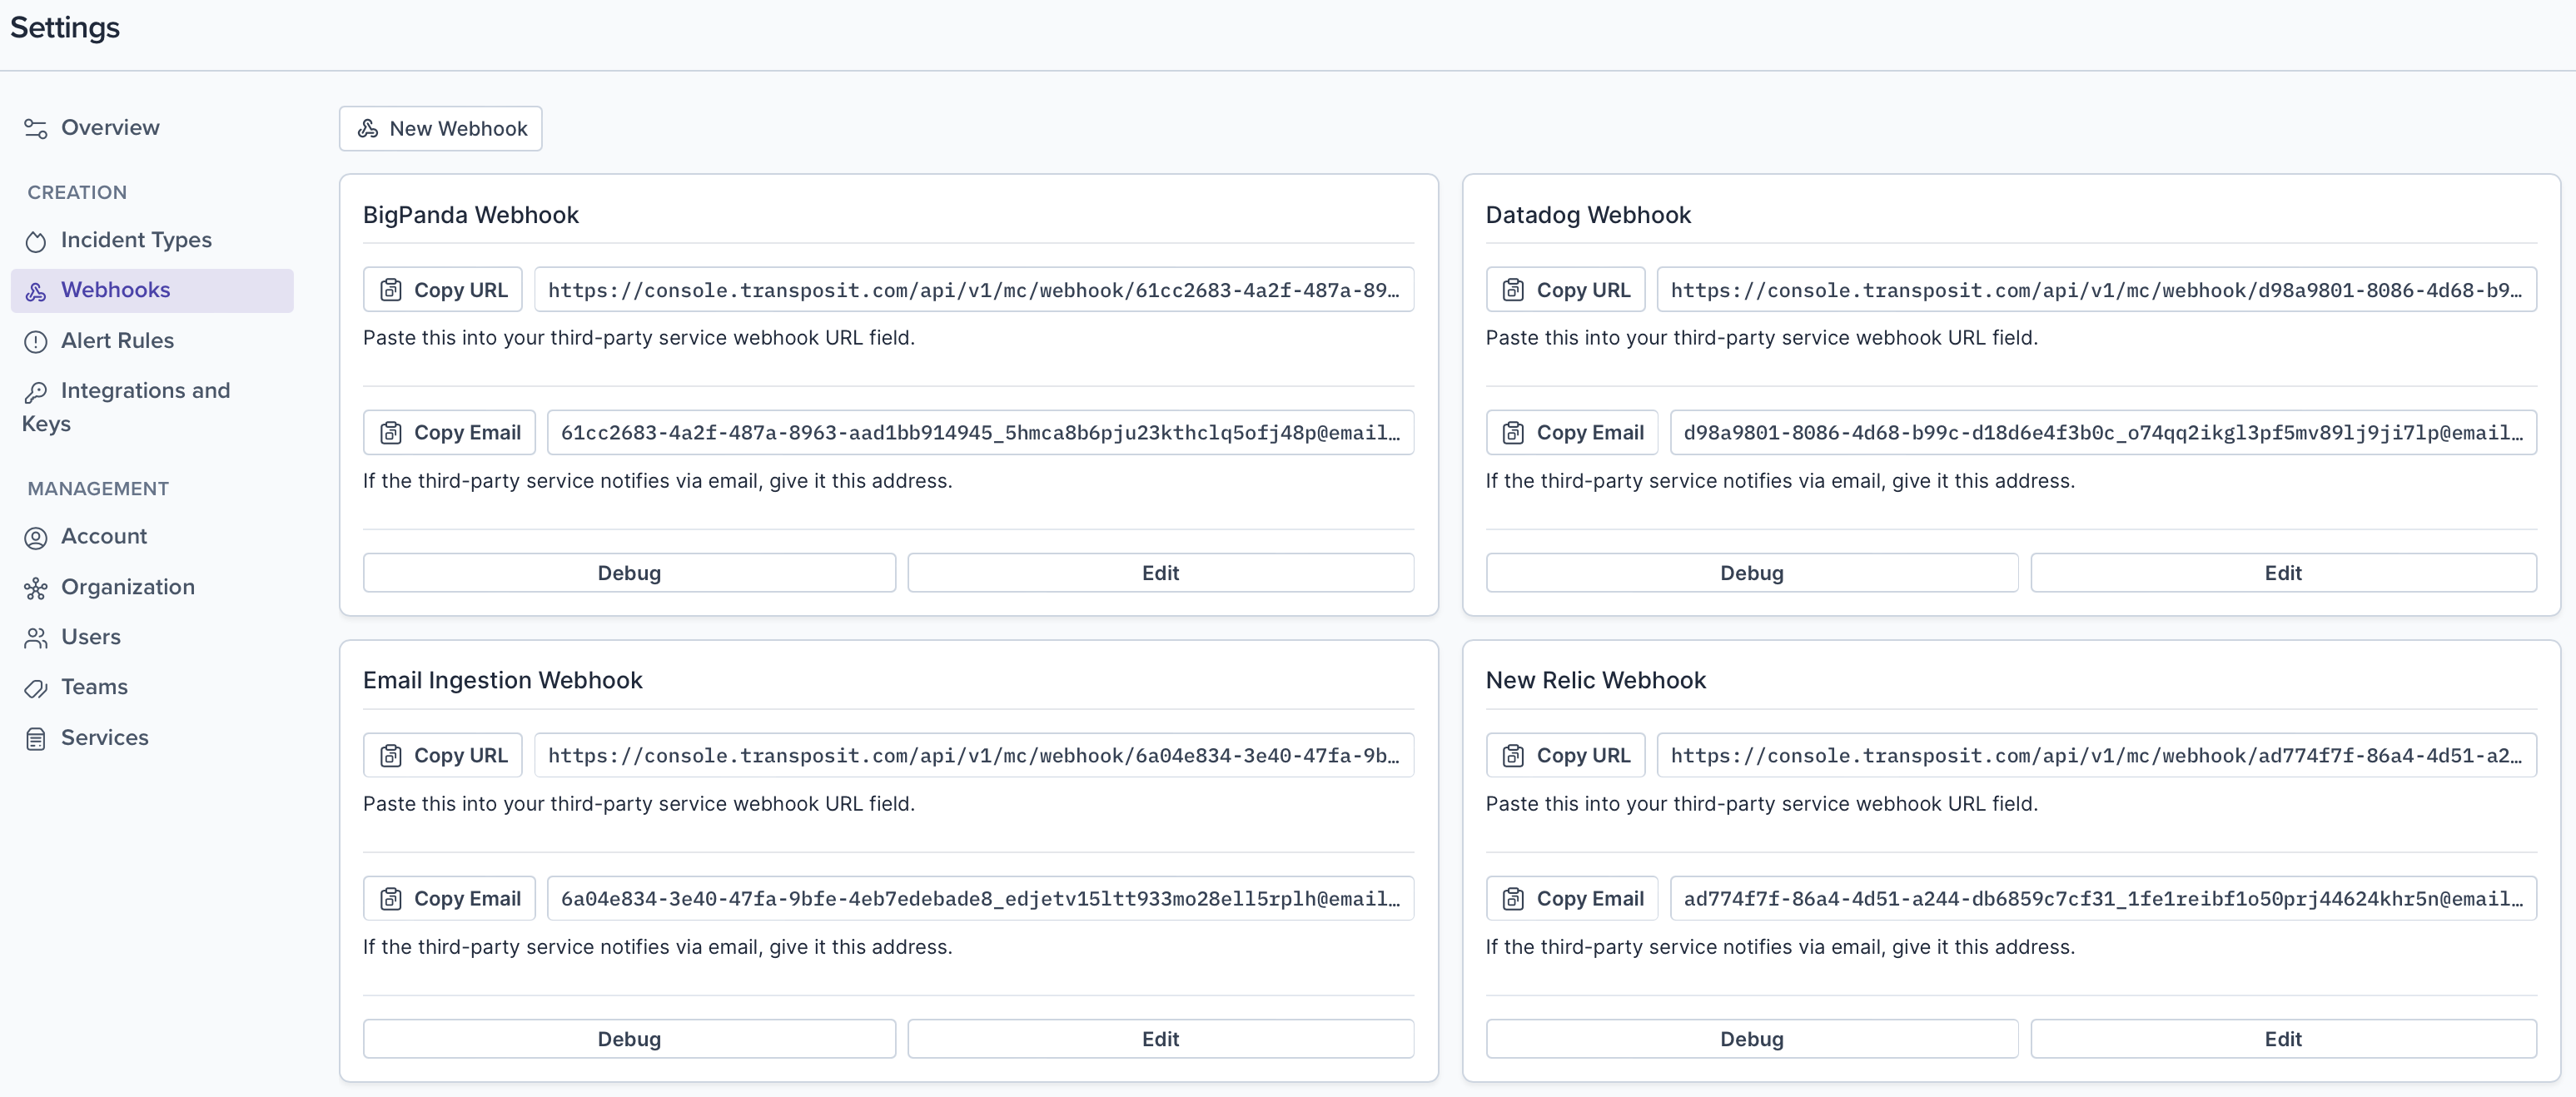
Display the Webhooks. Go to Settings > Webhooks to display all your webhooks. When you have added one or more webhooks, the Webhooks page will look as follows.
Create a Webhook. Click New Webhook to begin defining a webhook.
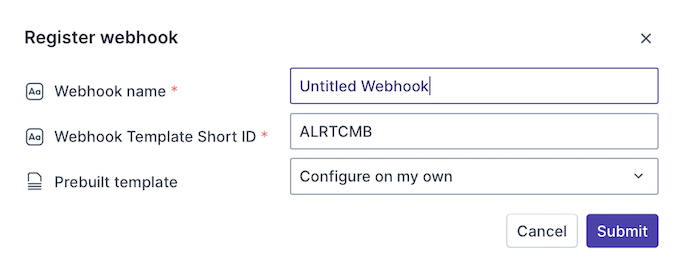
Alternatively, select a specific prebuilt template, to let Transposit set up your webhook for you based on your selected webhook technology.
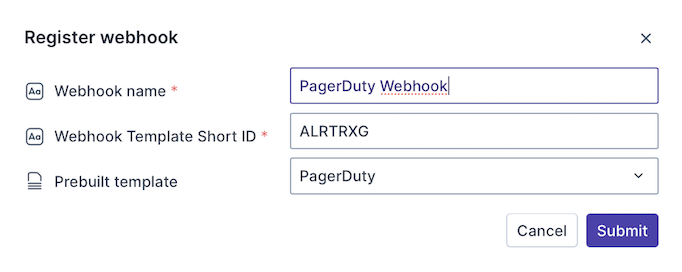
Click Submit.
In the Webhook section, you can do the following.
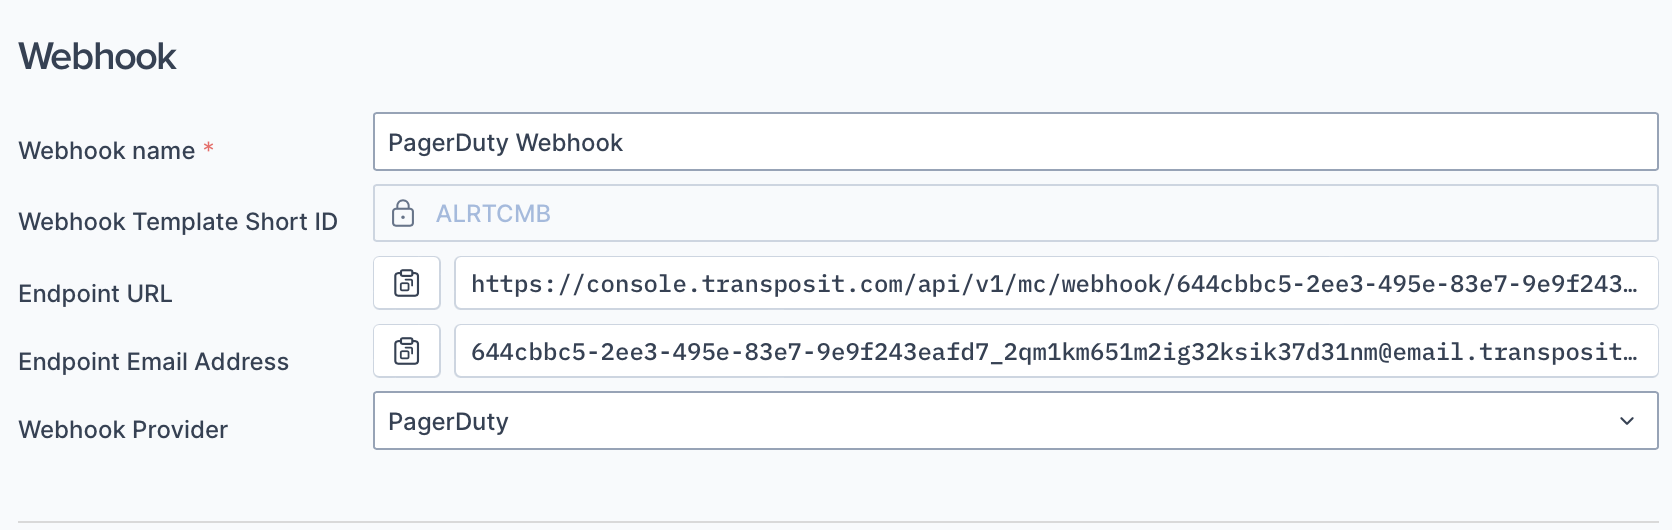
- Edit the Webhook name as needed.
- Click the Copy icon to the left of the Endpoint URL and register the URL in the technology from which you will be sending alerts and then send an alert from it.
- Click the Copy icon to the left of the Endpoint Email Address and use it when sending email alerts.
- Change the Webhook Provider as needed, which will change the payload shown in the Payload Editor.
In the Payload Configuration section, finetune the payload provided by the prebuilt template or paste in any other webhook payload to be processed by Transposit.
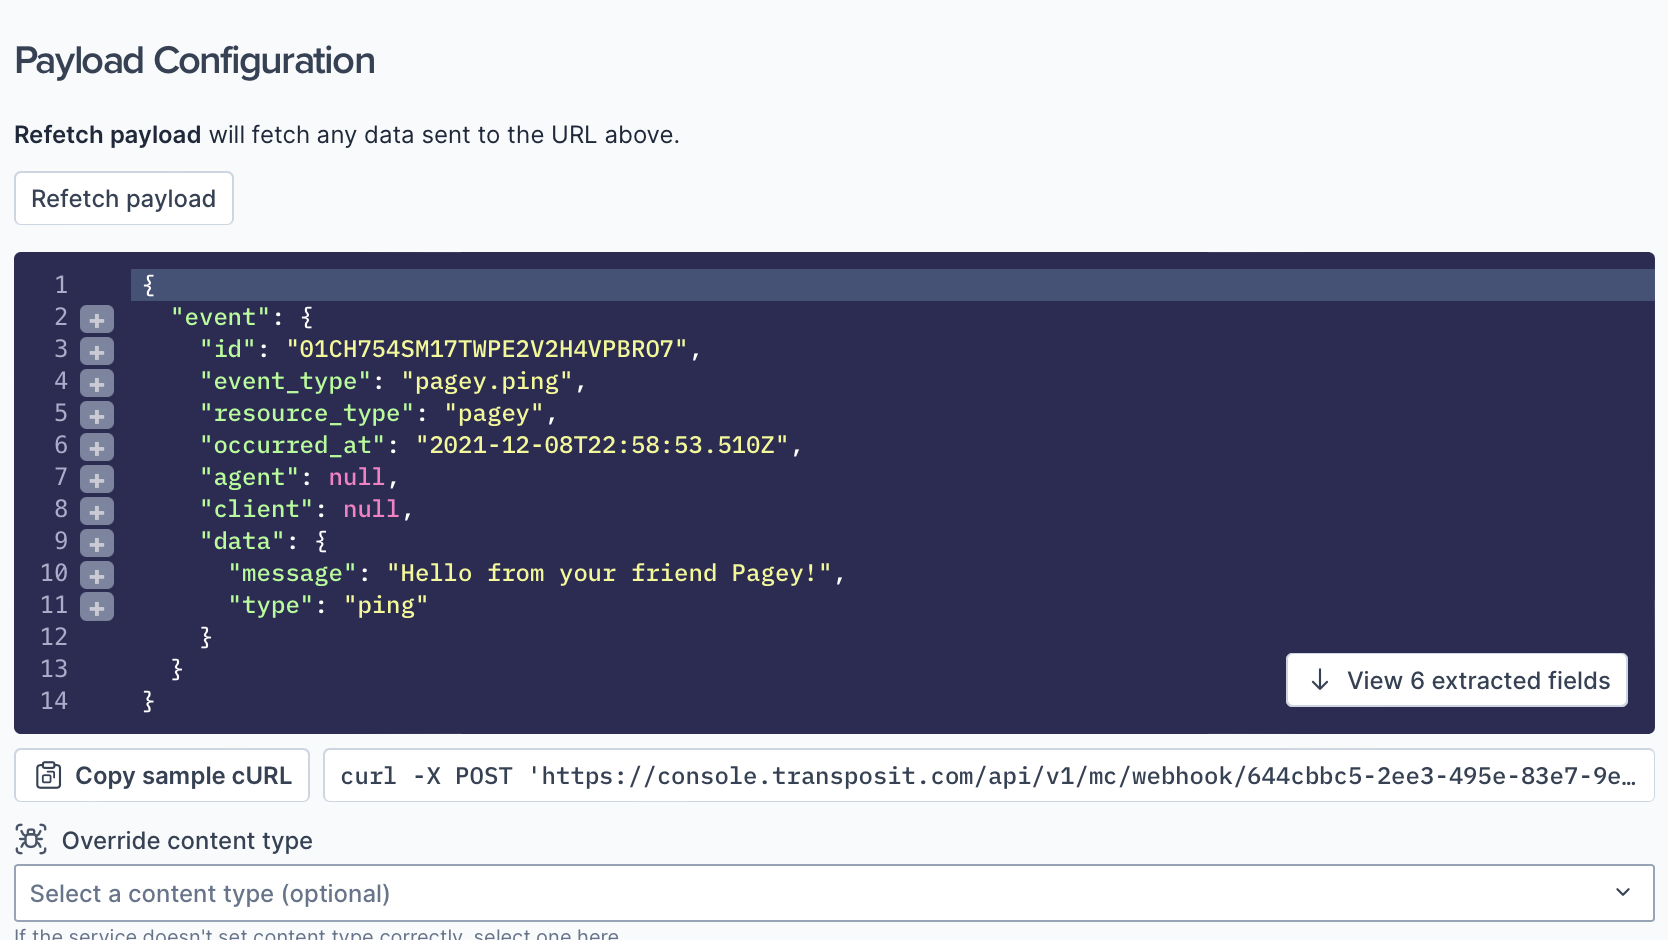
- After sending an alert, you can click Refetch payload above the Payload Editor to import the payload from the newly sent alert into the Payload Editor.
- Click Copy sample cURL to generate a cURL command prompt to simulate an alert sent from an external service or technology.
The Payload Editor is filled with the payload of your choice. Finetune it as needed.
Extract and Assign Fields from the Payload
Save Fields for Mapping. Click the plus icon in the left margin of a line in the Payload Editor to extract that field for mapping in the next step. For each line that you click, the related field is added to the list of extracted fields.
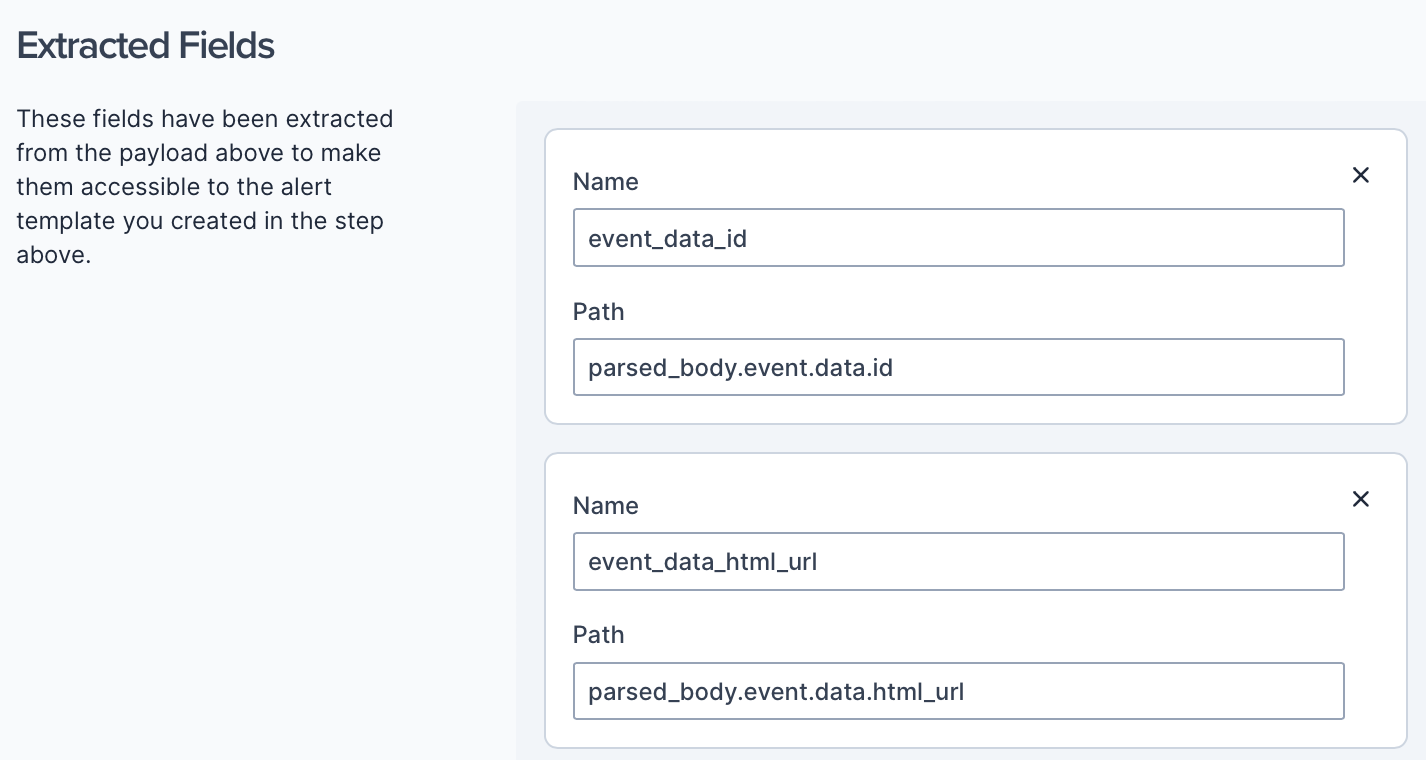
You can always come back to this screen from the Webhooks page to edit or optimize further.
Assign Fields to Alerts. In the Map fields section, use drag and drop to assign a saved field from the pane on the left to the relevant alert field on the right. Alternatively, instead of using drag and drop, click Data, to select the extracted field you need.
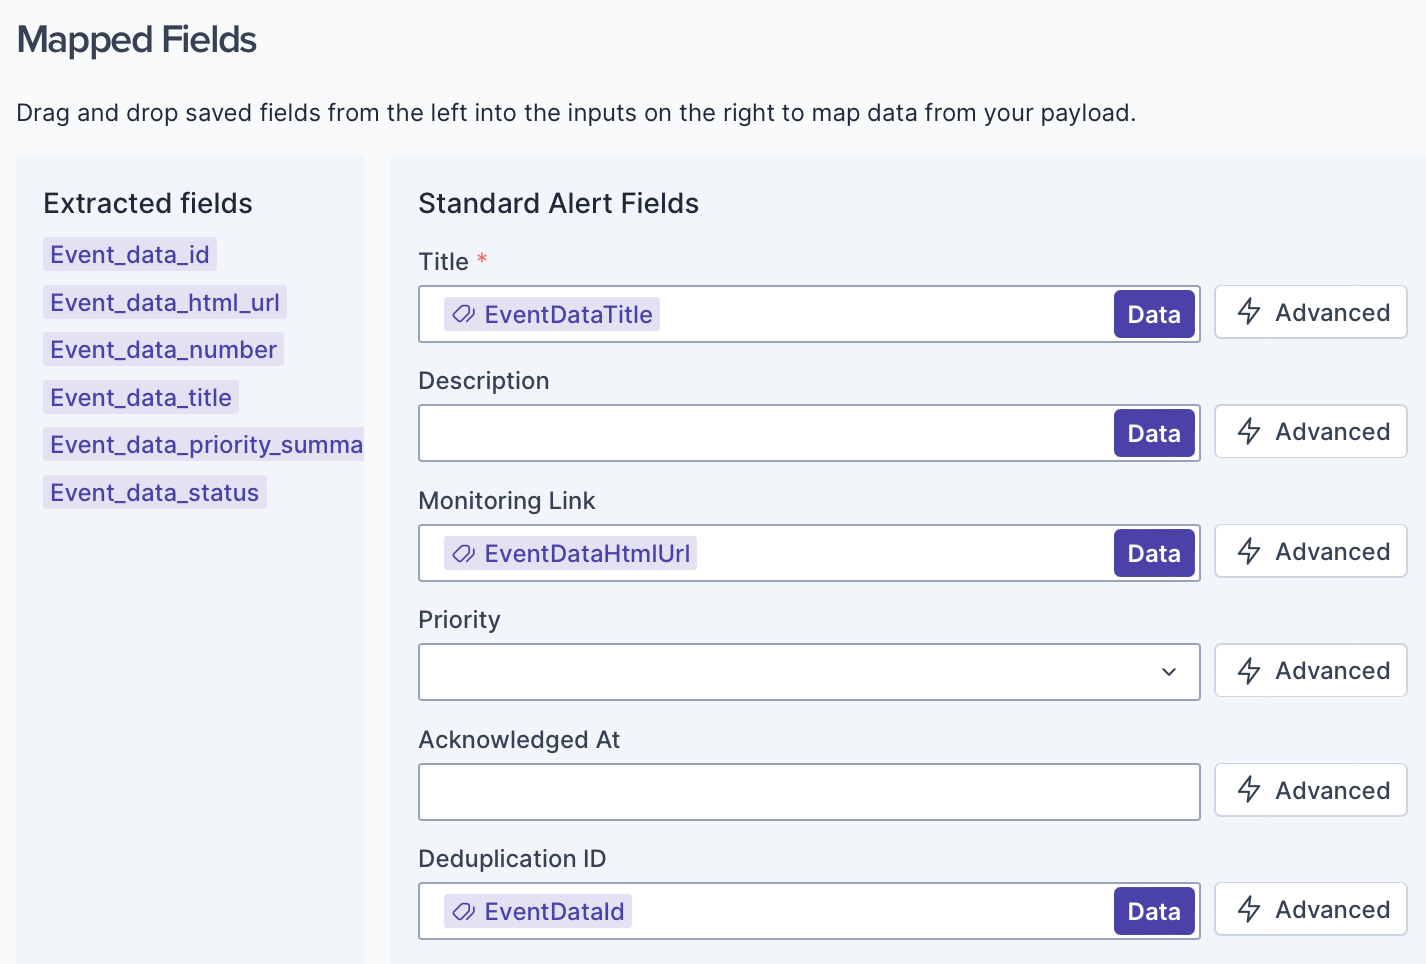
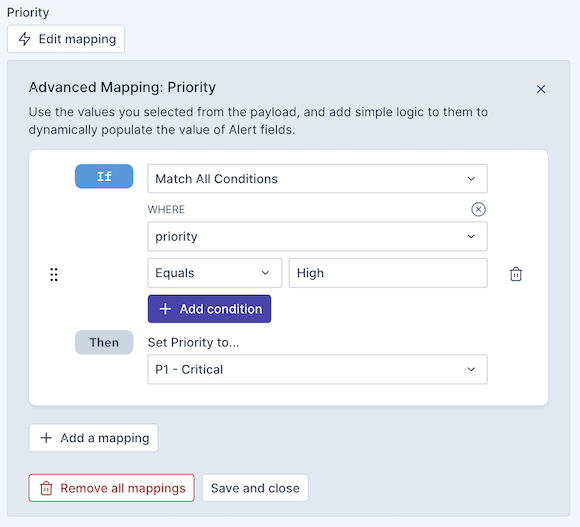
Optionally, click Advanced to use values selected from the payload and to add simple logic to them to dynamically populate the value of the alert fields.
Save the Webhook. Click Save Webhook when you're happy with how you've set up your webhook.