Once you've created an incident and while performing activities, such as running an automation, use the timeline for tracking and incident resolution.
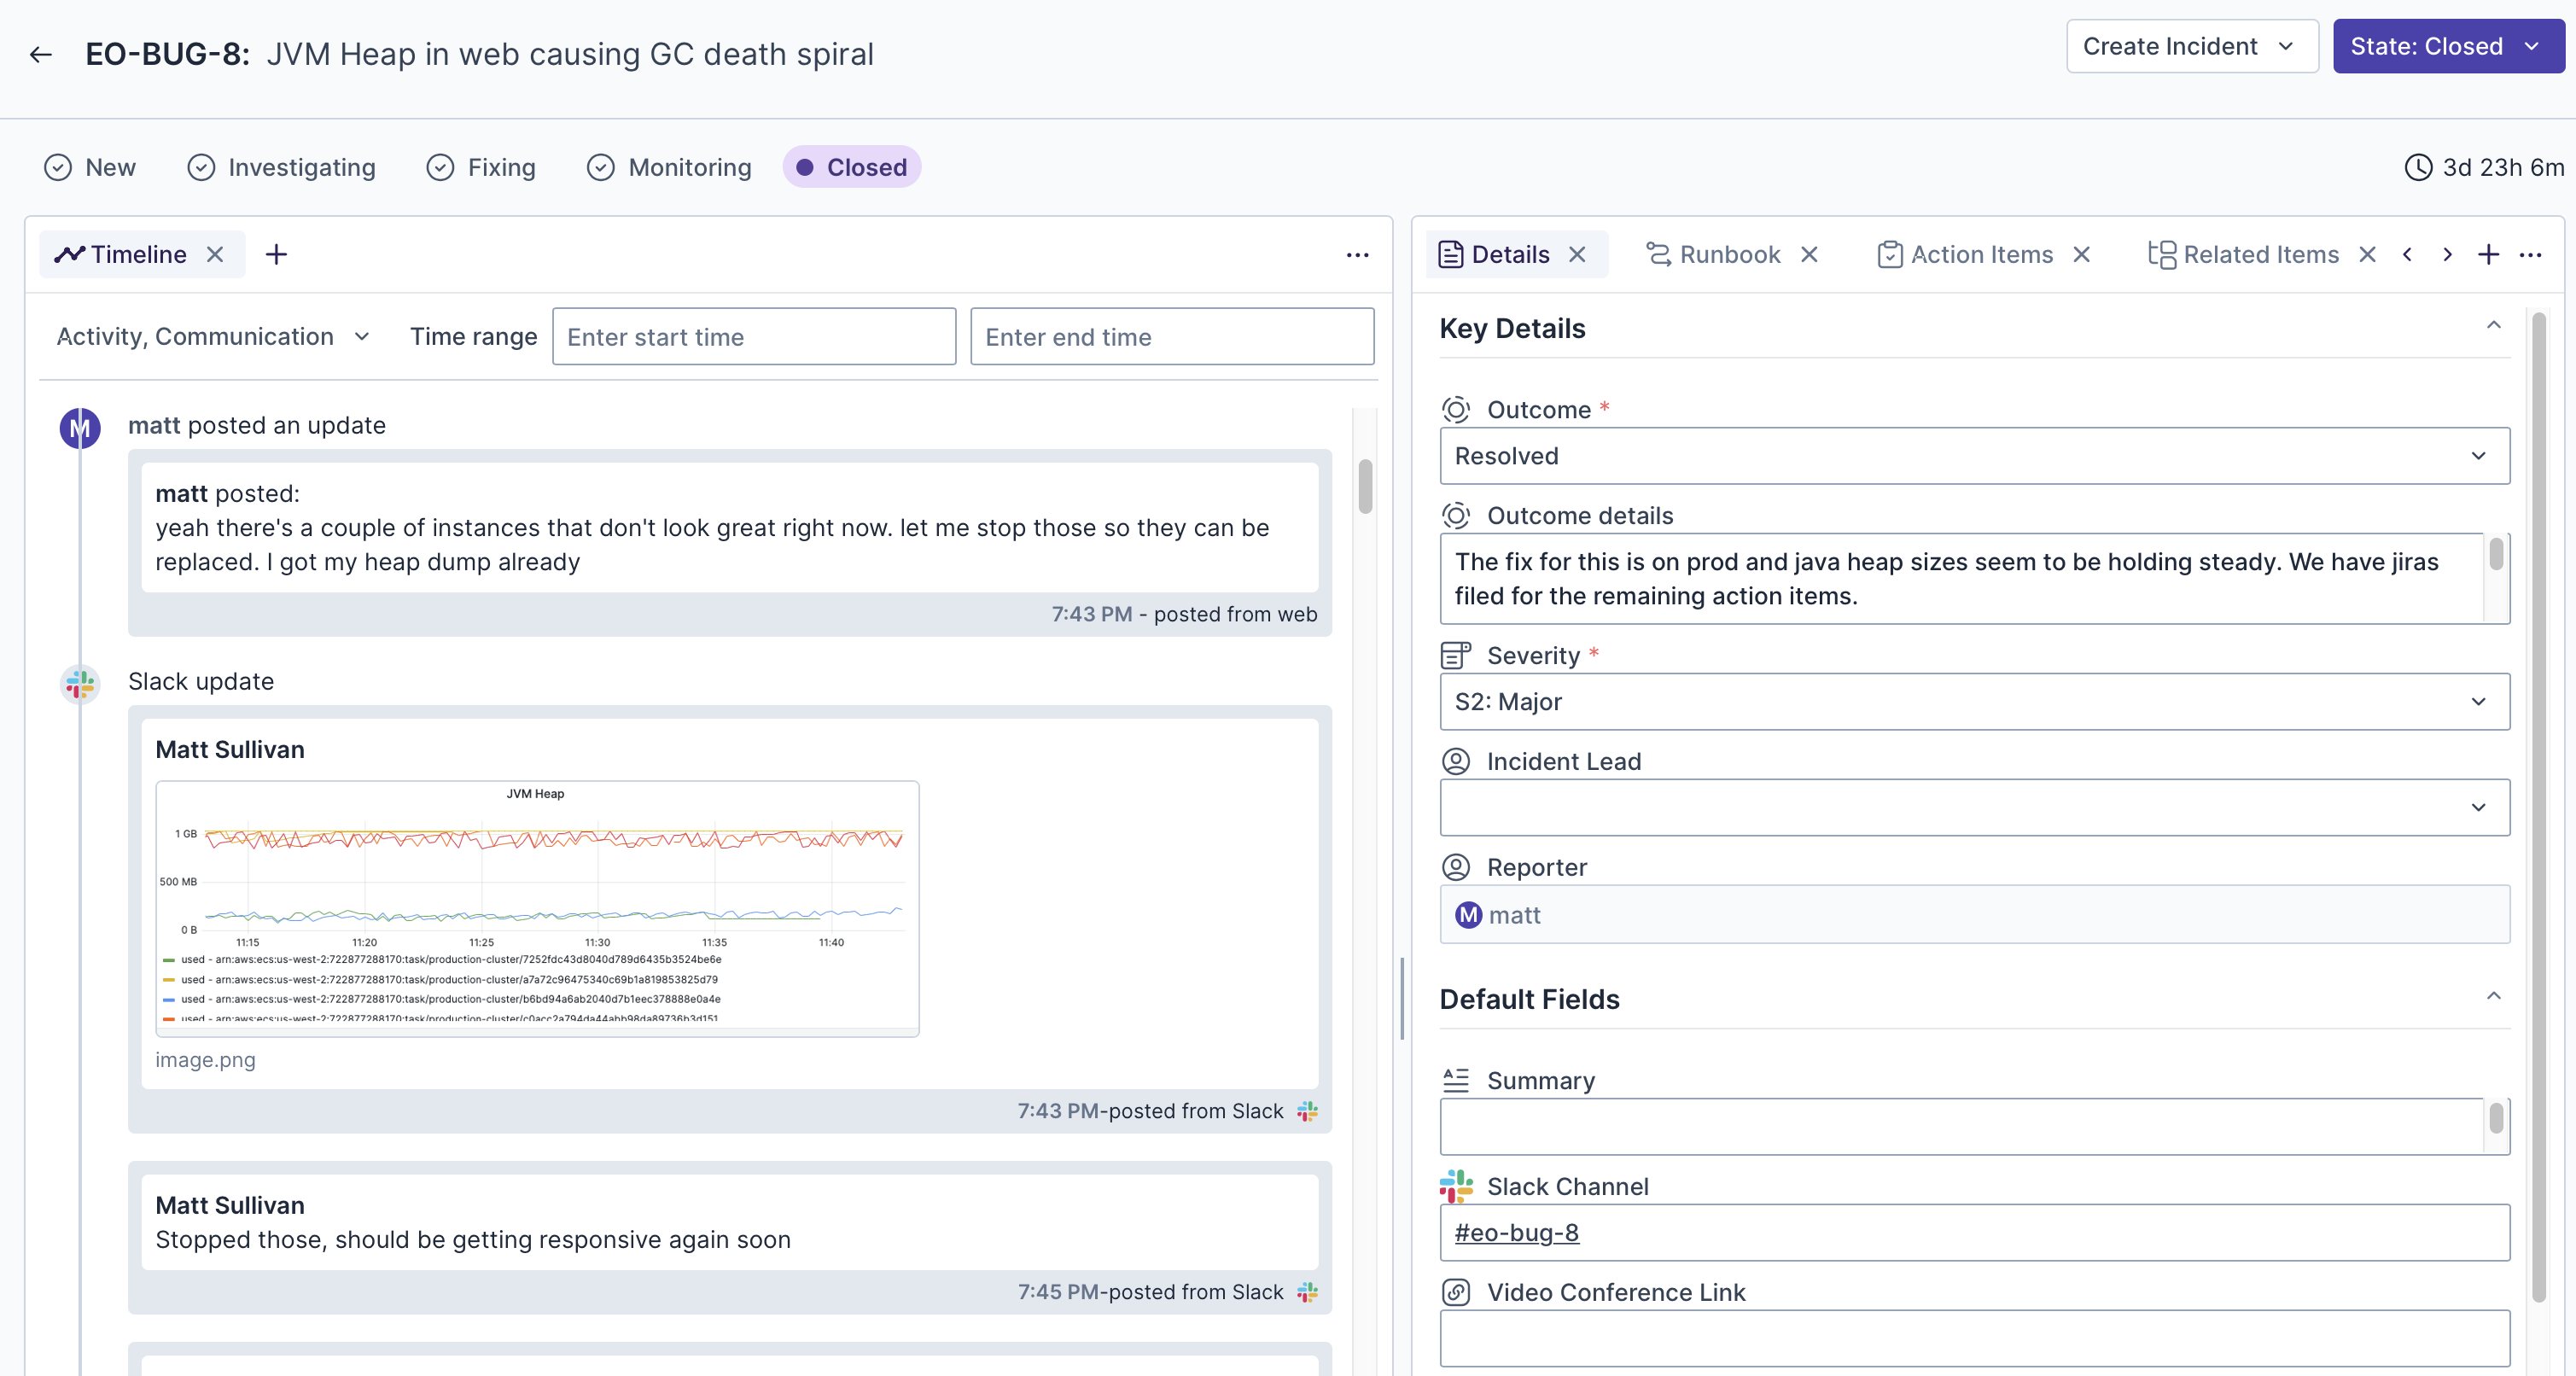
On the left above, you see your incident's timeline, shown larger below.
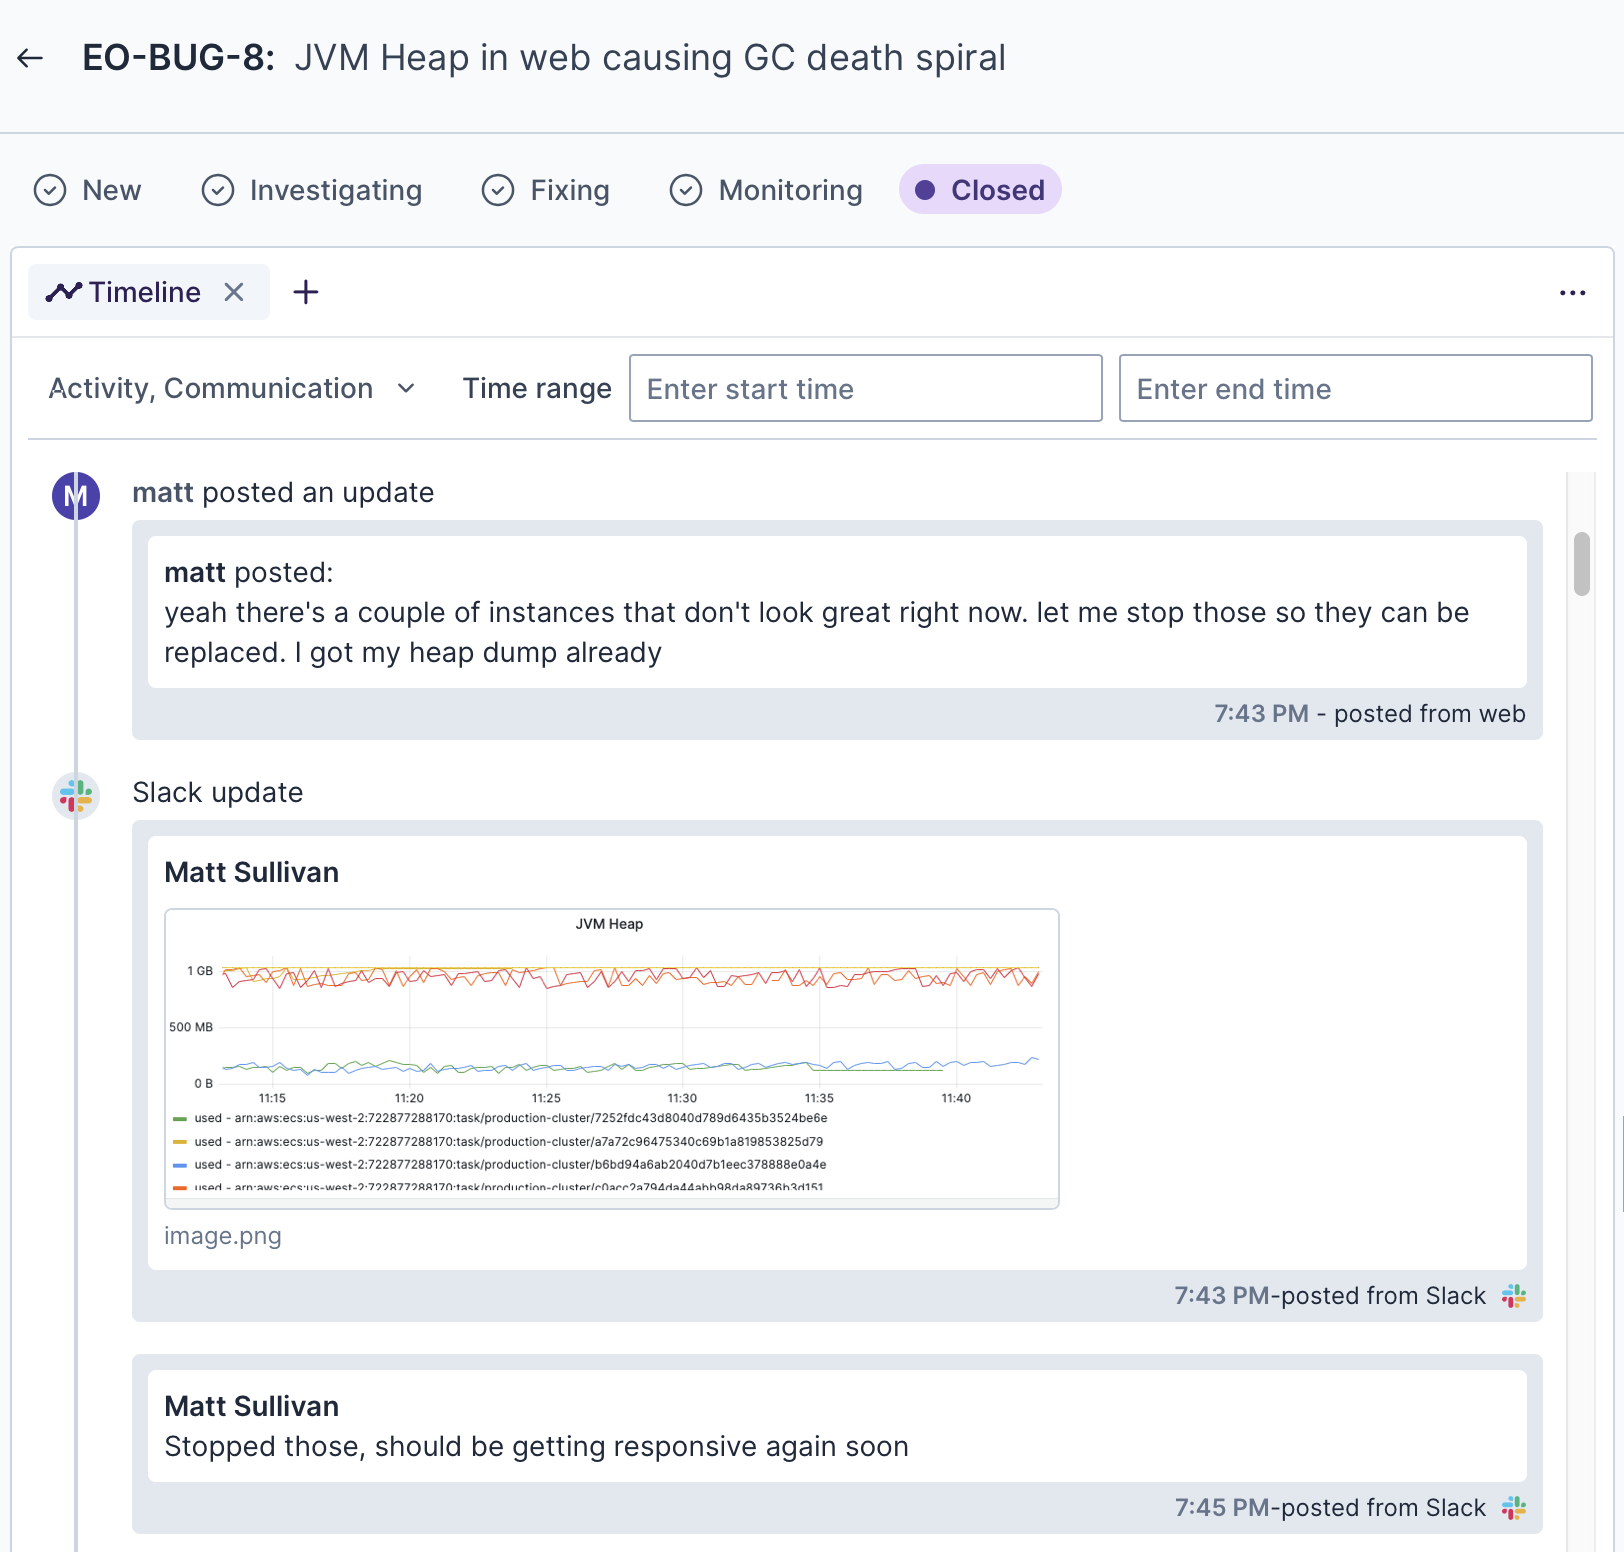
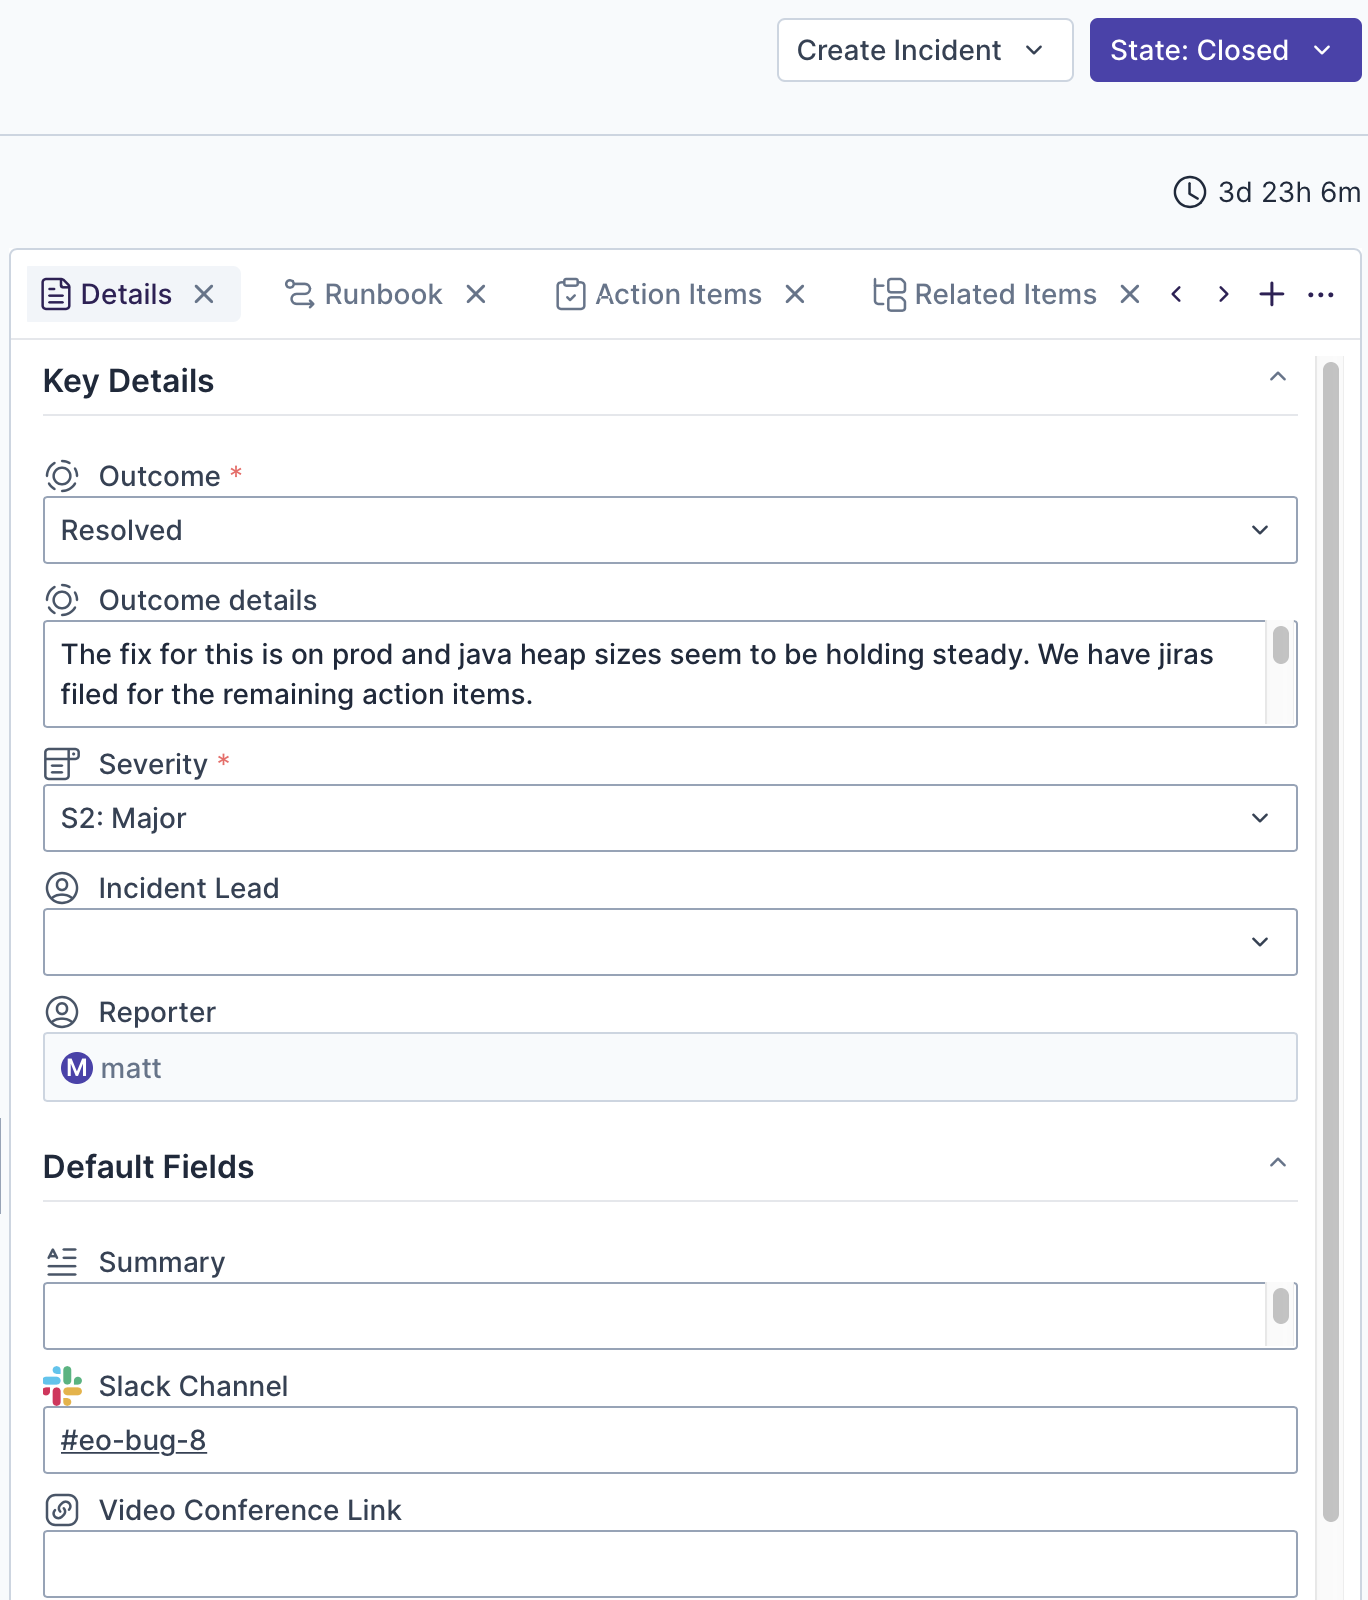
In the tabs to the right of the timeline, view and update the incident's details, while managing its runbook, action items, and relationships with other incidents, as shown below.
When you run an automation, you can see whether it succeeds, fails, or is in progress, by the coloring.
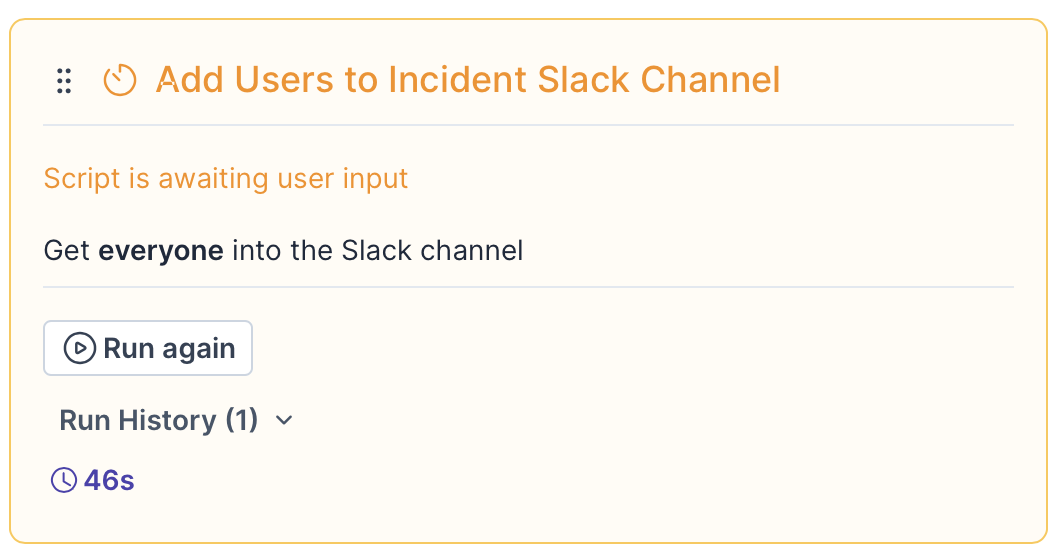
Follow the timeline that is shown to track the progress of your automation and to provide input as specified by the actions defined in the script.
As defined in the automation:
- The automation is automatically started according to triggering conditions, if any have been set.
- Actions are executed, with applications starting based on the integrations you added.
- As an action is executed, its output can serve as input of a subsequent action.
- Buttons are provided for user interaction.
- User input is prompted based on your requirements.
- The timeline is automatically populated with events, creating an audit trail of everything that happens in the context of the runbook.