In addition to setting up API integrations between Transposit and ServiceNow, you can also use webhooks to send incident payloads from ServiceNow to Transposit.
Prerequisites
- Create a ServiceNow account.
Watch the Video
The quick video below outlines the steps you'll take in this section.
Click here for more videos.
Define the Webhook
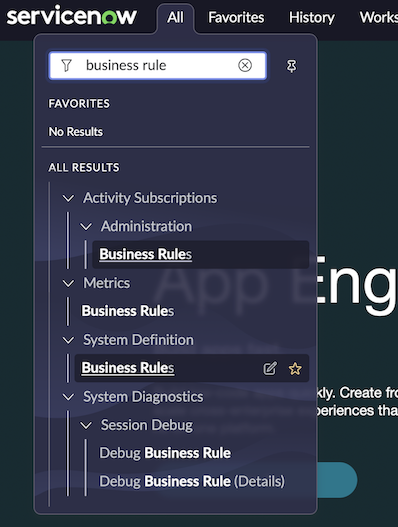
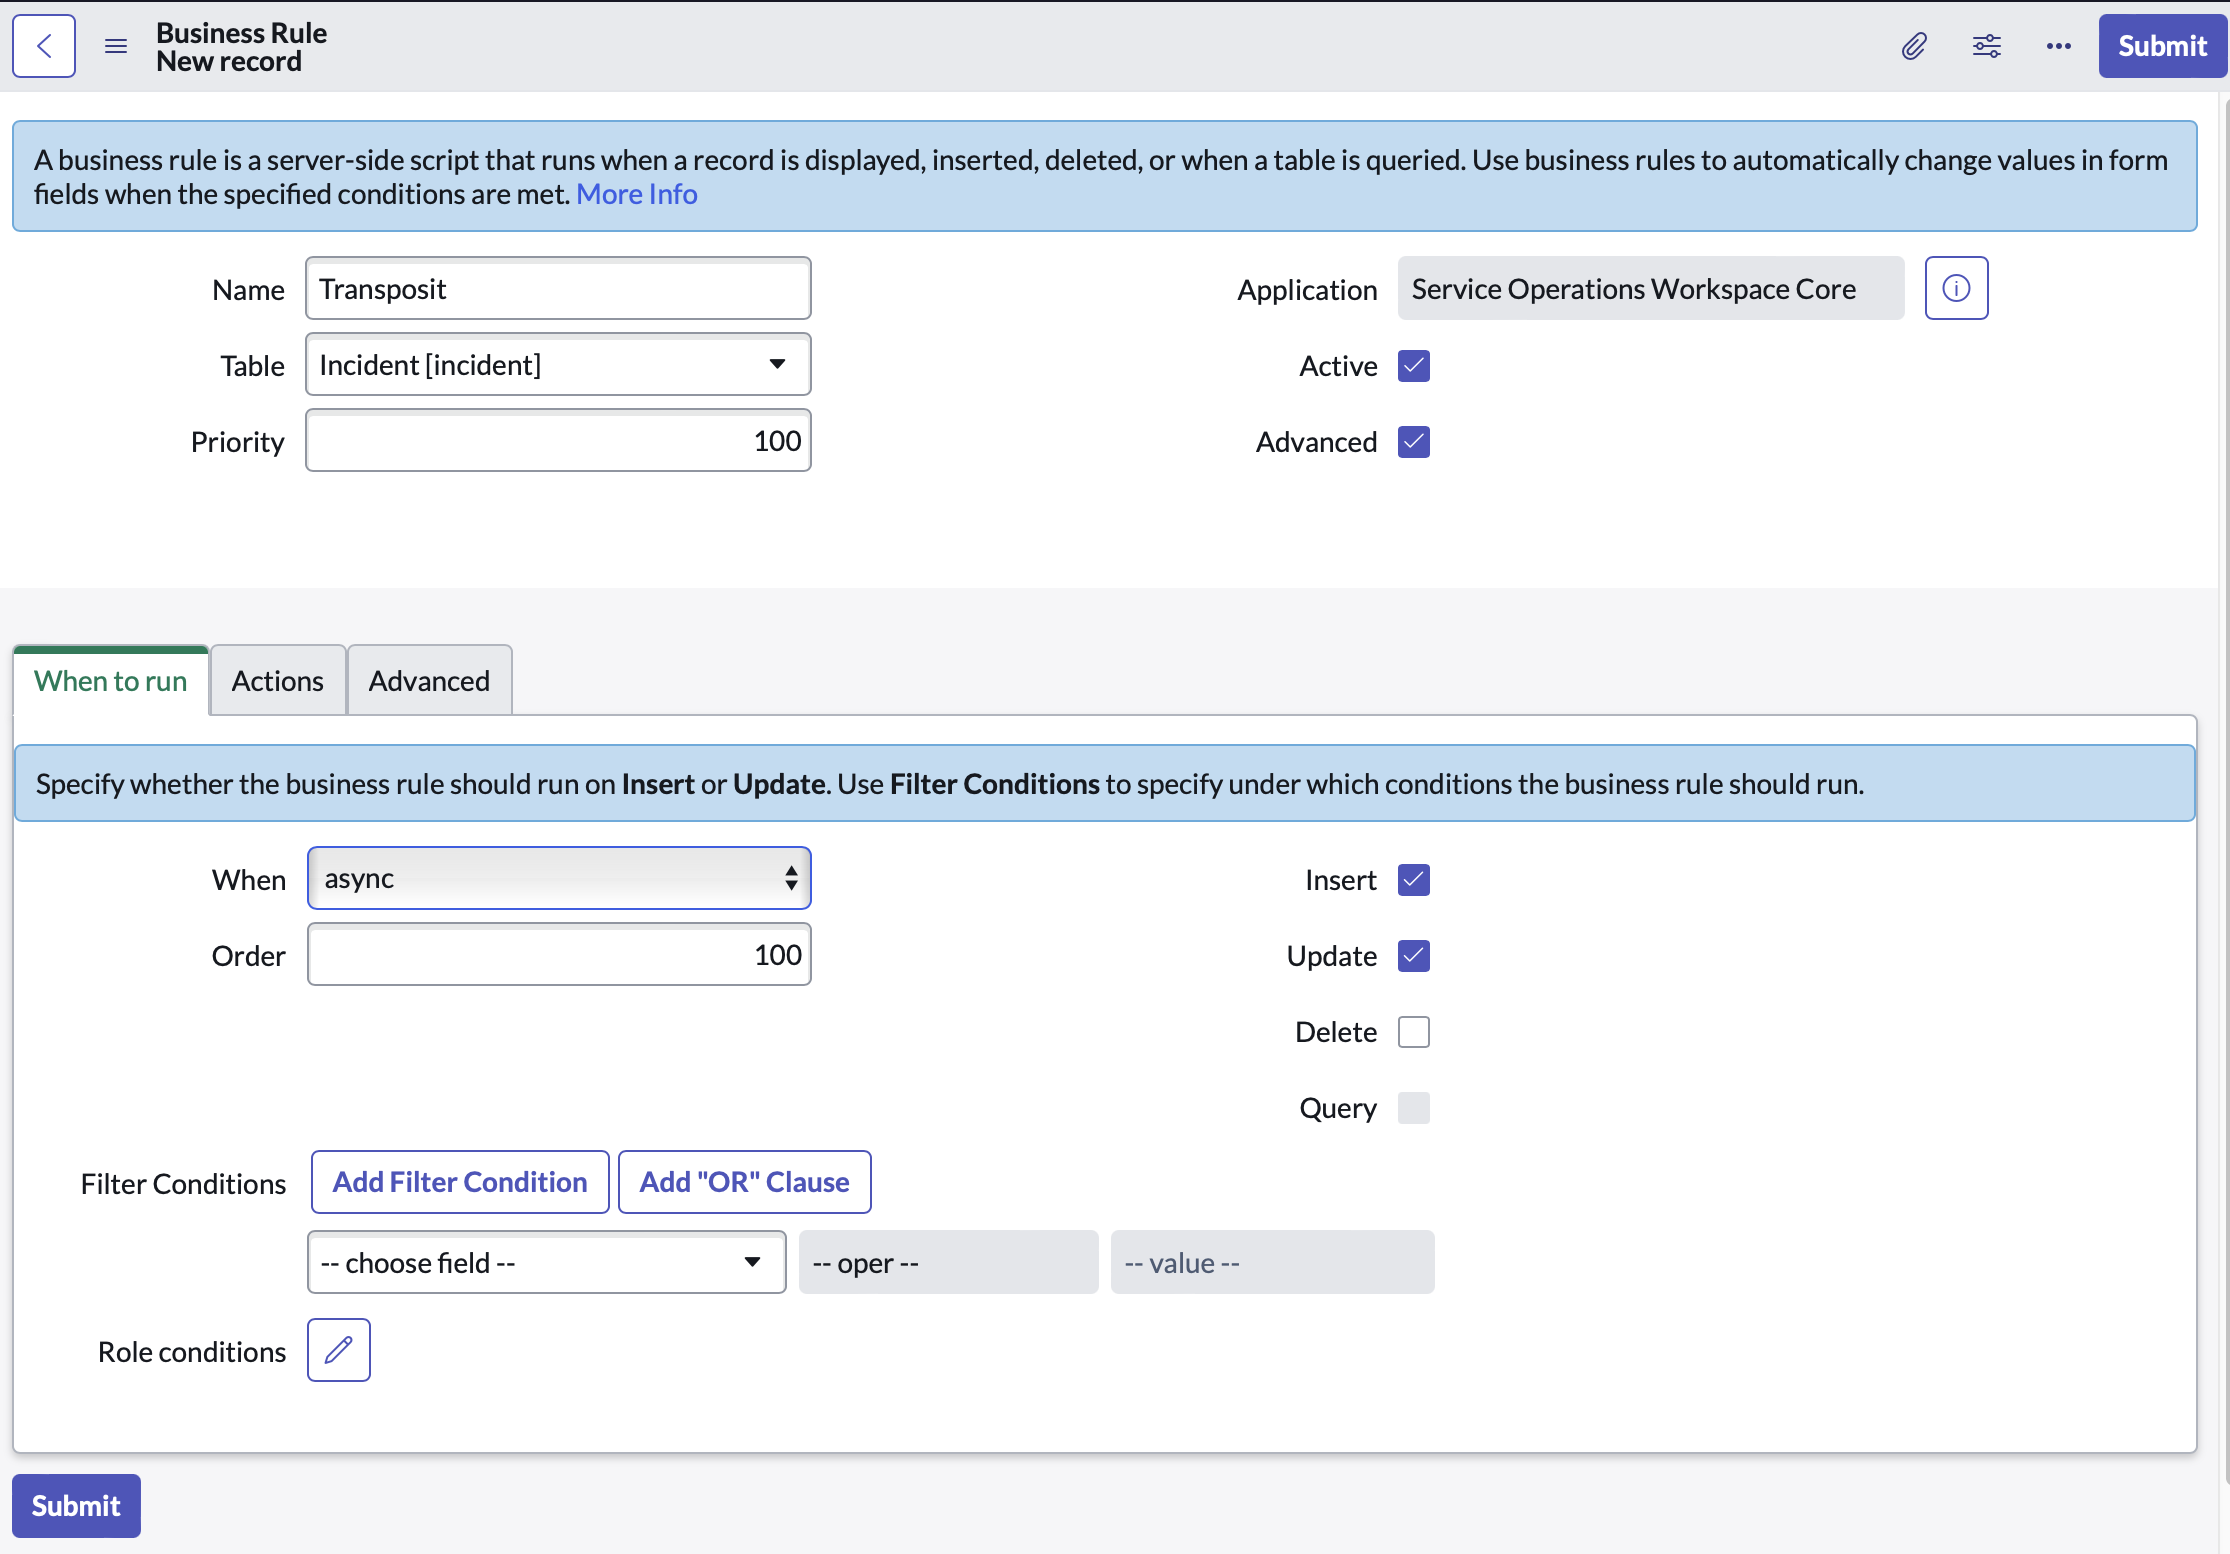
In ServiceNow, in All in the horizontal navigation bar at the top, search for business rule, and select it within System Definition.
All the existing System Definition business rules are shown.
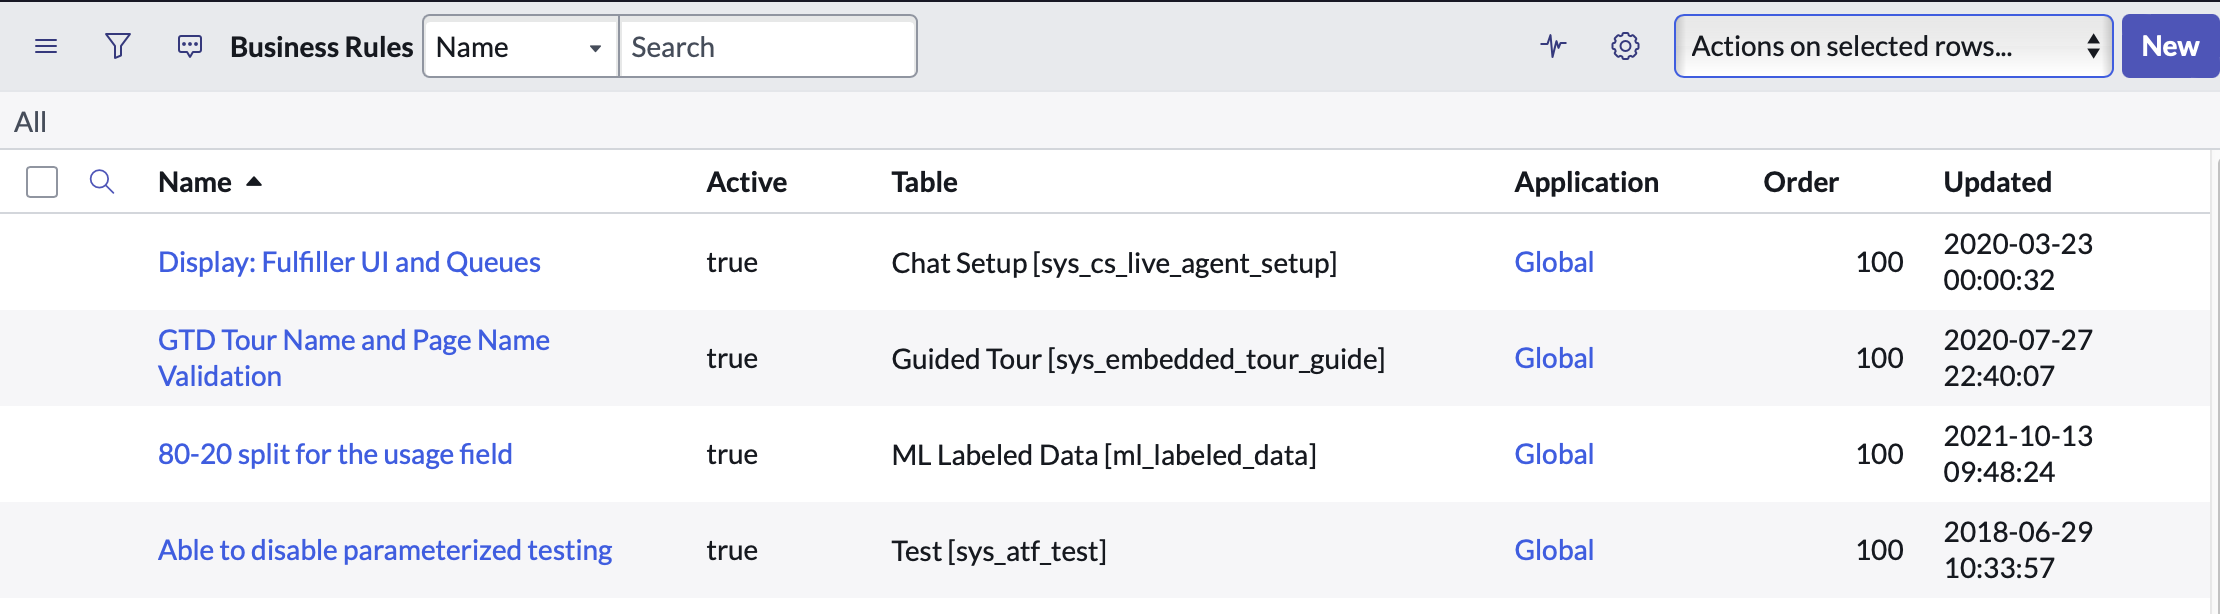
Click New in the top right. The form below is shown where System Definition business rules are defined.
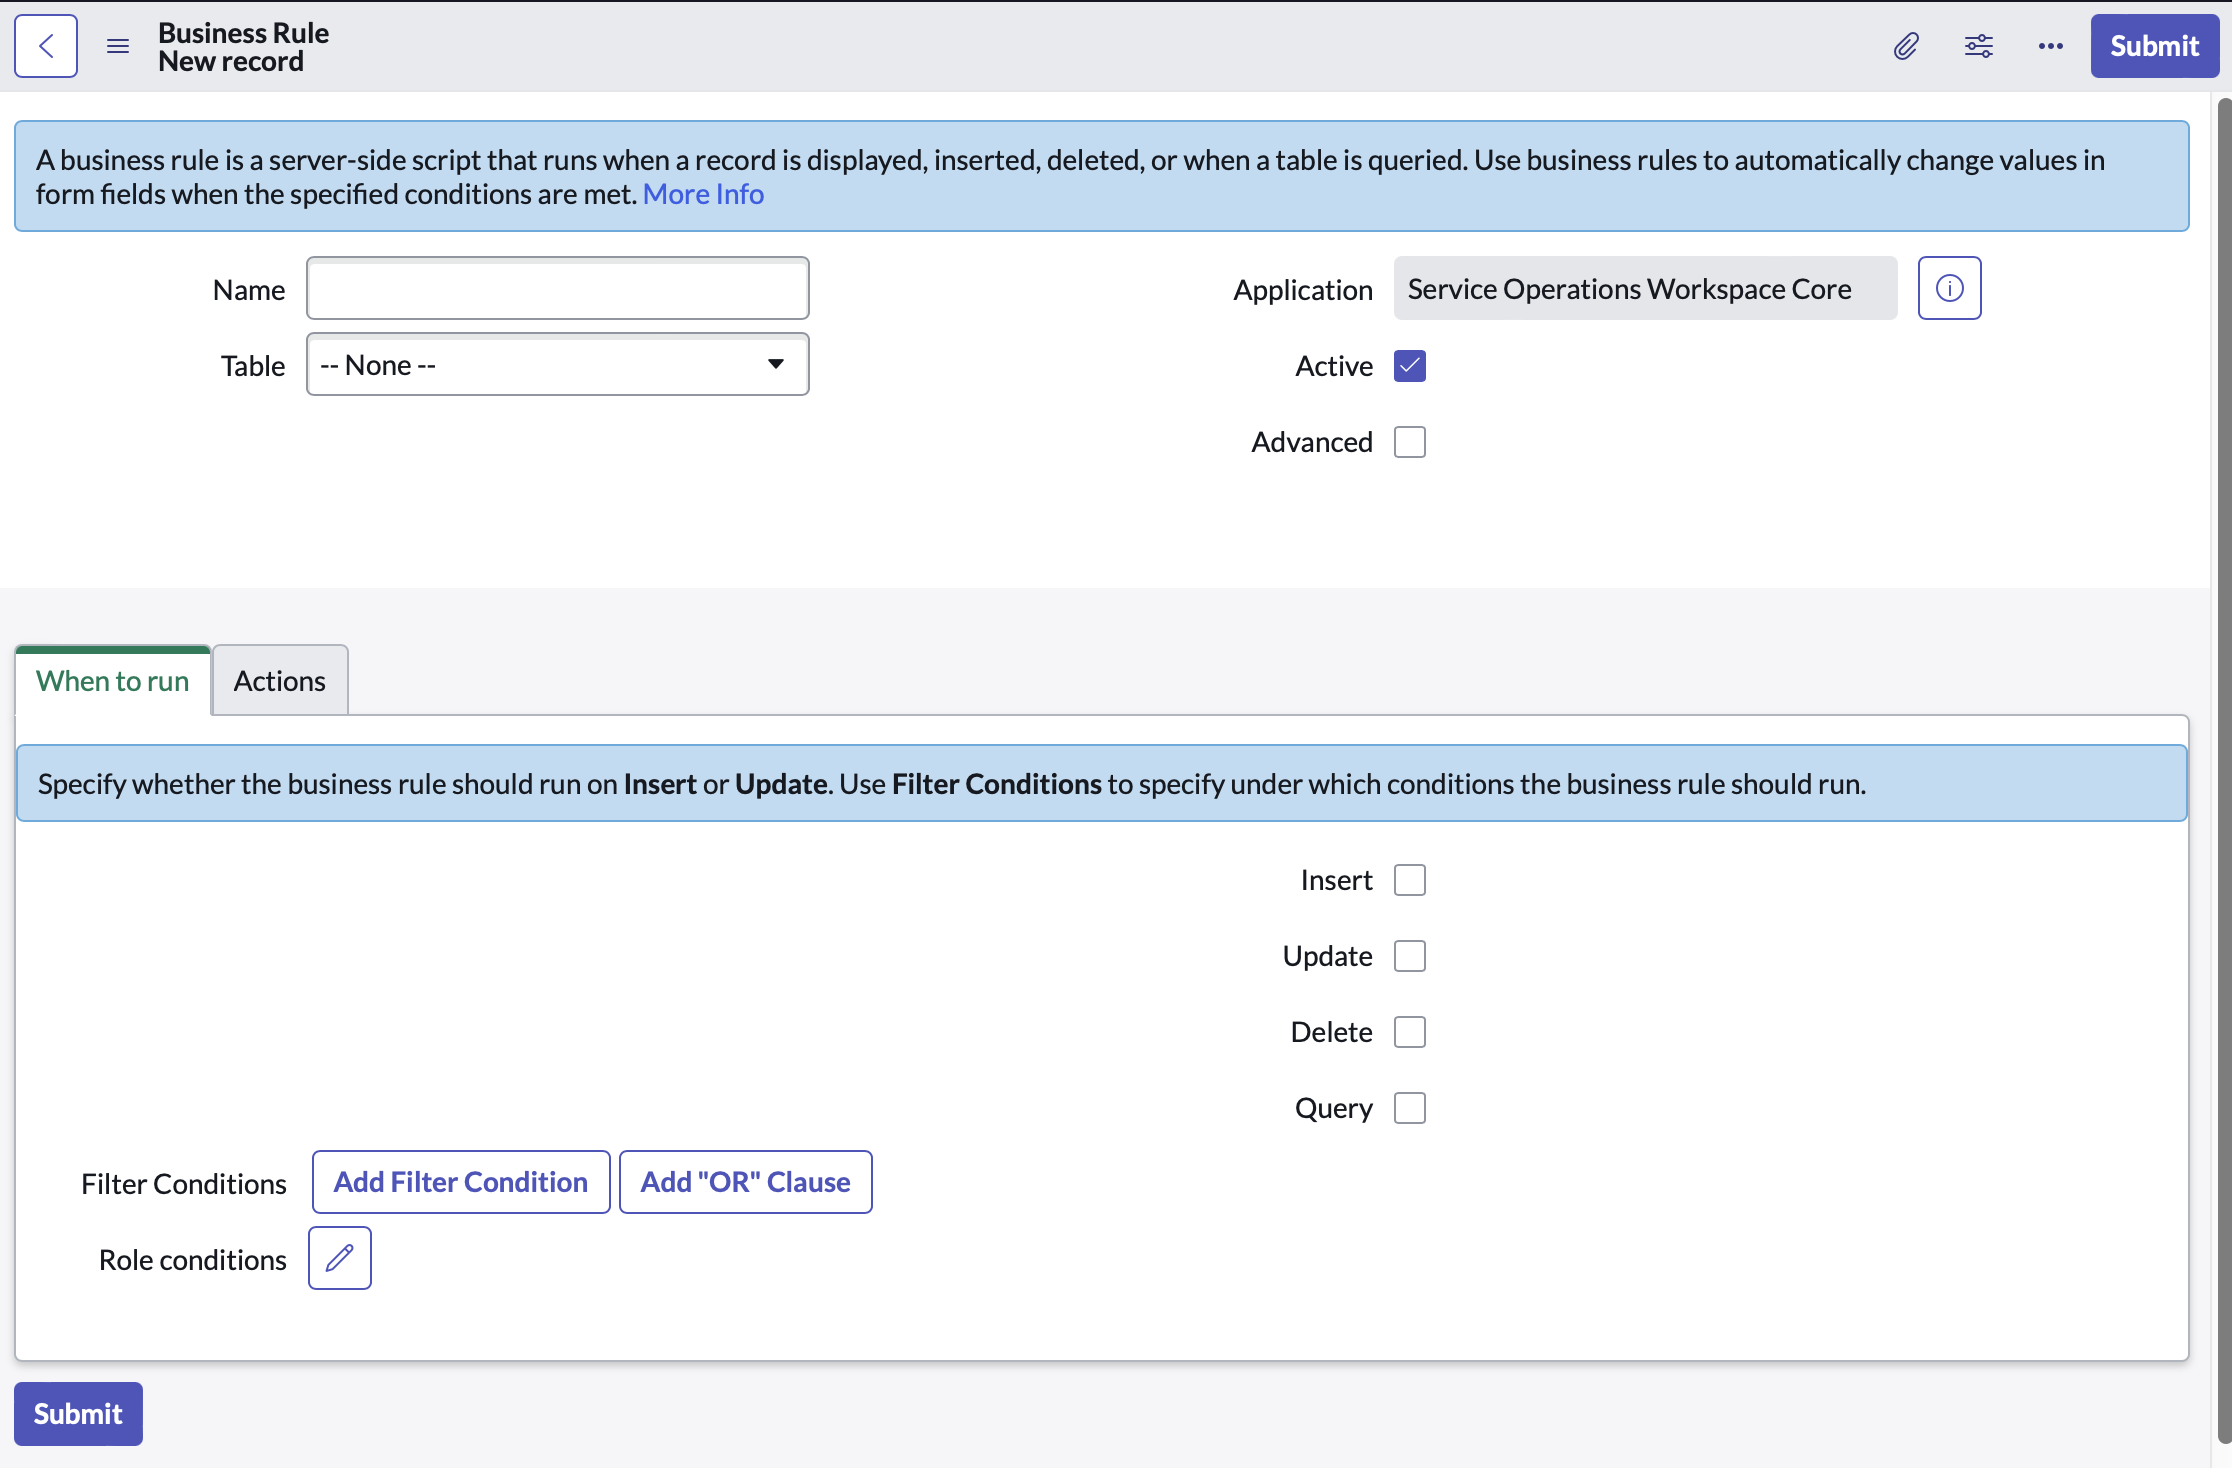
Set and enable the settings below.
- Name. Any name you like, e.g., 'Transposit'
- Table. 'Incident [Incident]'
- When. 'async'
- Insert. Enabled
- Update. Enabled
- Advanced. Enabled
The System Definition business rule is now defined as follows.
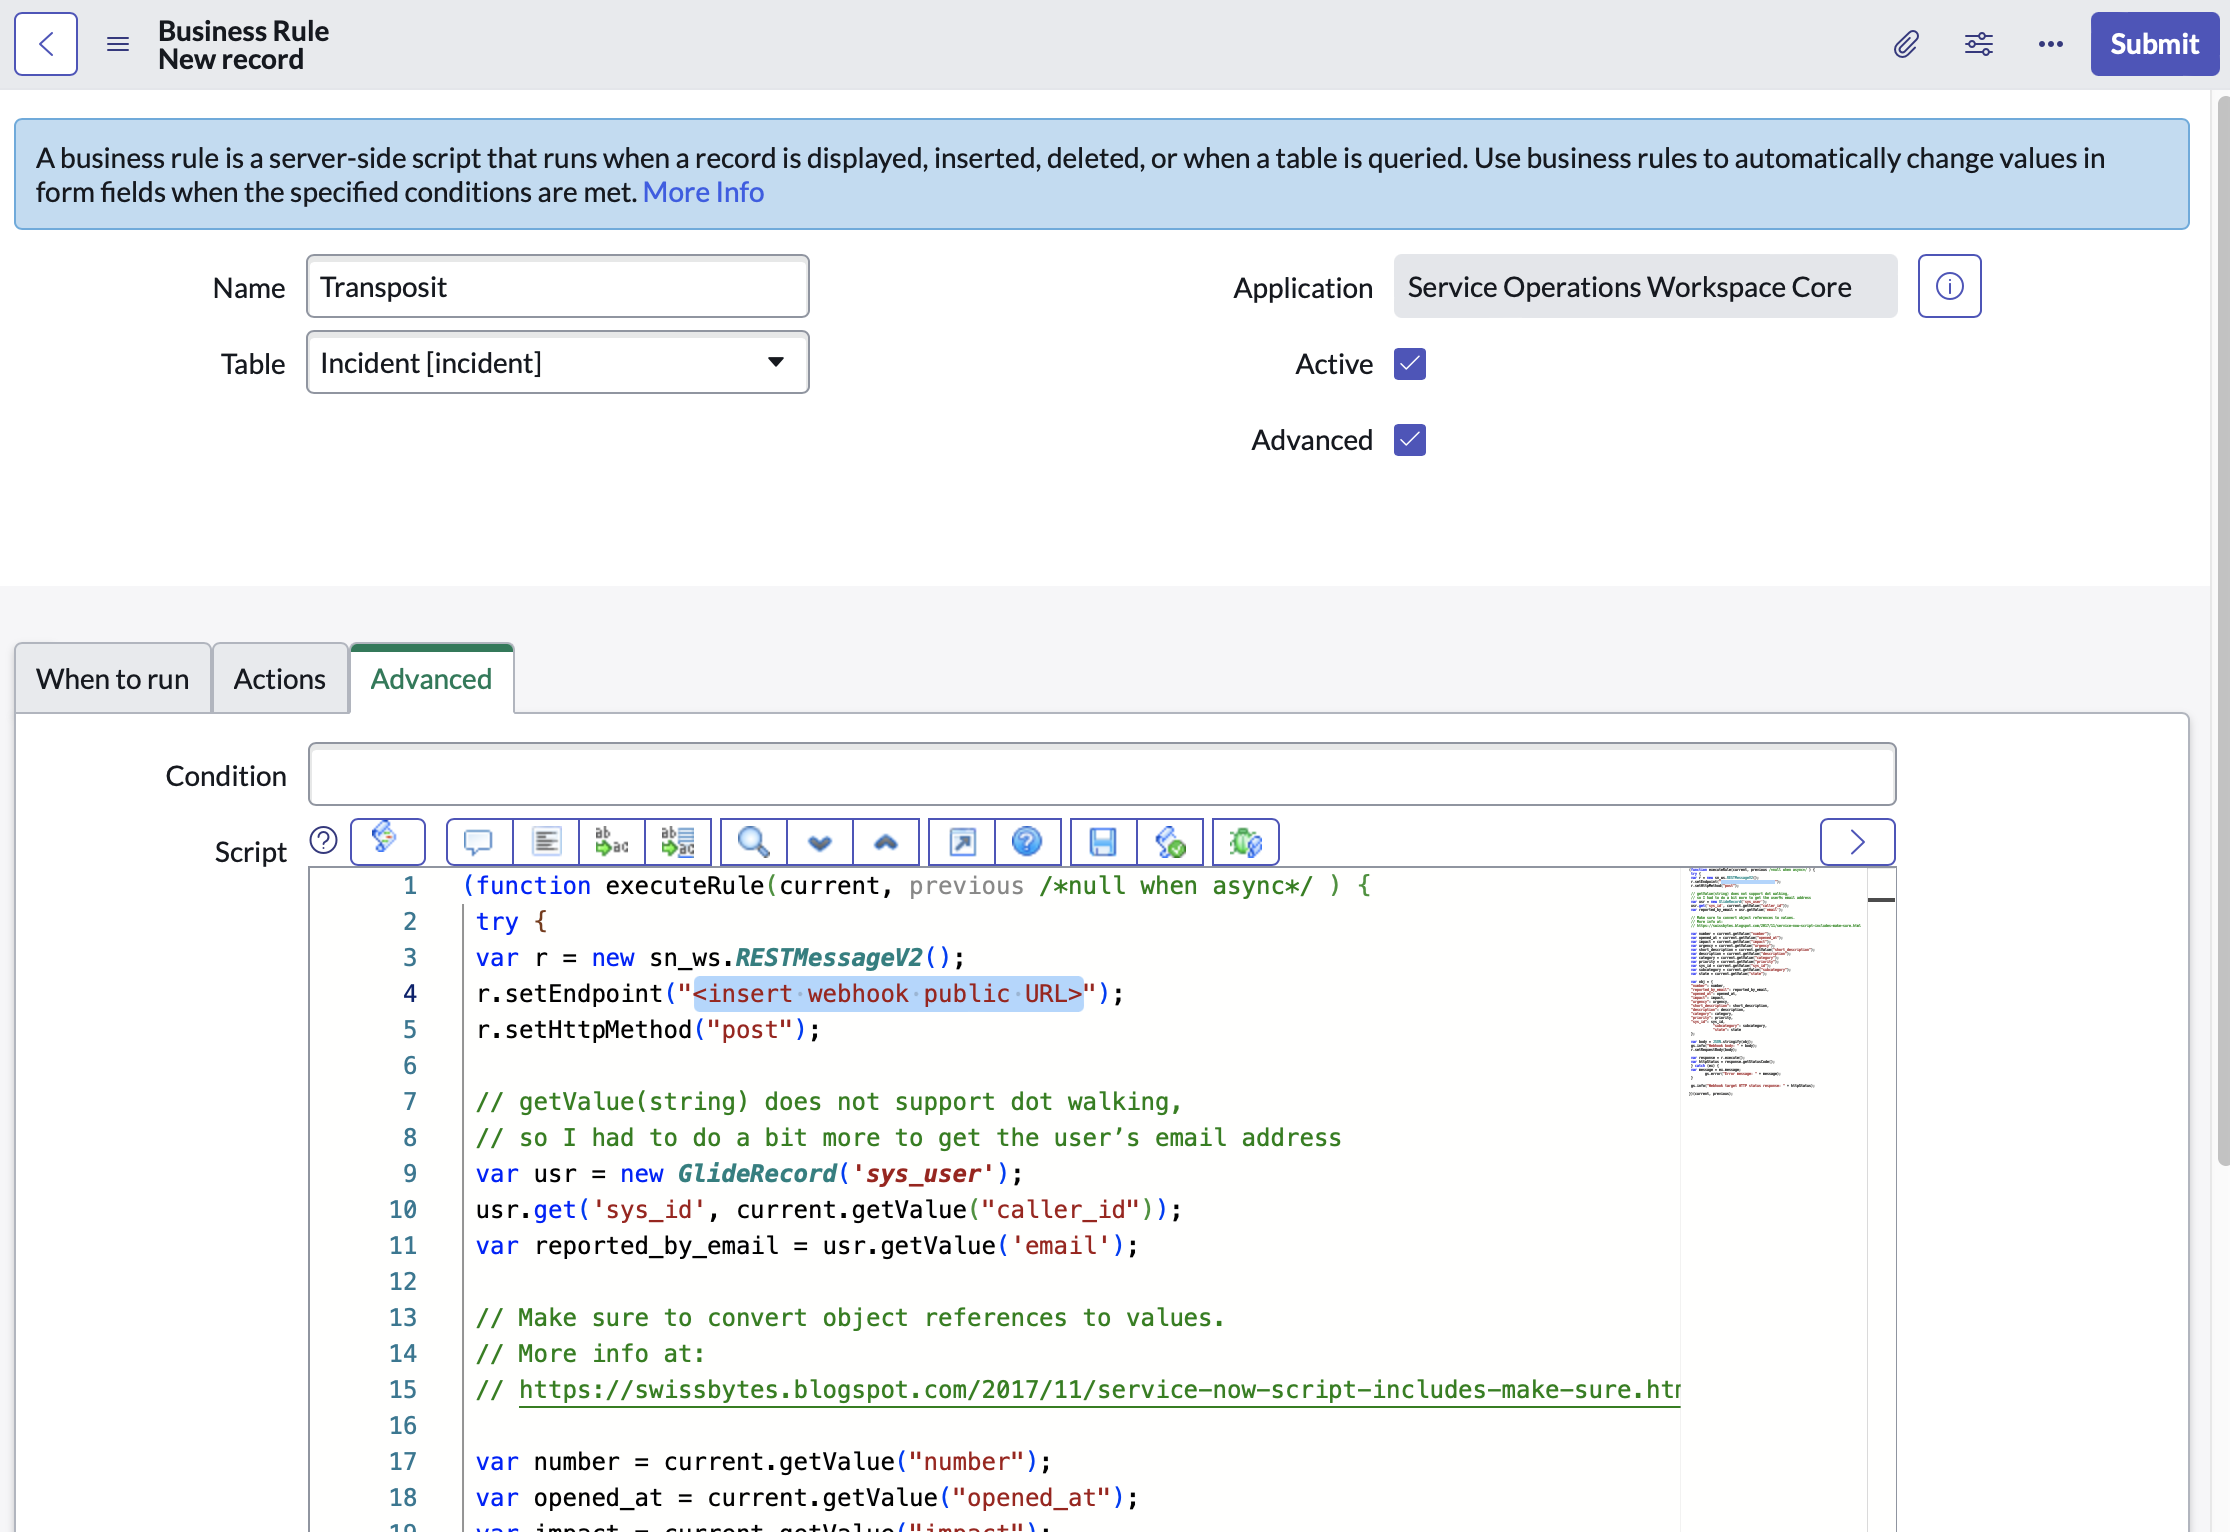
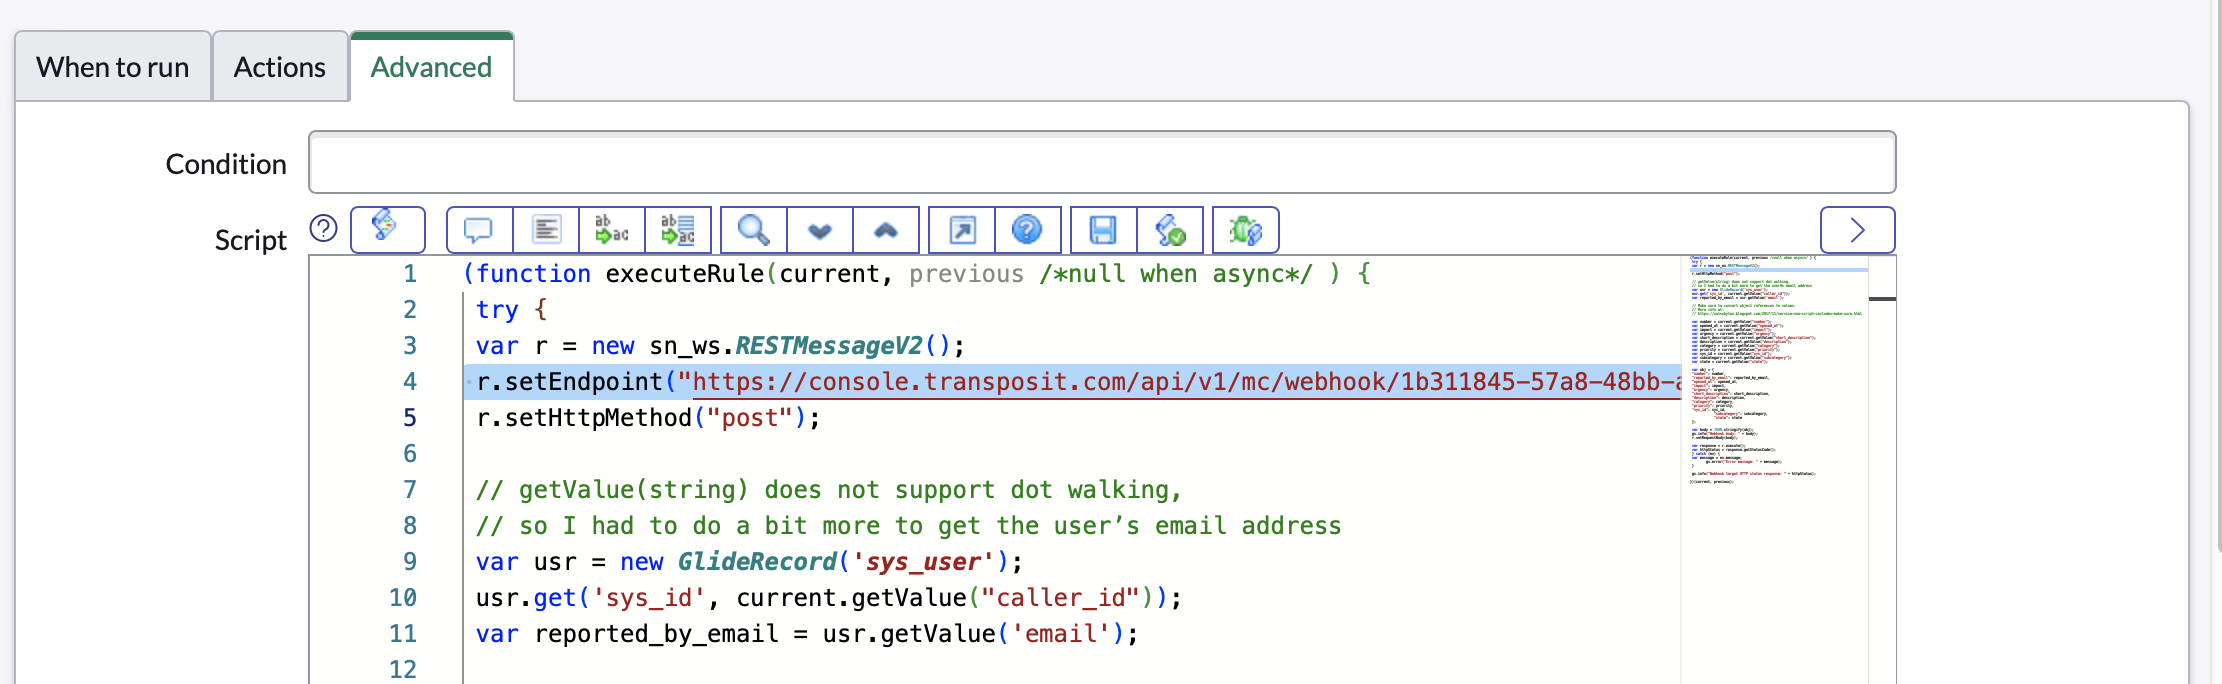
Select the Advanced tab, copy the code snippet below, and paste it into the Script field.
(function executeRule(current, previous /*null when async*/ ) {
   try {
   var r = new sn_ws.RESTMessageV2();
   r.setEndpoint("<insert webhook public URL>");
   r.setHttpMethod("post");

   // getValue(string) does not support dot walking,
   // so I had to do a bit more to get the user’s email address
   var usr = new GlideRecord('sys_user');
   usr.get('sys_id', current.getValue("caller_id"));
   var reported_by_email = usr.getValue('email');

   // Make sure to convert object references to values.
   // More info at:
   // https://swissbytes.blogspot.com/2017/11/service-now-script-includes-make-sure.html

   var number = current.getValue("number");
   var opened_at = current.getValue("opened_at");
   var impact = current.getValue("impact");
   var urgency = current.getValue("urgency");
   var short_description = current.getValue("short_description");
   var description = current.getValue("description");
   var category = current.getValue("category");
   var priority = current.getValue("priority");
   var sys_id = current.getValue("sys_id");
   var subcategory = current.getValue("subcategory");
   var state = current.getValue("state");

   var obj = {
   "number": number,
   "reported_by_email": reported_by_email,
   "opened_at": opened_at,
   "impact": impact,
   "urgency": urgency,
   "short_description": short_description,
   "description": description,
   "category": category,
   "priority": priority,
   "sys_id": sys_id,
           "subcategory": subcategory,
           "state": state
   };

   var body = JSON.stringify(obj);
   gs.info("Webhook body: " + body);
   r.setRequestBody(body);

   var response = r.execute();
   var httpStatus = response.getStatusCode();
   } catch (ex) {
   var message = ex.message;
        gs.error("Error message: " + message);
   }

   gs.info("Webhook target HTTP status response: " + httpStatus);

  })(current, previous);
For details on the above code snippet, see Transposit Blog: Creating Webhooks in ServiceNow, which is referenced in ServiceNow Community: Webhook Question - ServiceNow to External 3rd Party.
In the Advanced tab, the Script field now looks as follows and notice the placeholder for the Transposit webhook URL endpoint in line 4.
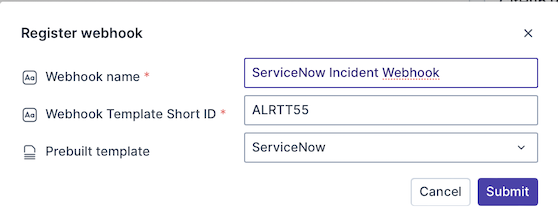
Define a Webhook in Transposit, give it a name and select the ServiceNow template in the Prebuilt template drop-down.
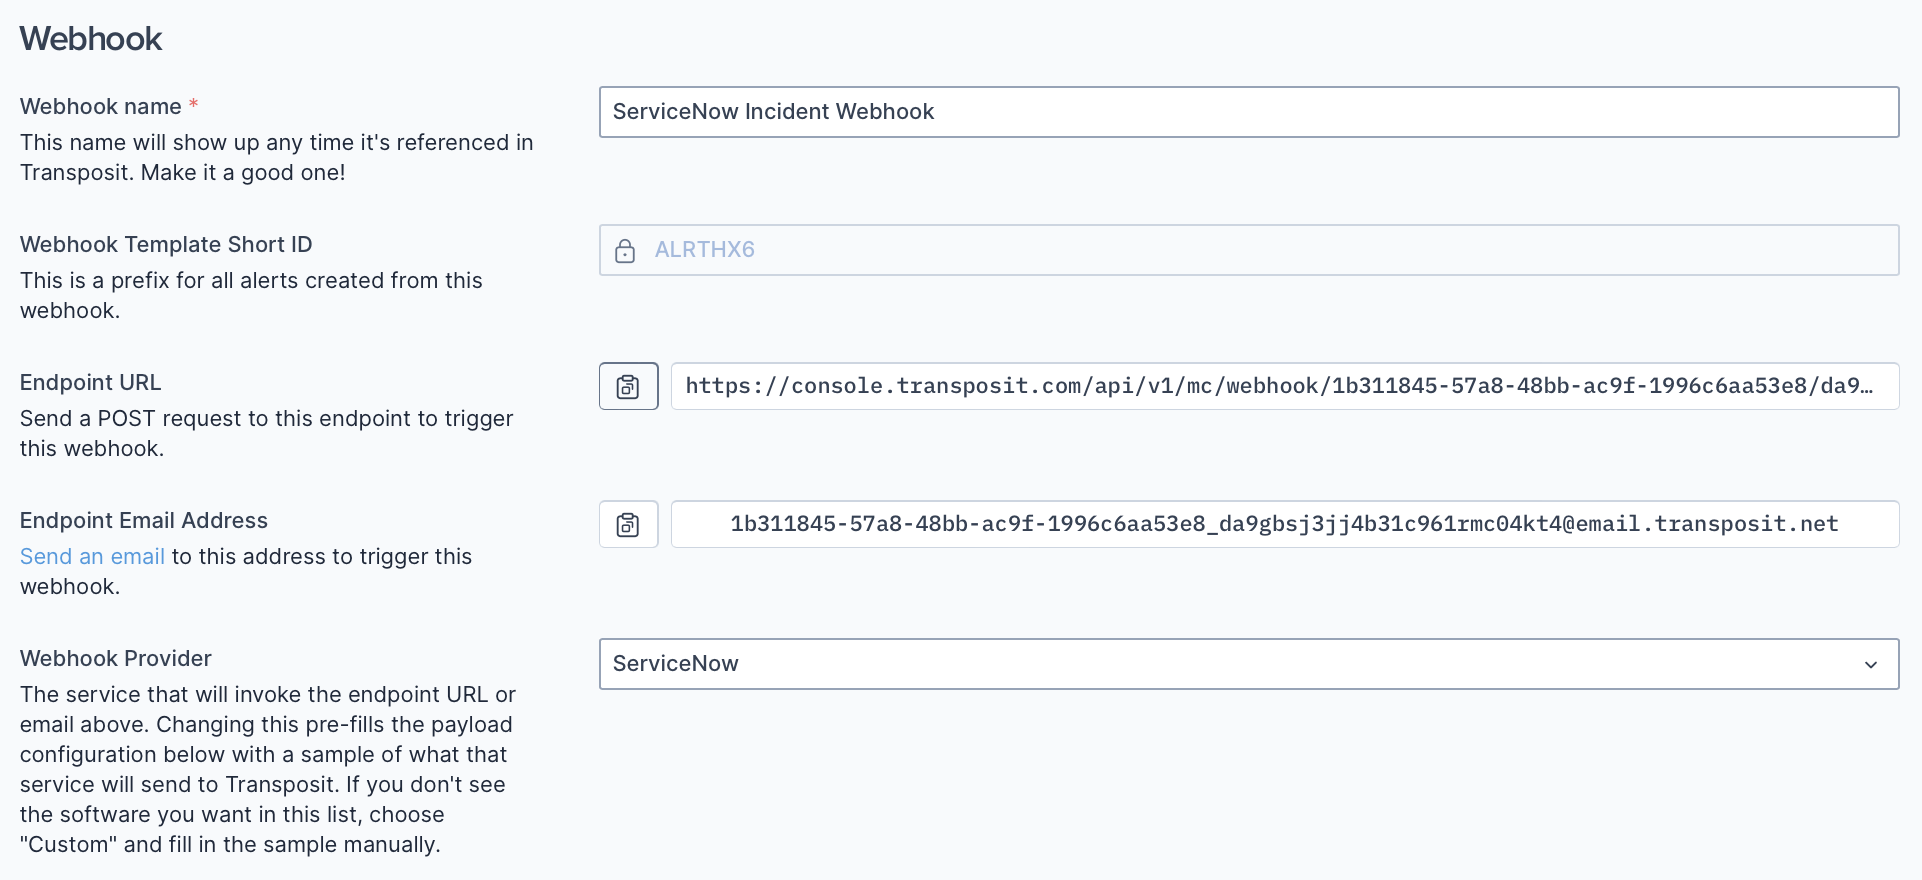
After you click Submit above, copy the Endpoint URL in Transposit from your newly created ServiceNow incident webhook.
Paste the URL into the placeholder in line 4 in the ServiceNow code, as shown in step 6 above.
Click Submit in ServiceNow. The list of System Definition business rules now includes the one you've created for interacting with Transposit.

You've now created your business rule, which is explained in more detail in Transposit Blog: Creating Webhooks in ServiceNow.
Trigger the Webhook
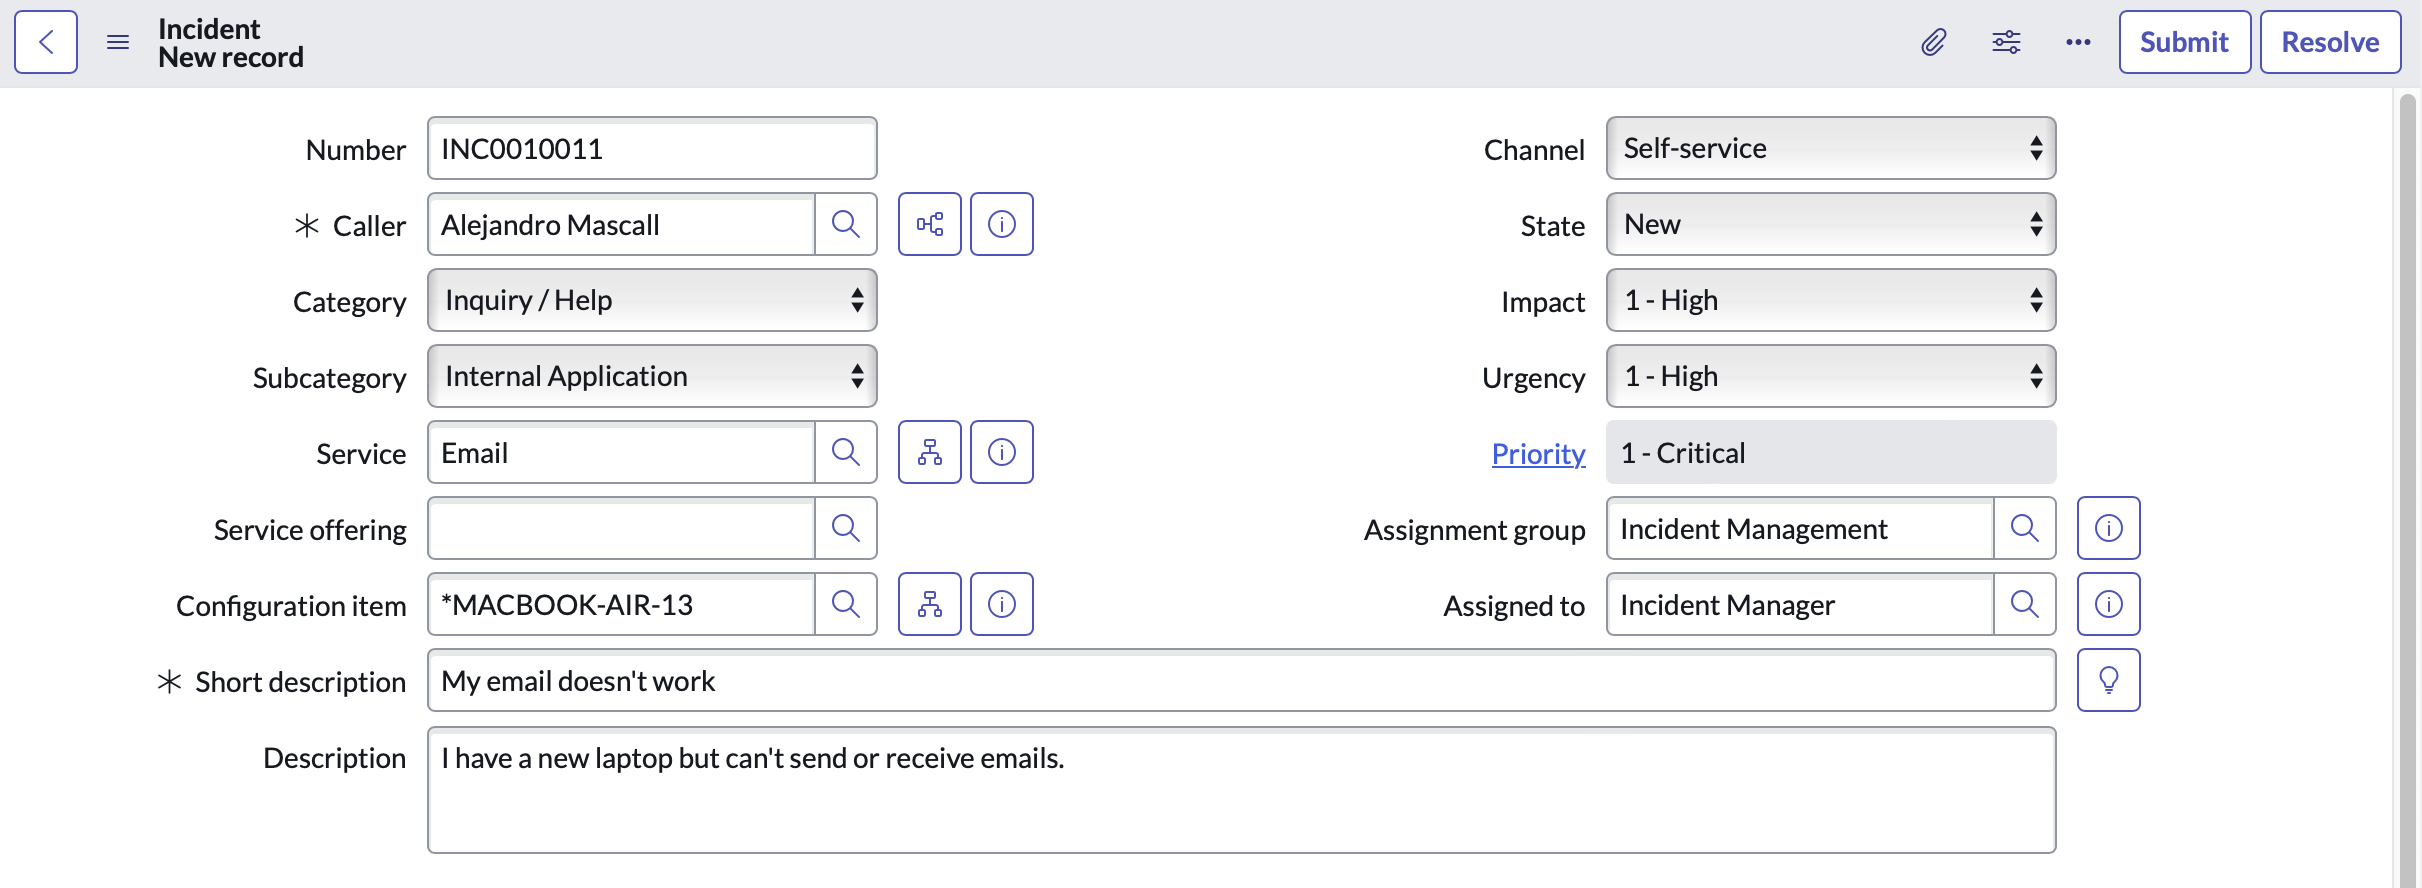
In ServiceNow, create a new incident and click Submit.
When you click Refetch payload in your Webhook definition in Transposit, the payload sent from ServiceNow when you clicked Submit above is made available, as shown below.
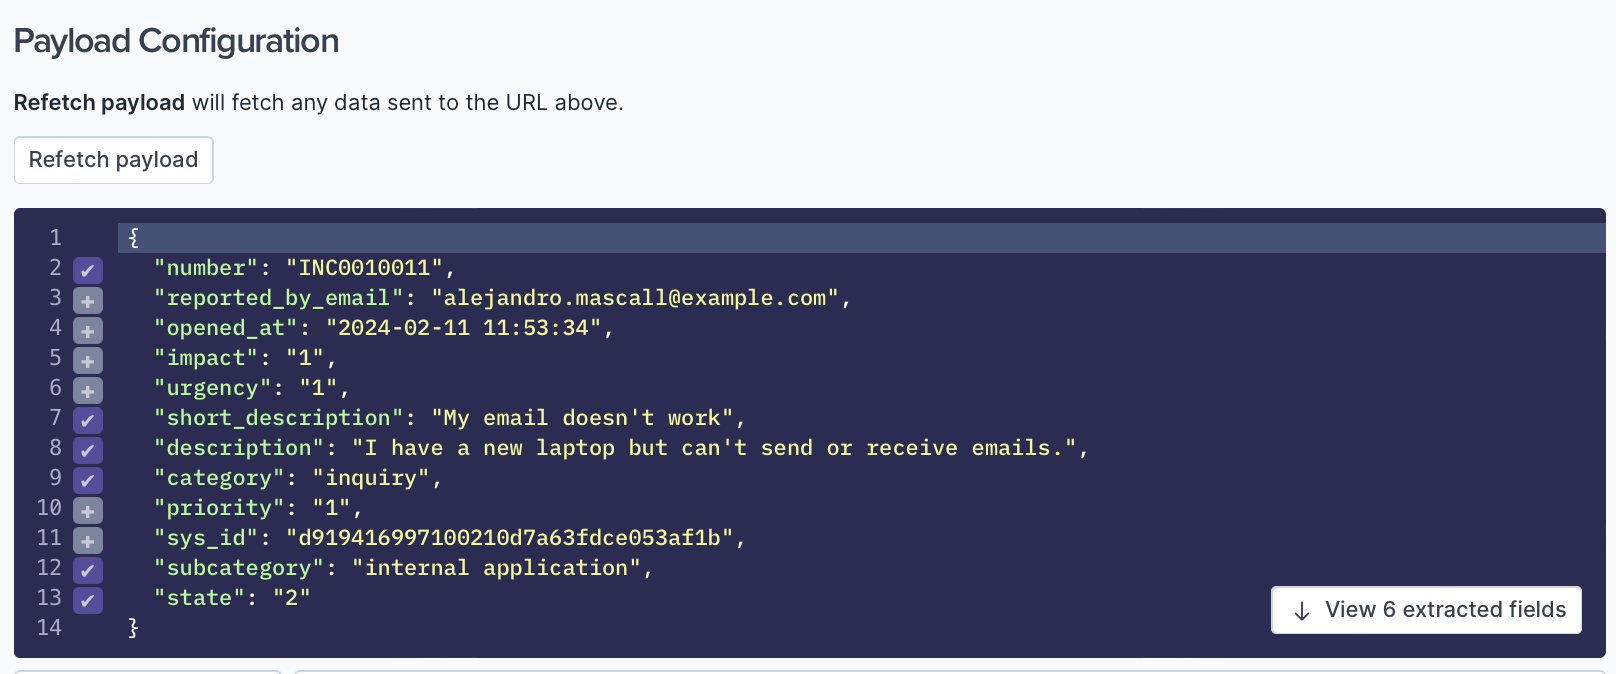
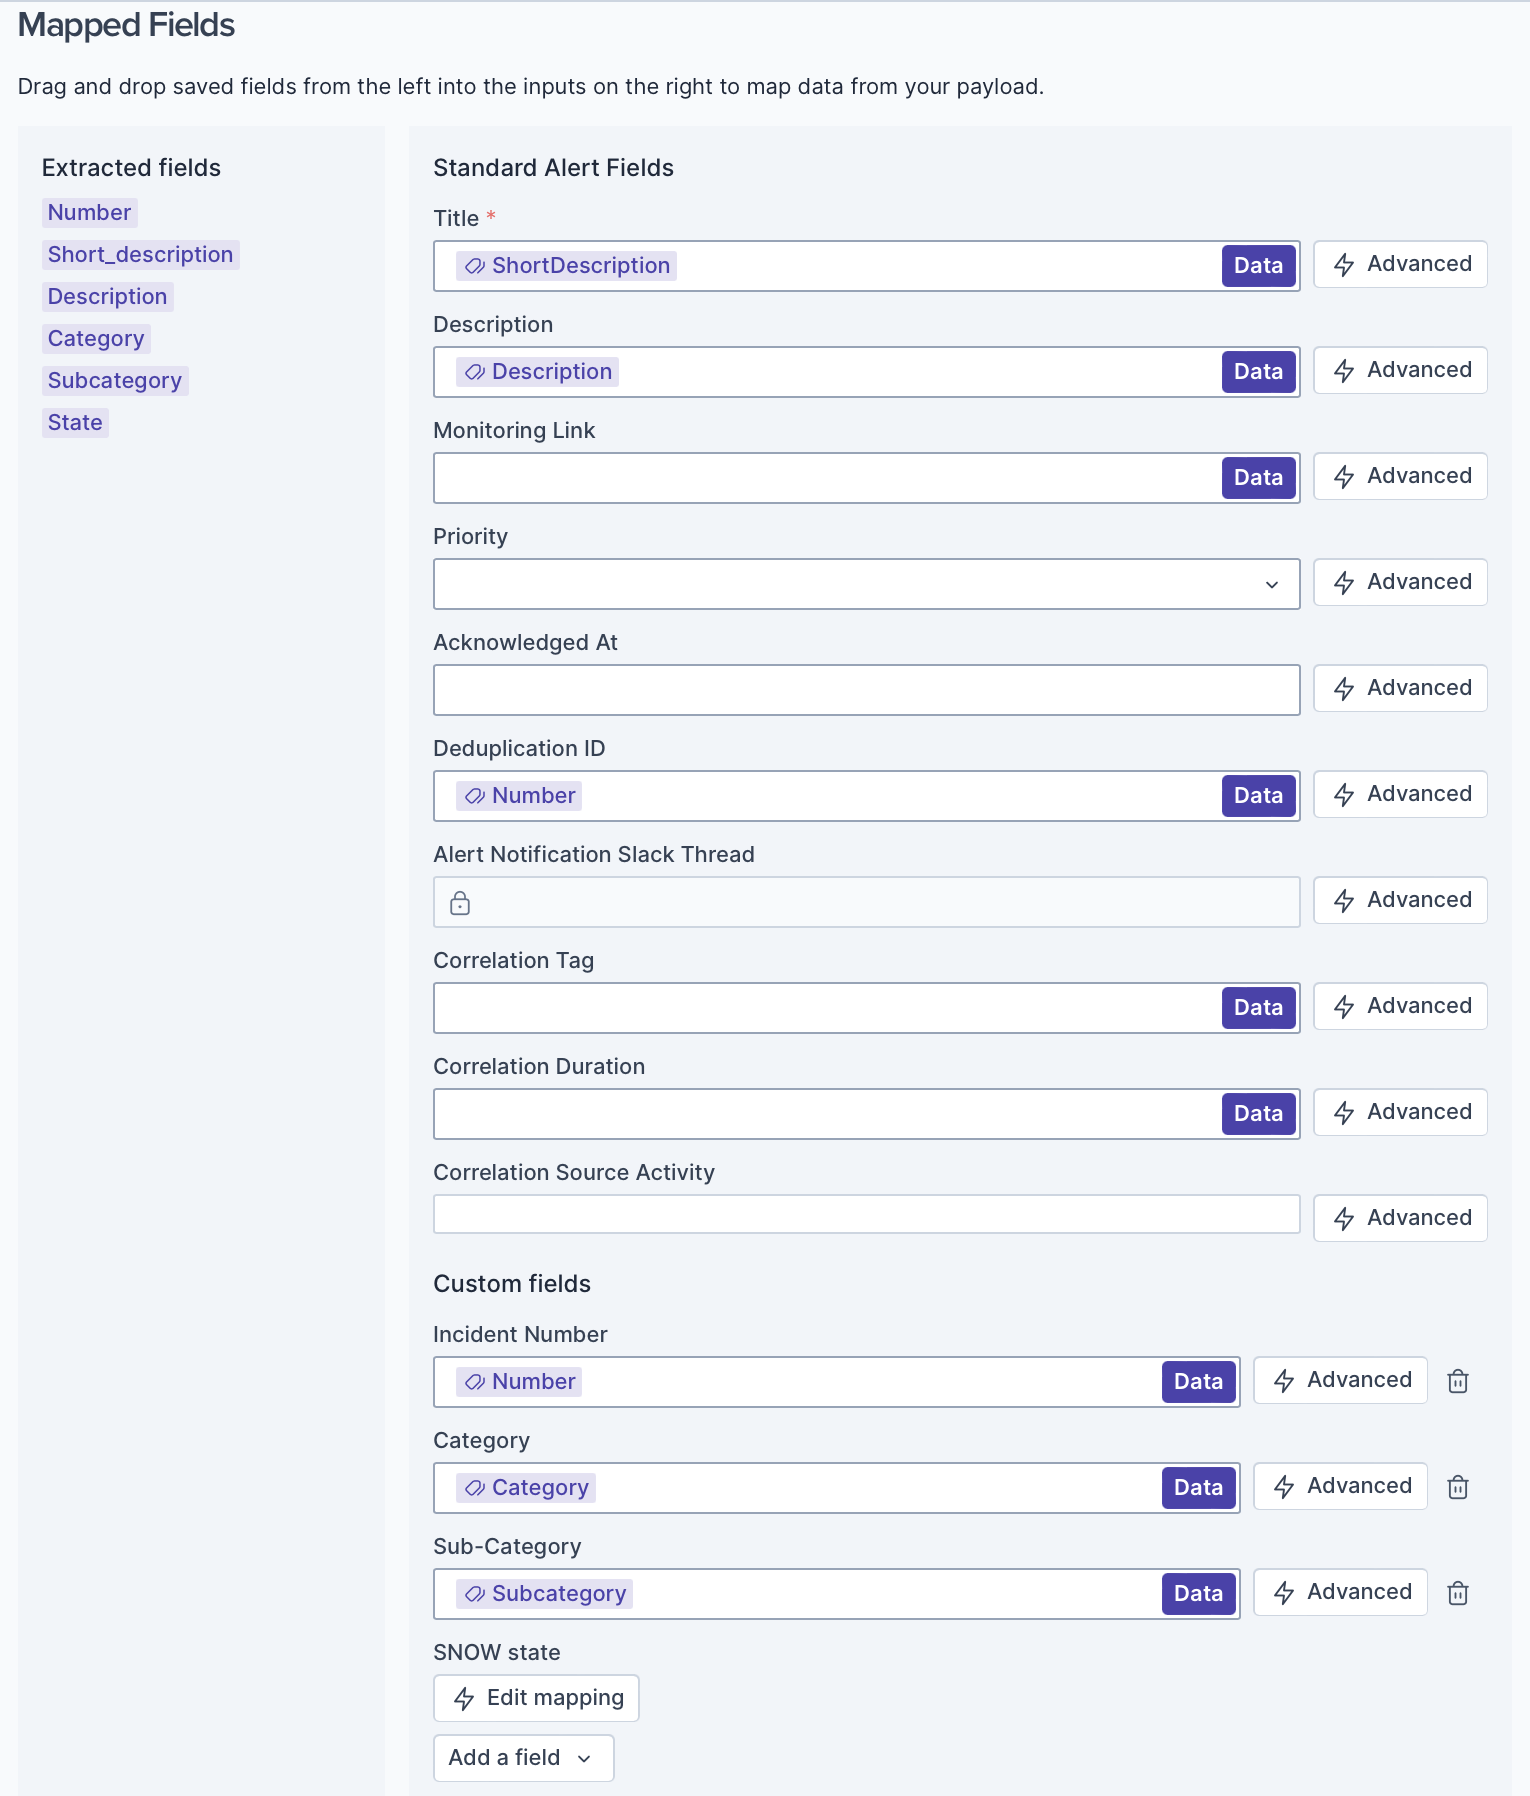
The prebuilt template has automatically extracted relevant ServiceNow fields and mapped them to Transposit alert fields. Custom fields have been created automatically for fields that are specific to ServiceNow.
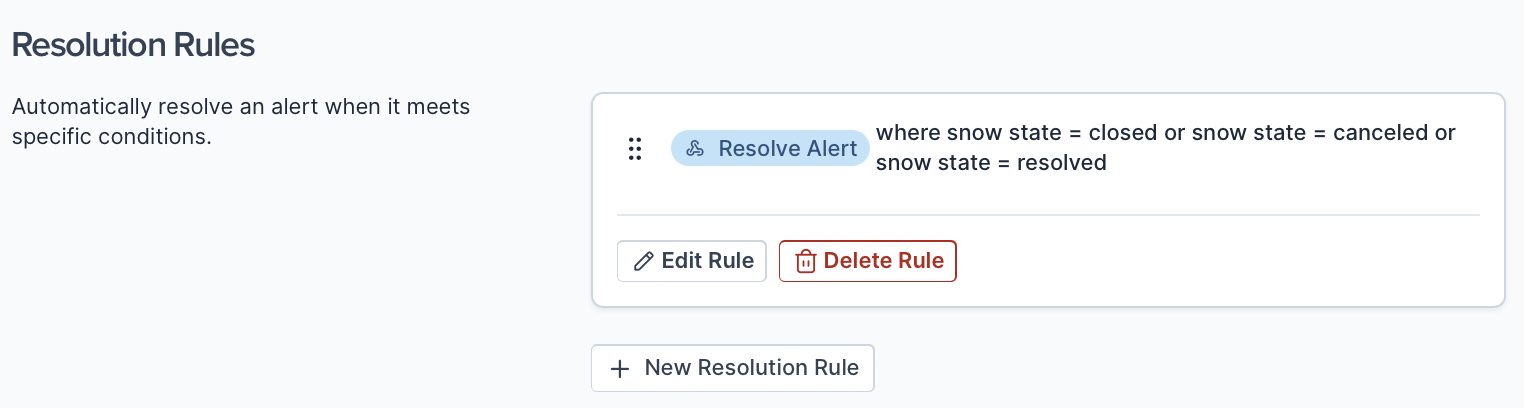
A resolution rule has also been generated. The alert in Transposit will automatically be resolved when the incident in ServiceNow state is set to canceled, closed, or resolved.
Continue developing your webhook settings in Transposit, as described in Setting Up Webhooks.
Use the Webhook
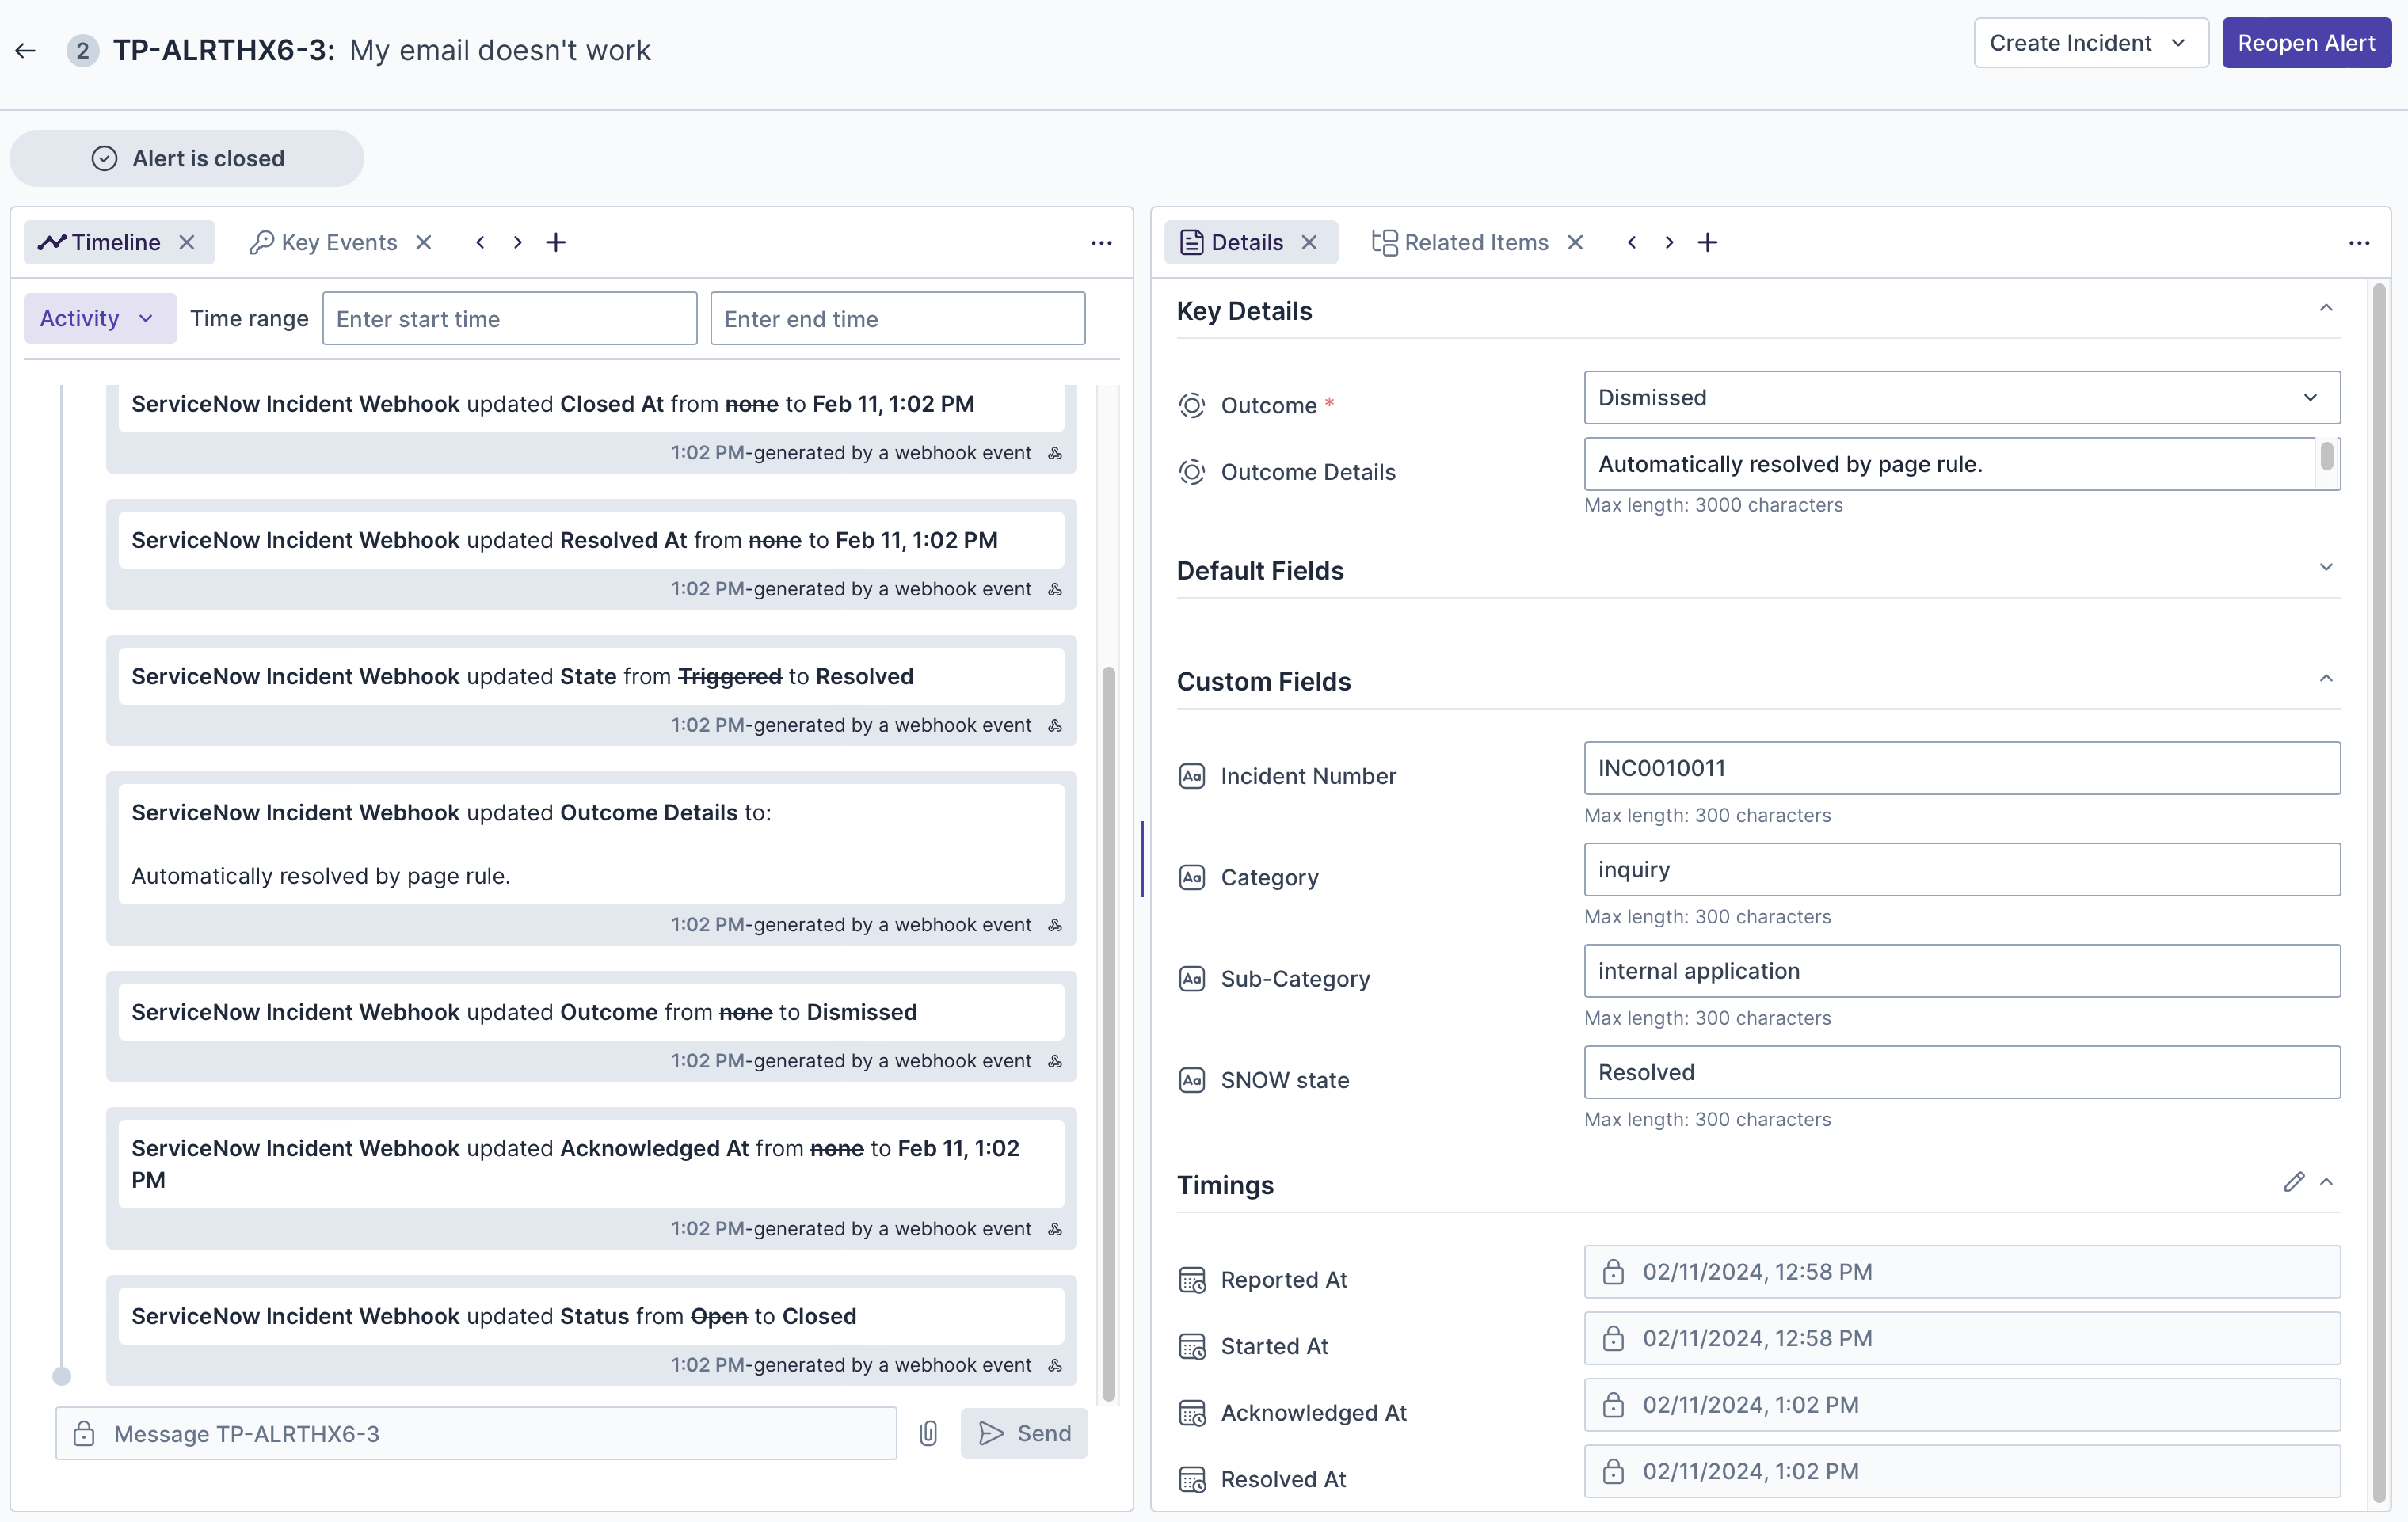
In the Transposit Alerts tab, notice that a new alert has been received from ServiceNow.
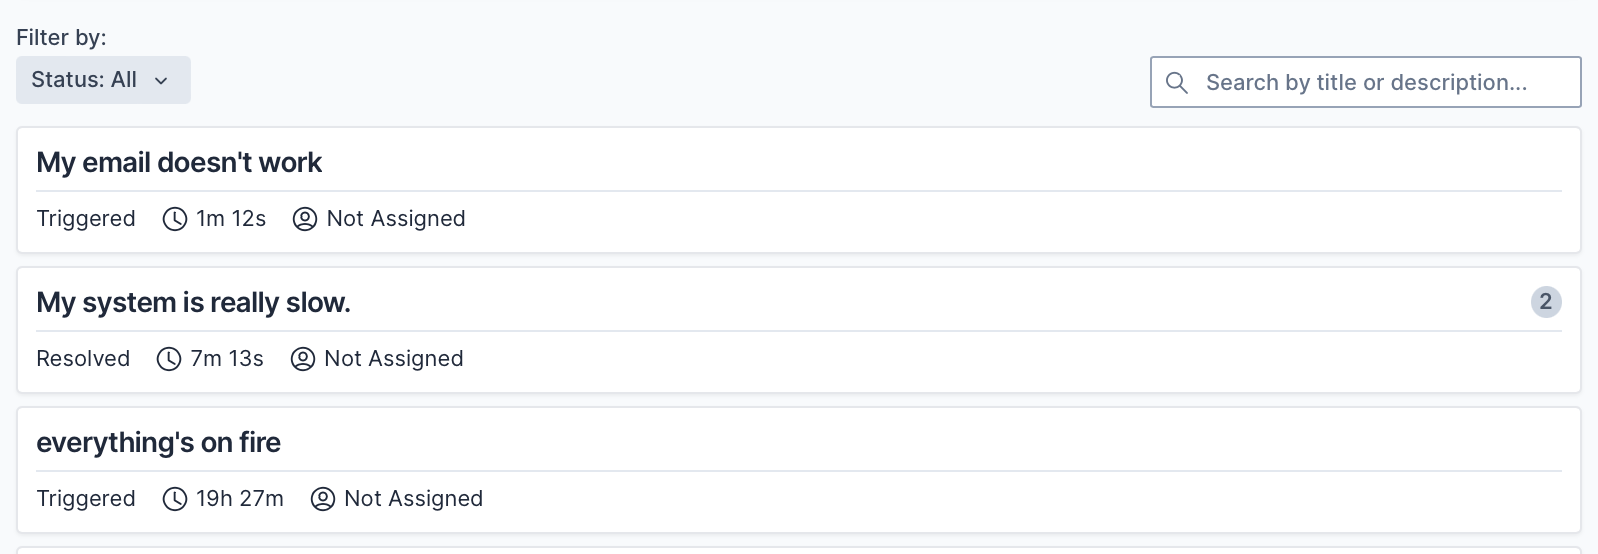
Open the alert and notice that its properties are populated as expected based on the webhook definitions above.
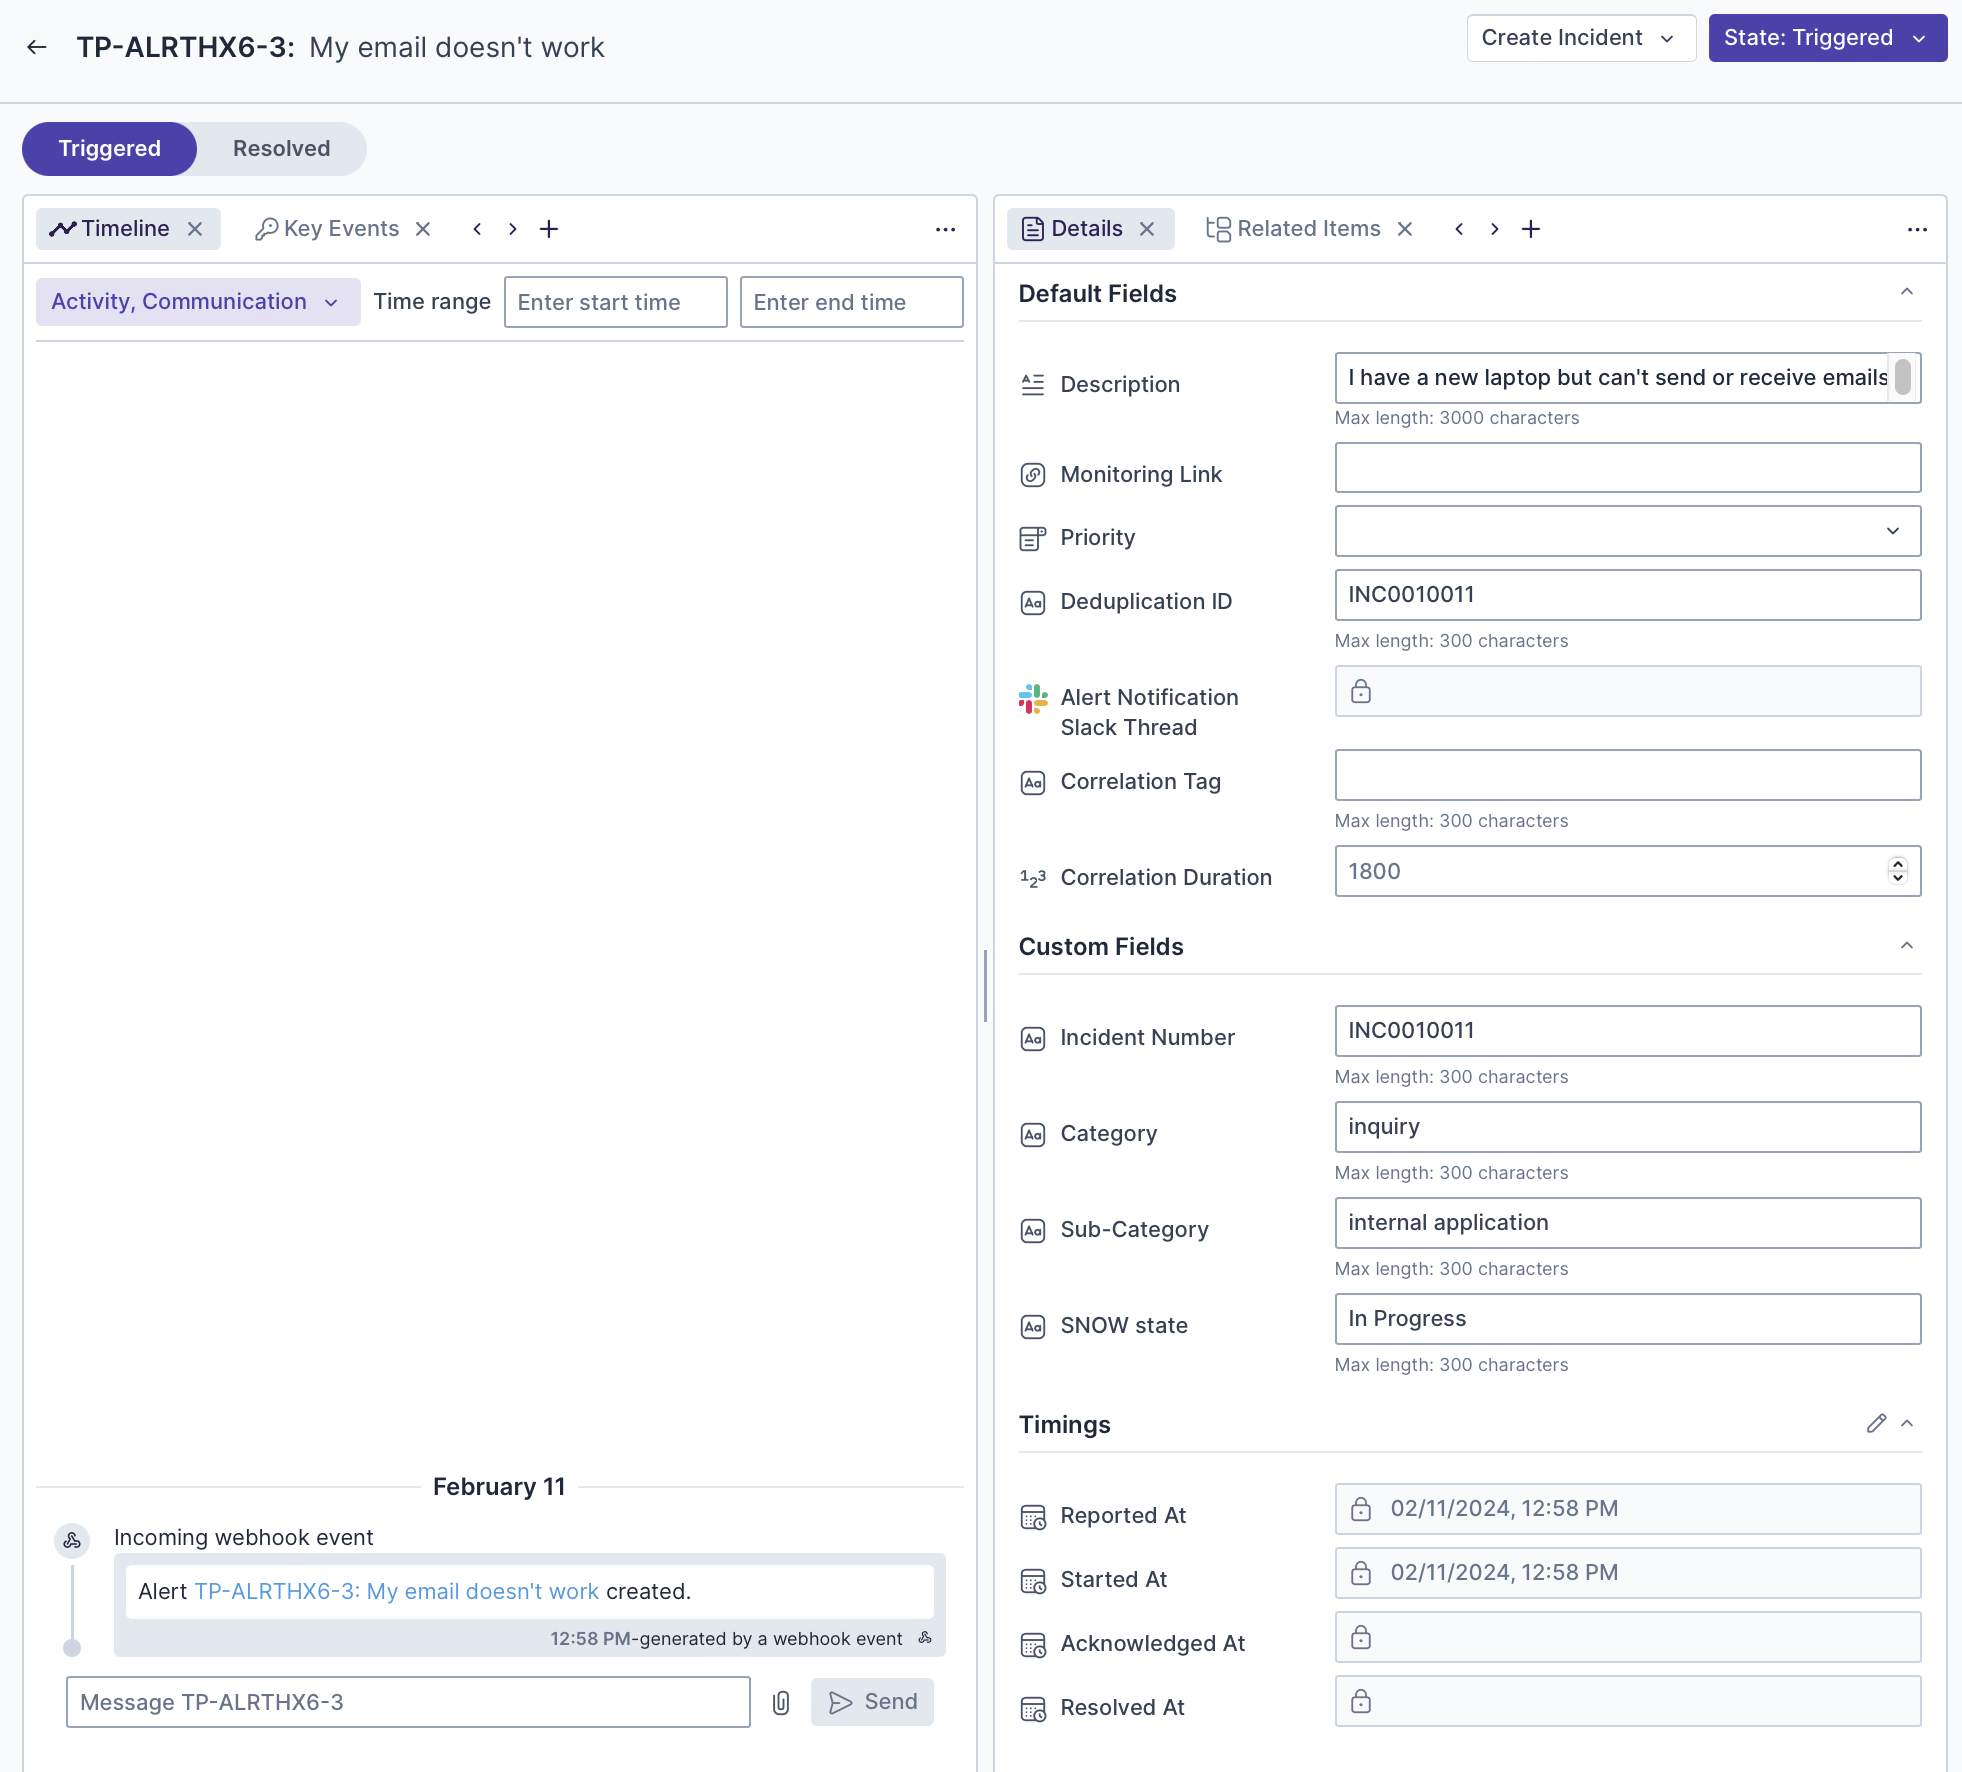
When the incident is canceled, closed, or resolved in ServiceNow, notice that the alert in Transposit is automatically resolved.