Prerequisites
- Create a Sentry account.
Define the Webhook
In Sentry, click Settings in the navigation tree on the left and, in the Organization submenu, click Integrations.
Click Create New Integration, select Internal Integration, and click Next.
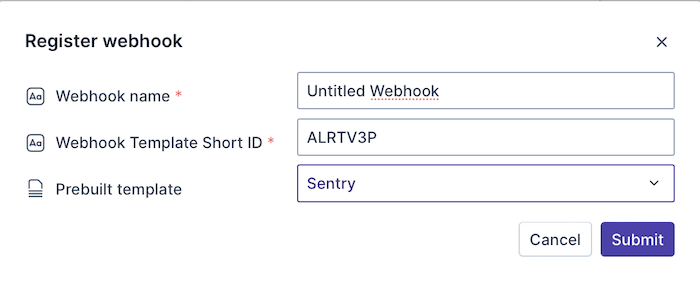
Define a Webhook in Transposit and select the Sentry template in the Prebuilt template drop-down.
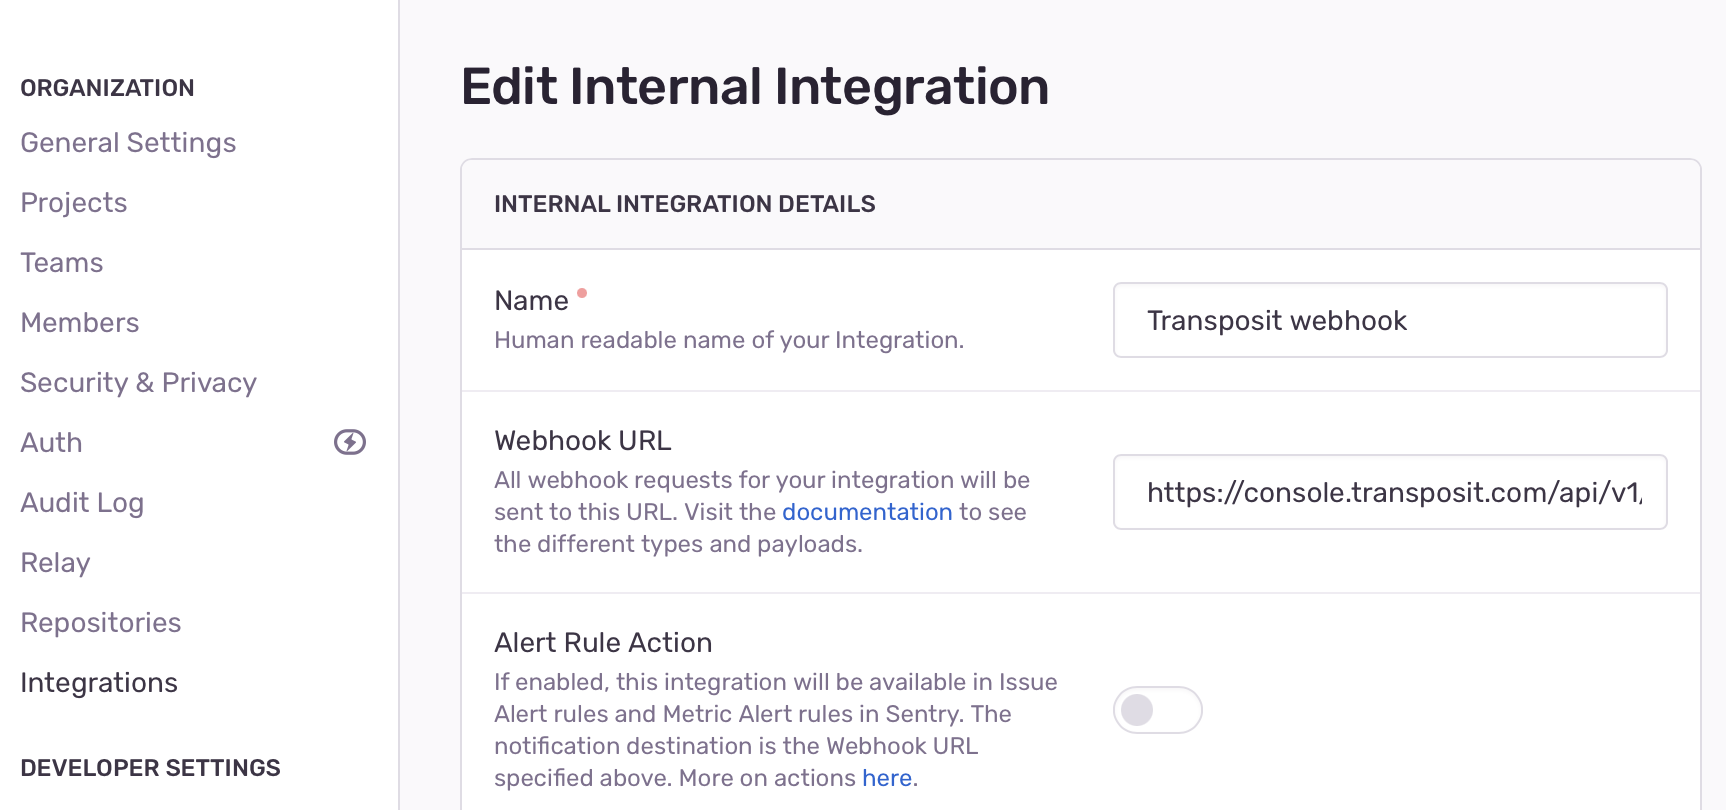
Copy the Webhook URL into the Webhook URL field in your Webhook definition in Sentry.
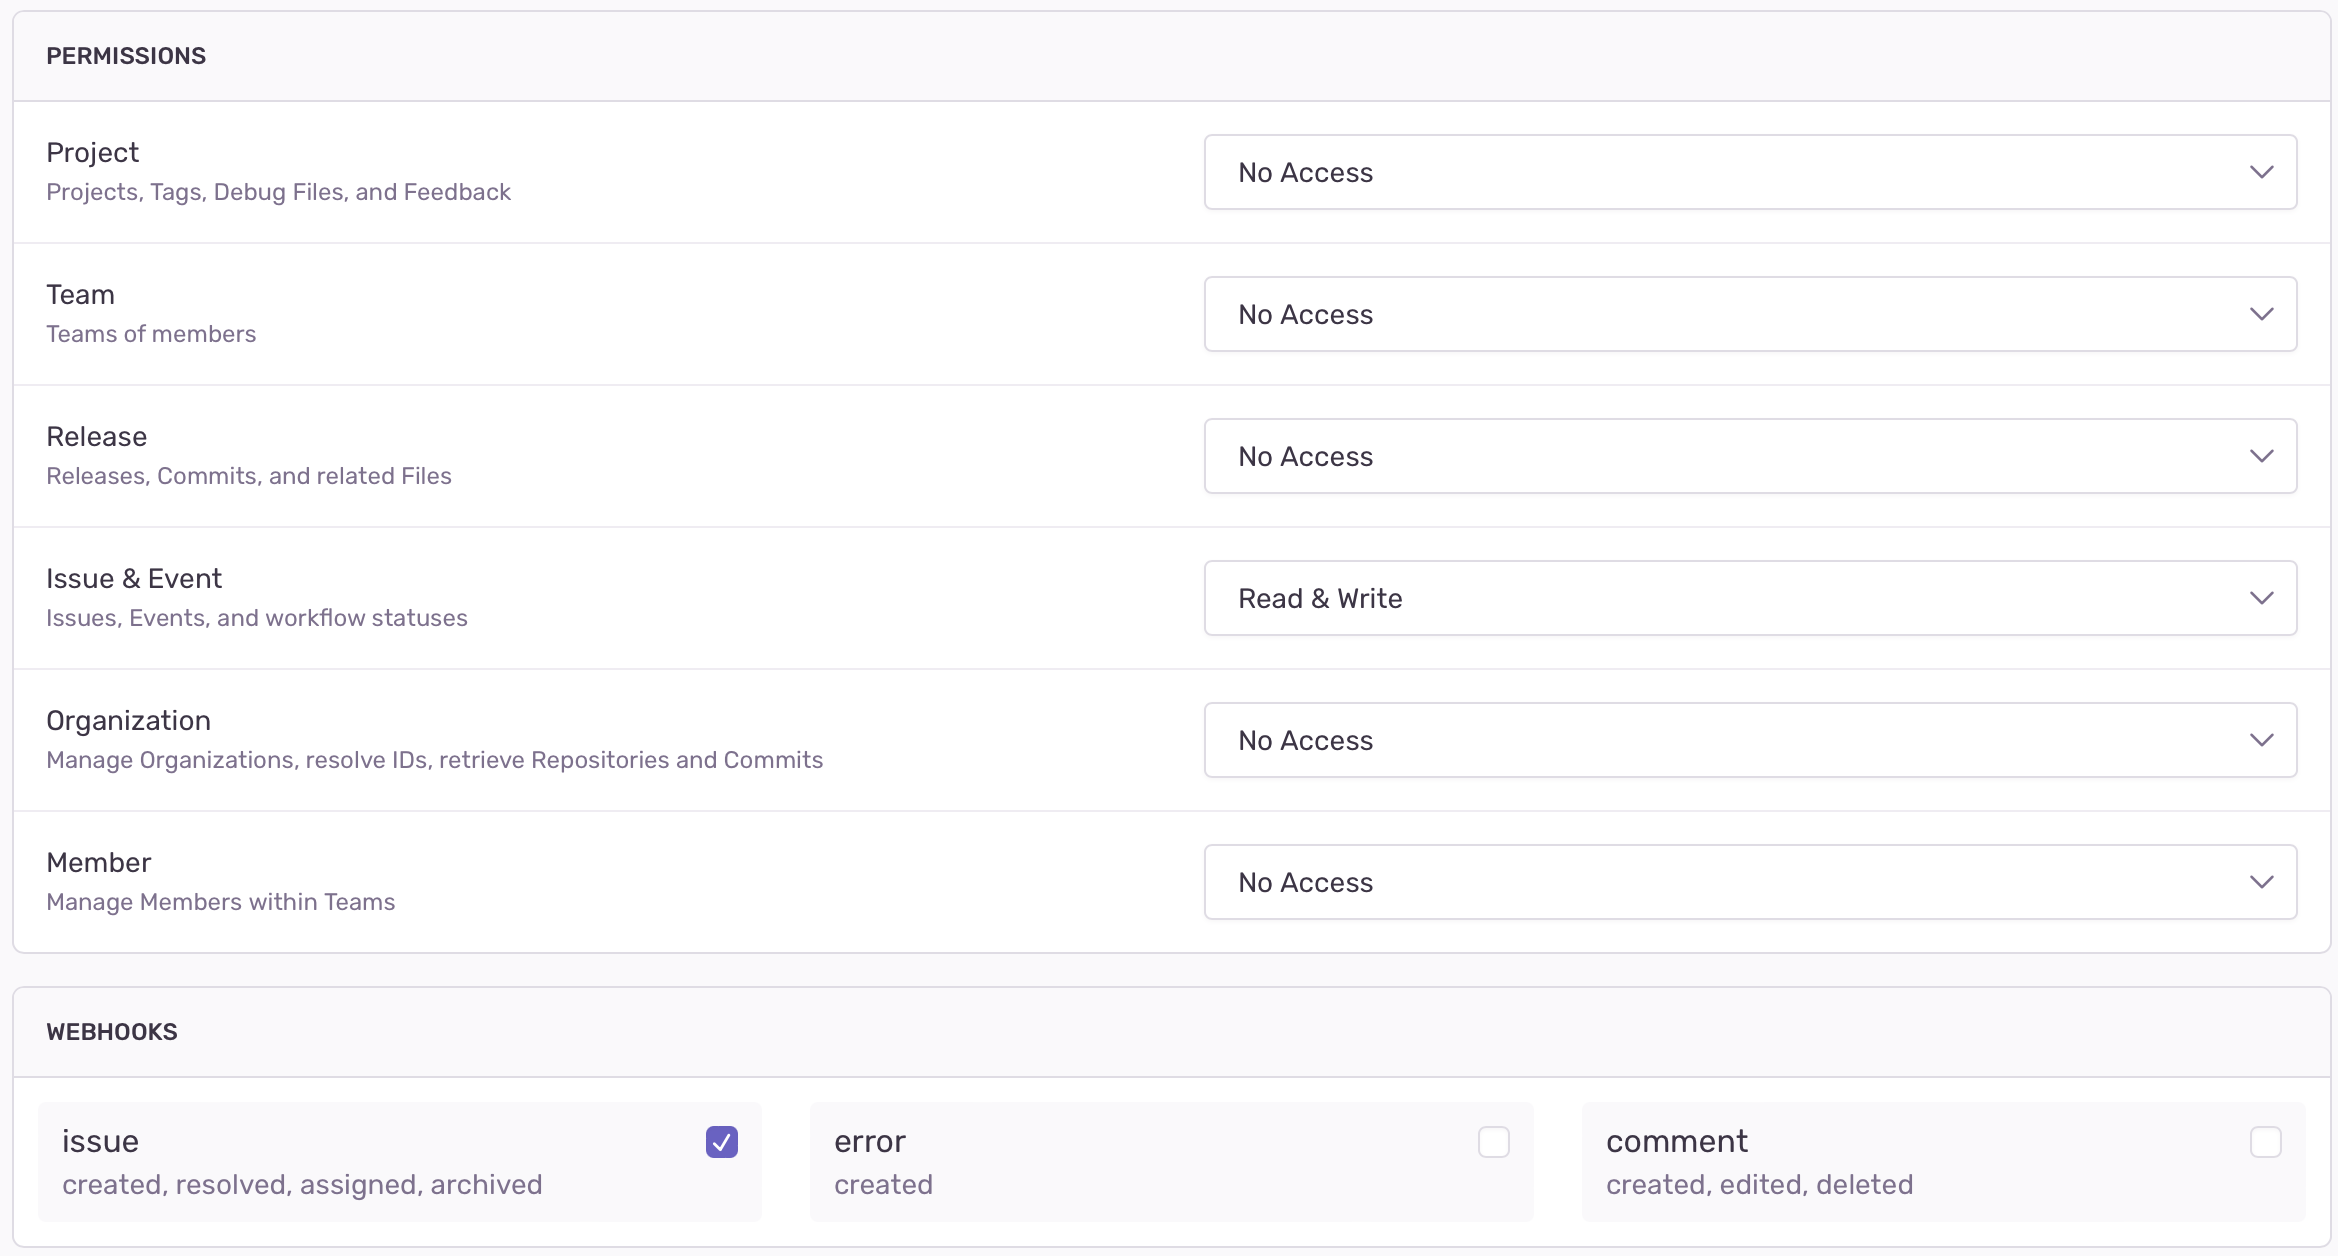
Under the PERMISSIONS section in the Webhook definition in Sentry, select Read & Write in the Issue & Event drop-down list. Also, click the issue checkbox in the WEBHOOKS section.
Click Save Changes.
Trigger the Webhook
On your Sentry organization page, click Issues in the navigation tree on the left.
On the Issues page, open an issue by clicking its name. If you don't have any issues, click Create a sample event.
Process the issue and notice that Transposit receives the events that are generated.
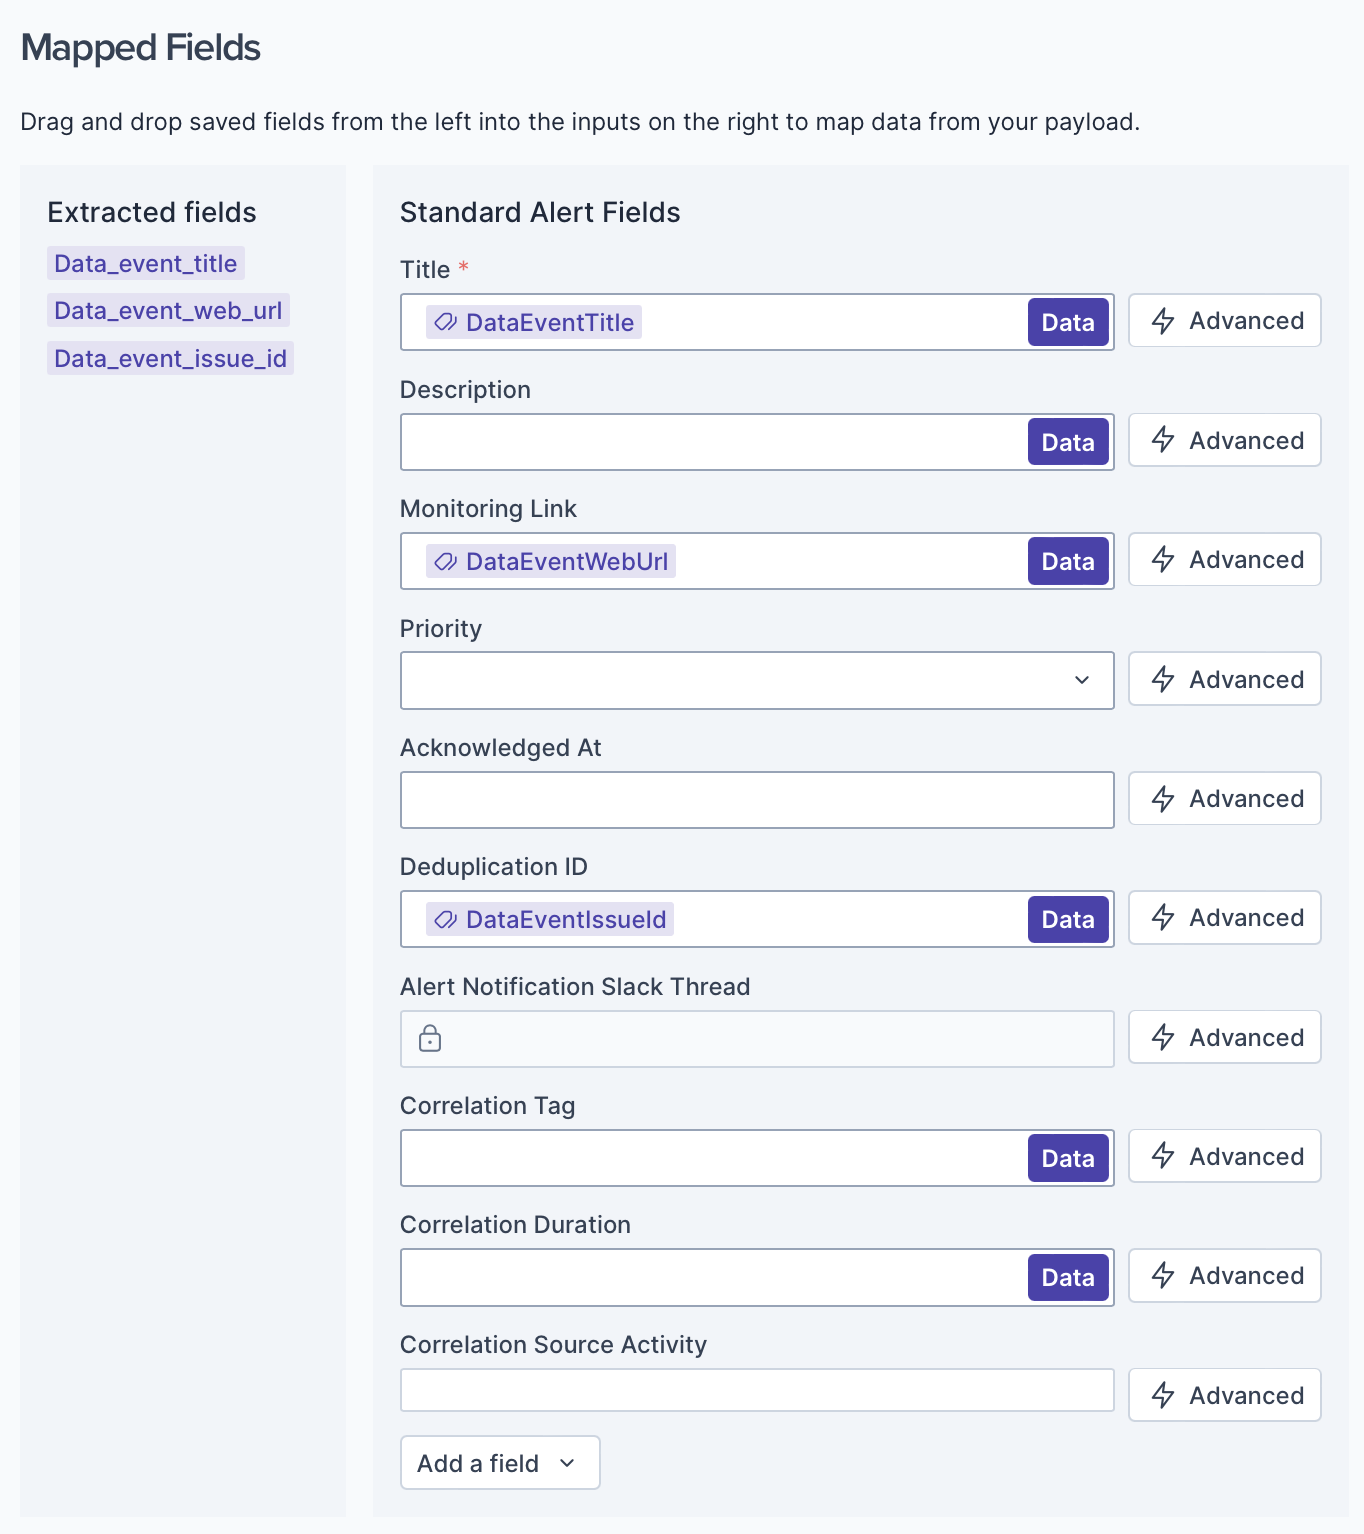
When you click Refetch payload in your Webhook definition in Transposit, the payload sent by Sentry is made available, as shown below.
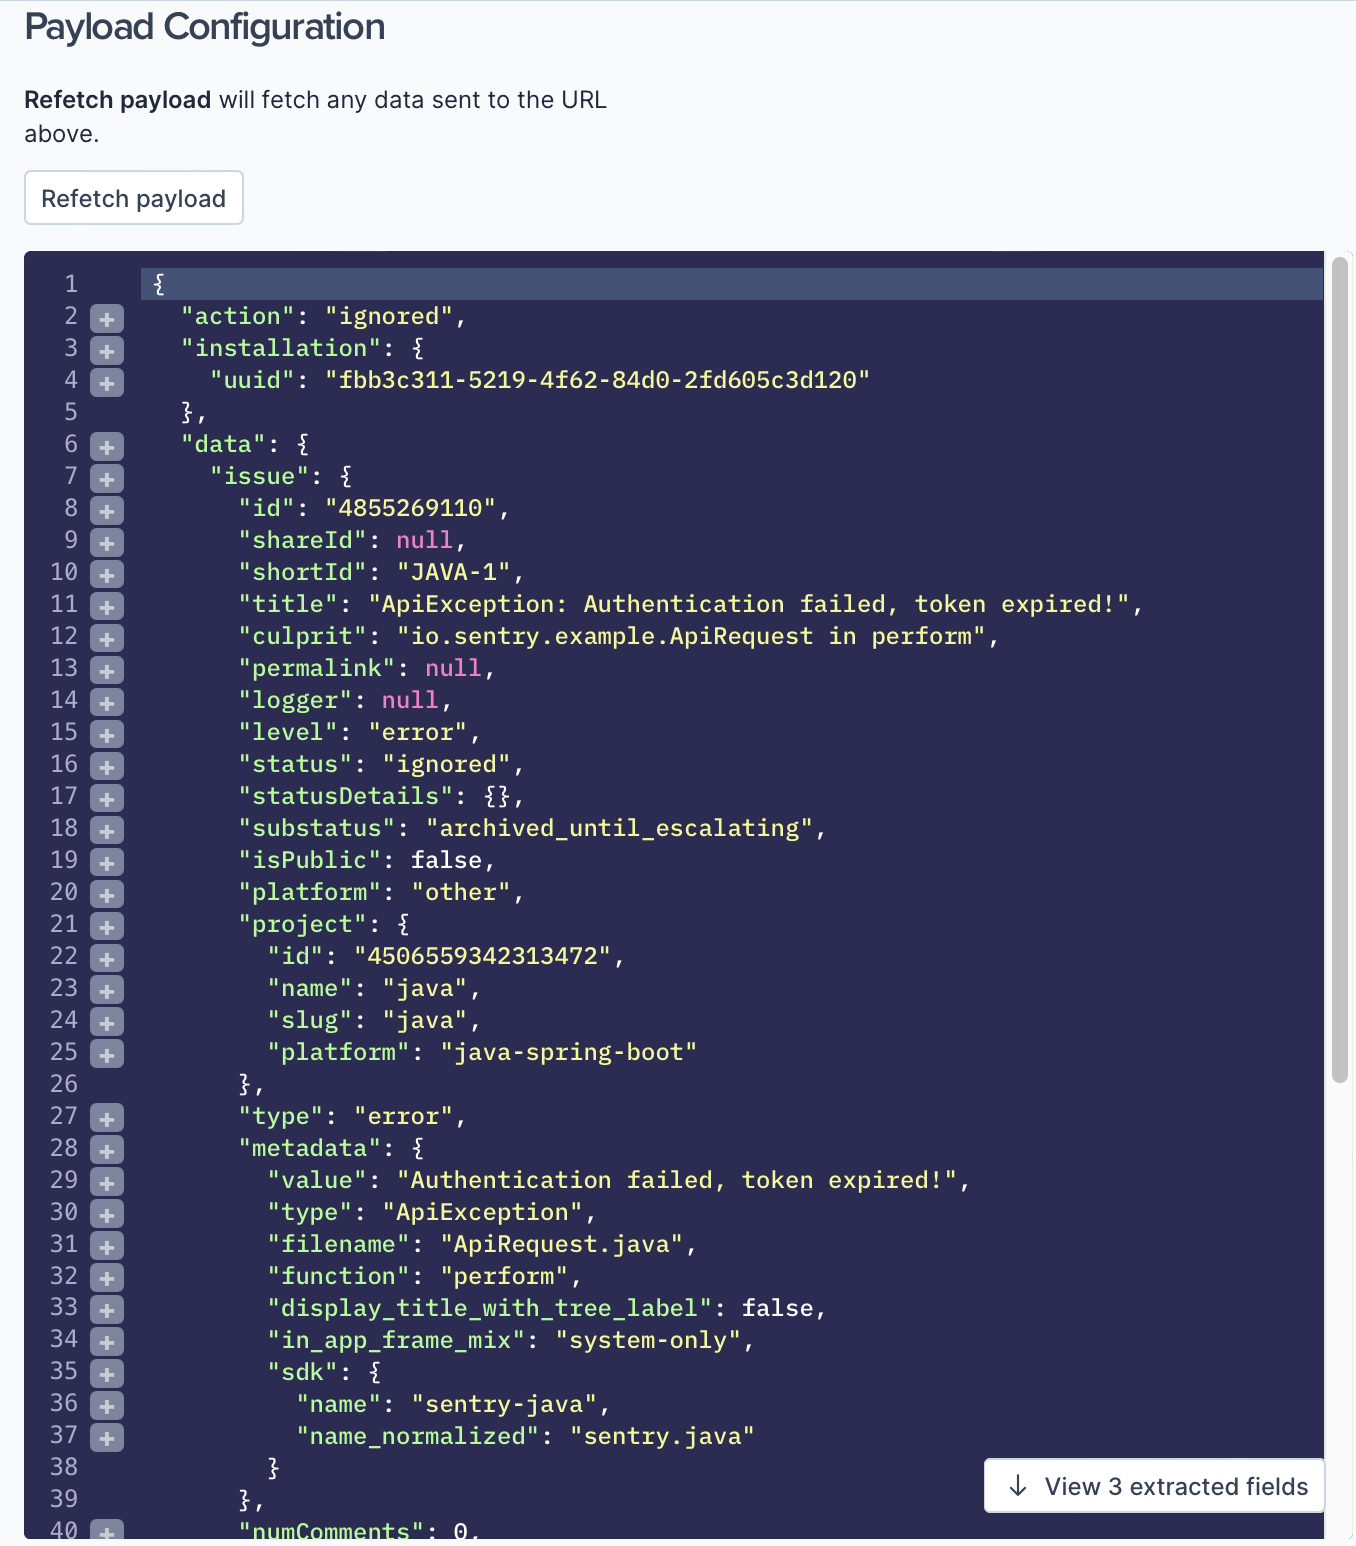
The prebuilt template has automatically extracted relevant Sentry fields and mapped them to Transposit alert fields.
Next Steps
Continue developing your webhook settings in Transposit, as described in Setting Up Webhooks.