Prerequisites
- Create a Jira account.
Define the Webhook
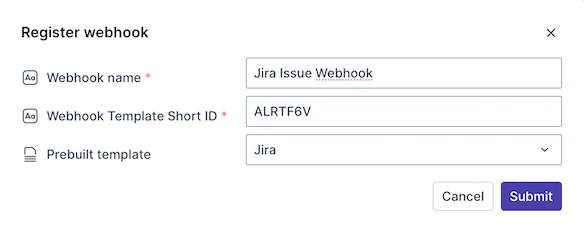
Define a Webhook in Transposit and select the Jira template in the Prebuilt template drop-down.
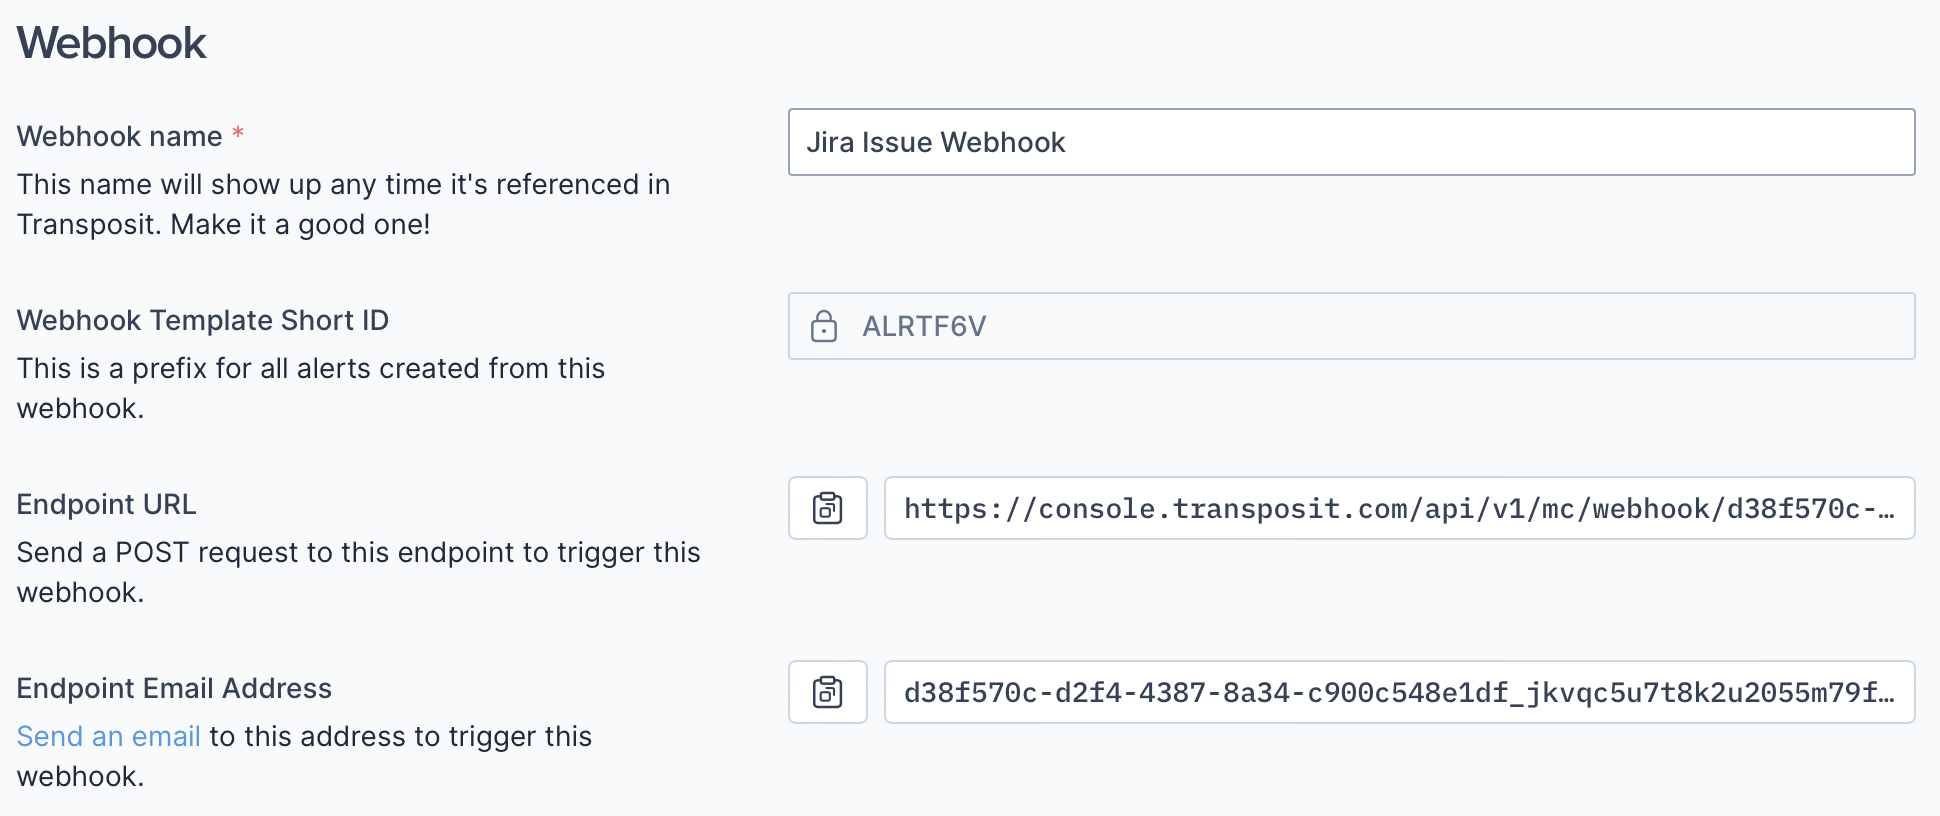
After you click Submit above, copy the Endpoint URL in Transposit from your newly created Jira webhook.
Define a webhook in Jira and paste Transposit's Endpoint URL into the URL field in the Jira webhook form.
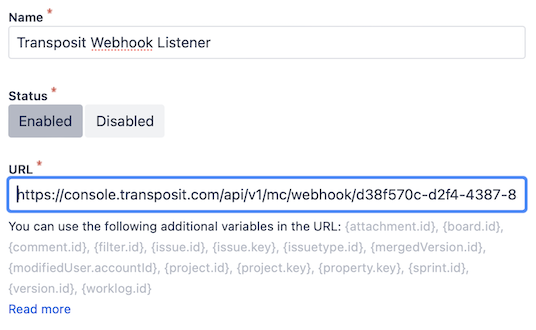
In the Jira webhook page above, scroll down and specify the events for which you'd like the webhook to be triggered. For example, check the checkboxes in the Issue section to trigger the webhook when issues are created, updated, or deleted.
Trigger the Webhook
Perform an action that triggers the webhook in Jira. For example, create, update or delete an issue if doing so is set to trigger the webhook.
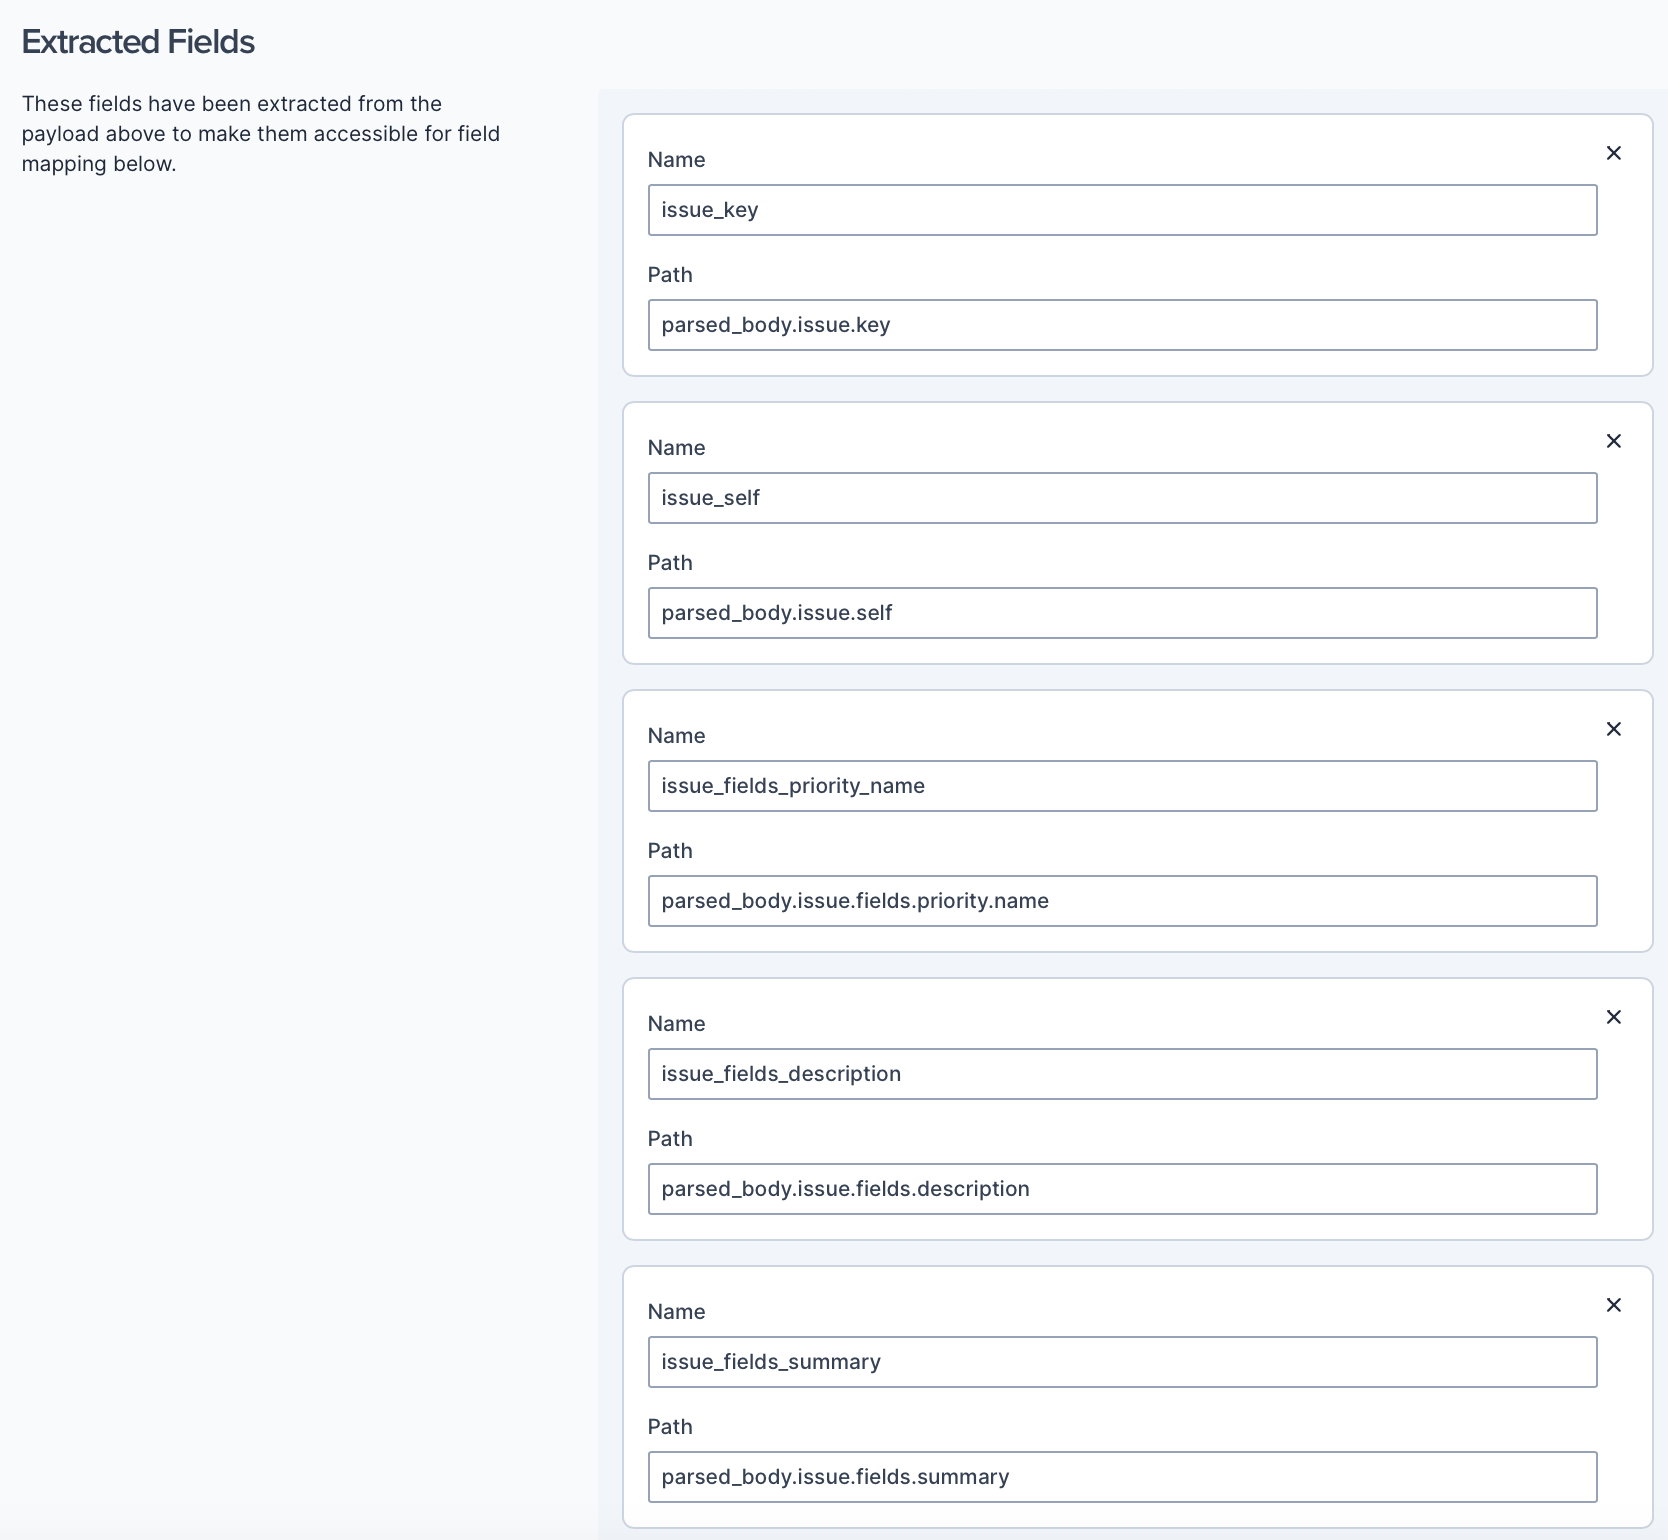
When you click Refetch payload in your Webhook definition in Transposit, the payload sent by Jira is made available, as shown below.
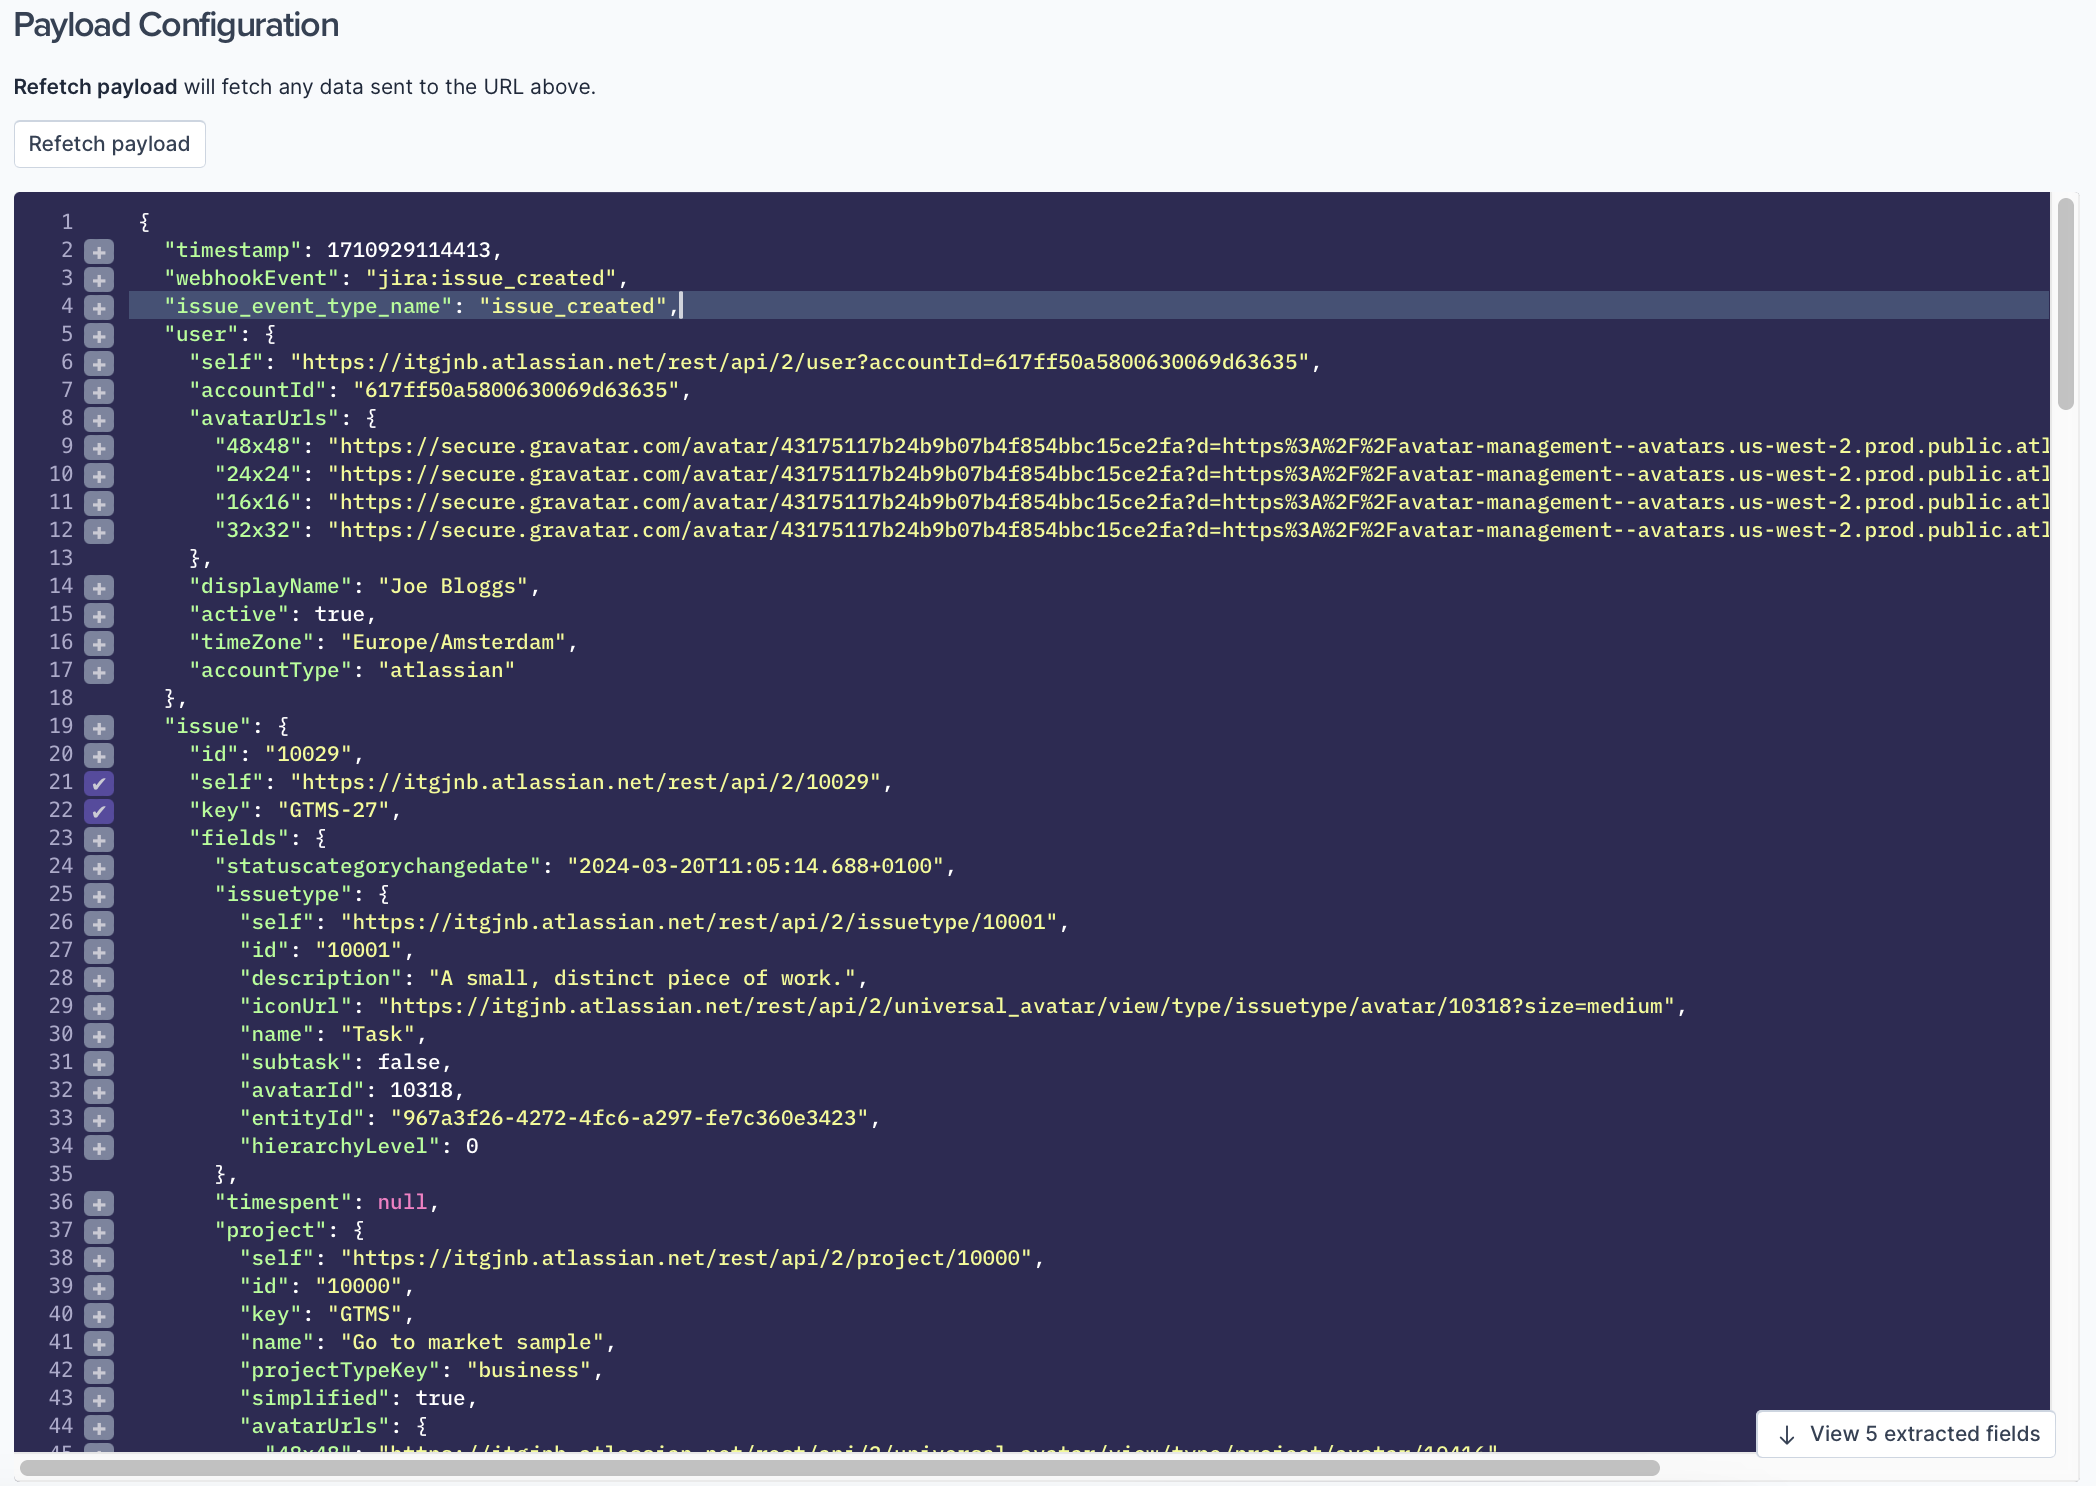
The prebuilt template has automatically extracted relevant Jira fields and mapped them to Transposit alert fields.
Next Steps
Continue developing your webhook settings in Transposit, as described in Setting Up Webhooks.