The purpose of configuring workflows in Transposit is to create incident types that your team will use as the basis of their incidents.
Bundled into your incident types are automations, runbooks, and more, as you'll see while working through the step-by-step instructions below.
Overview
Watch this quick screencast for an overview of the steps you'll take below.
Create an Automation
We'll start by creating a new automation for taking a screenshot of websites via thumbnail.ws. That can be useful as part of an incident resolution process to show the current state of a website, which may include error messages or images that are not loading correctly.
- In the navigation bar on the left, go to Automation Hub.
Before you create a new automation, go to the Explore Templates tab, and check if a template that suits your needs already exists.
Click Create a new script, name your script My First Script, and click Create new Script.
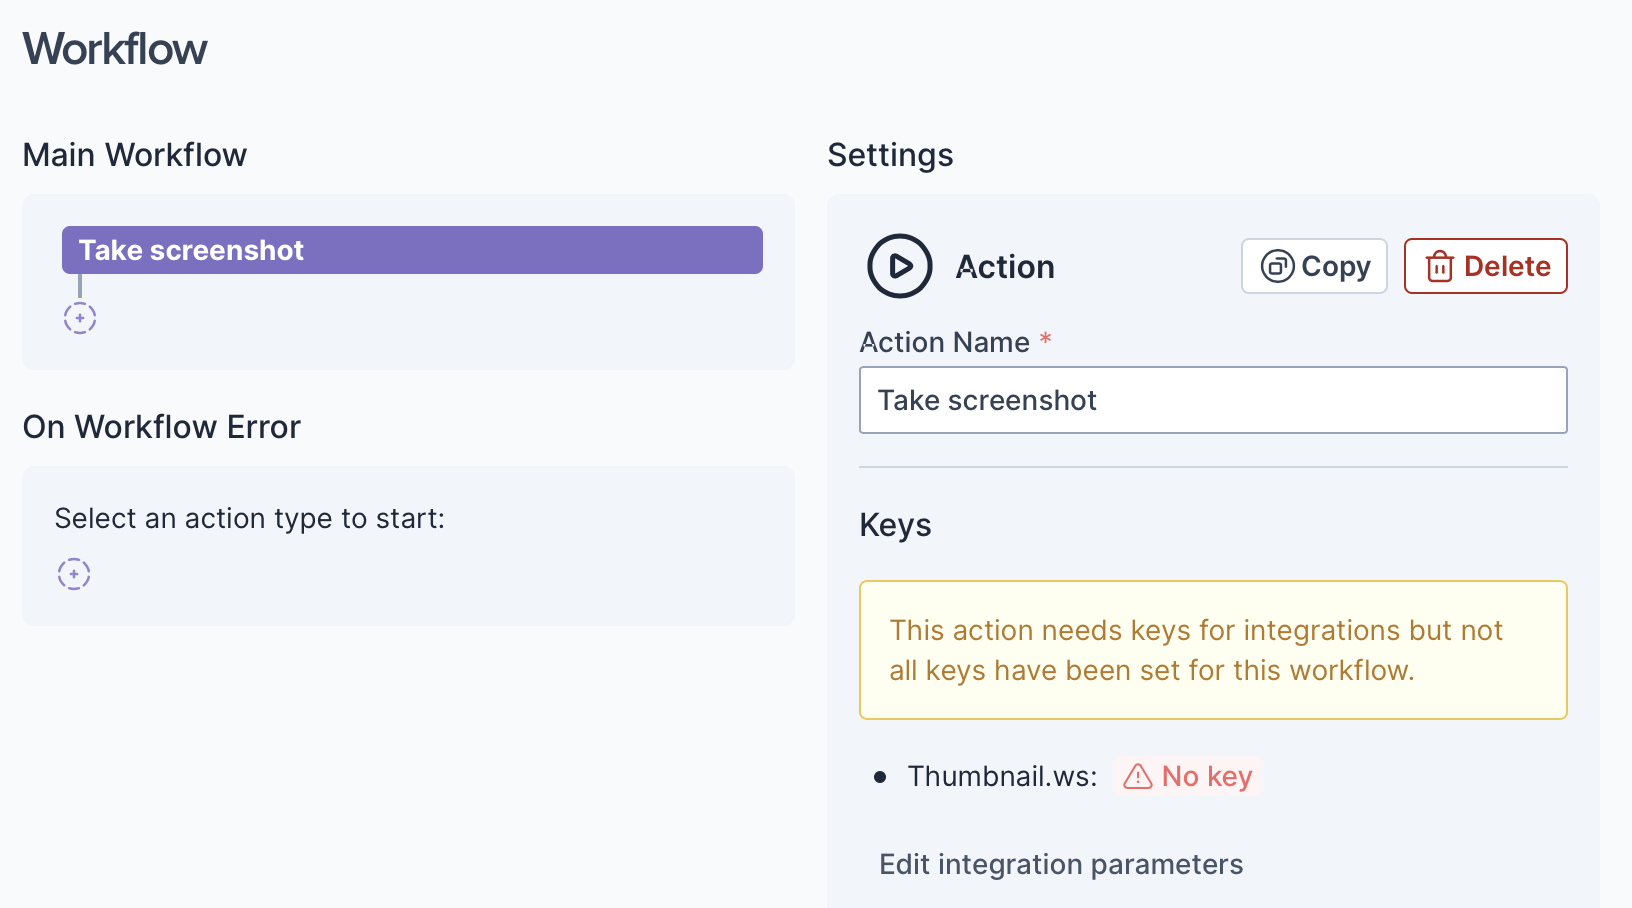
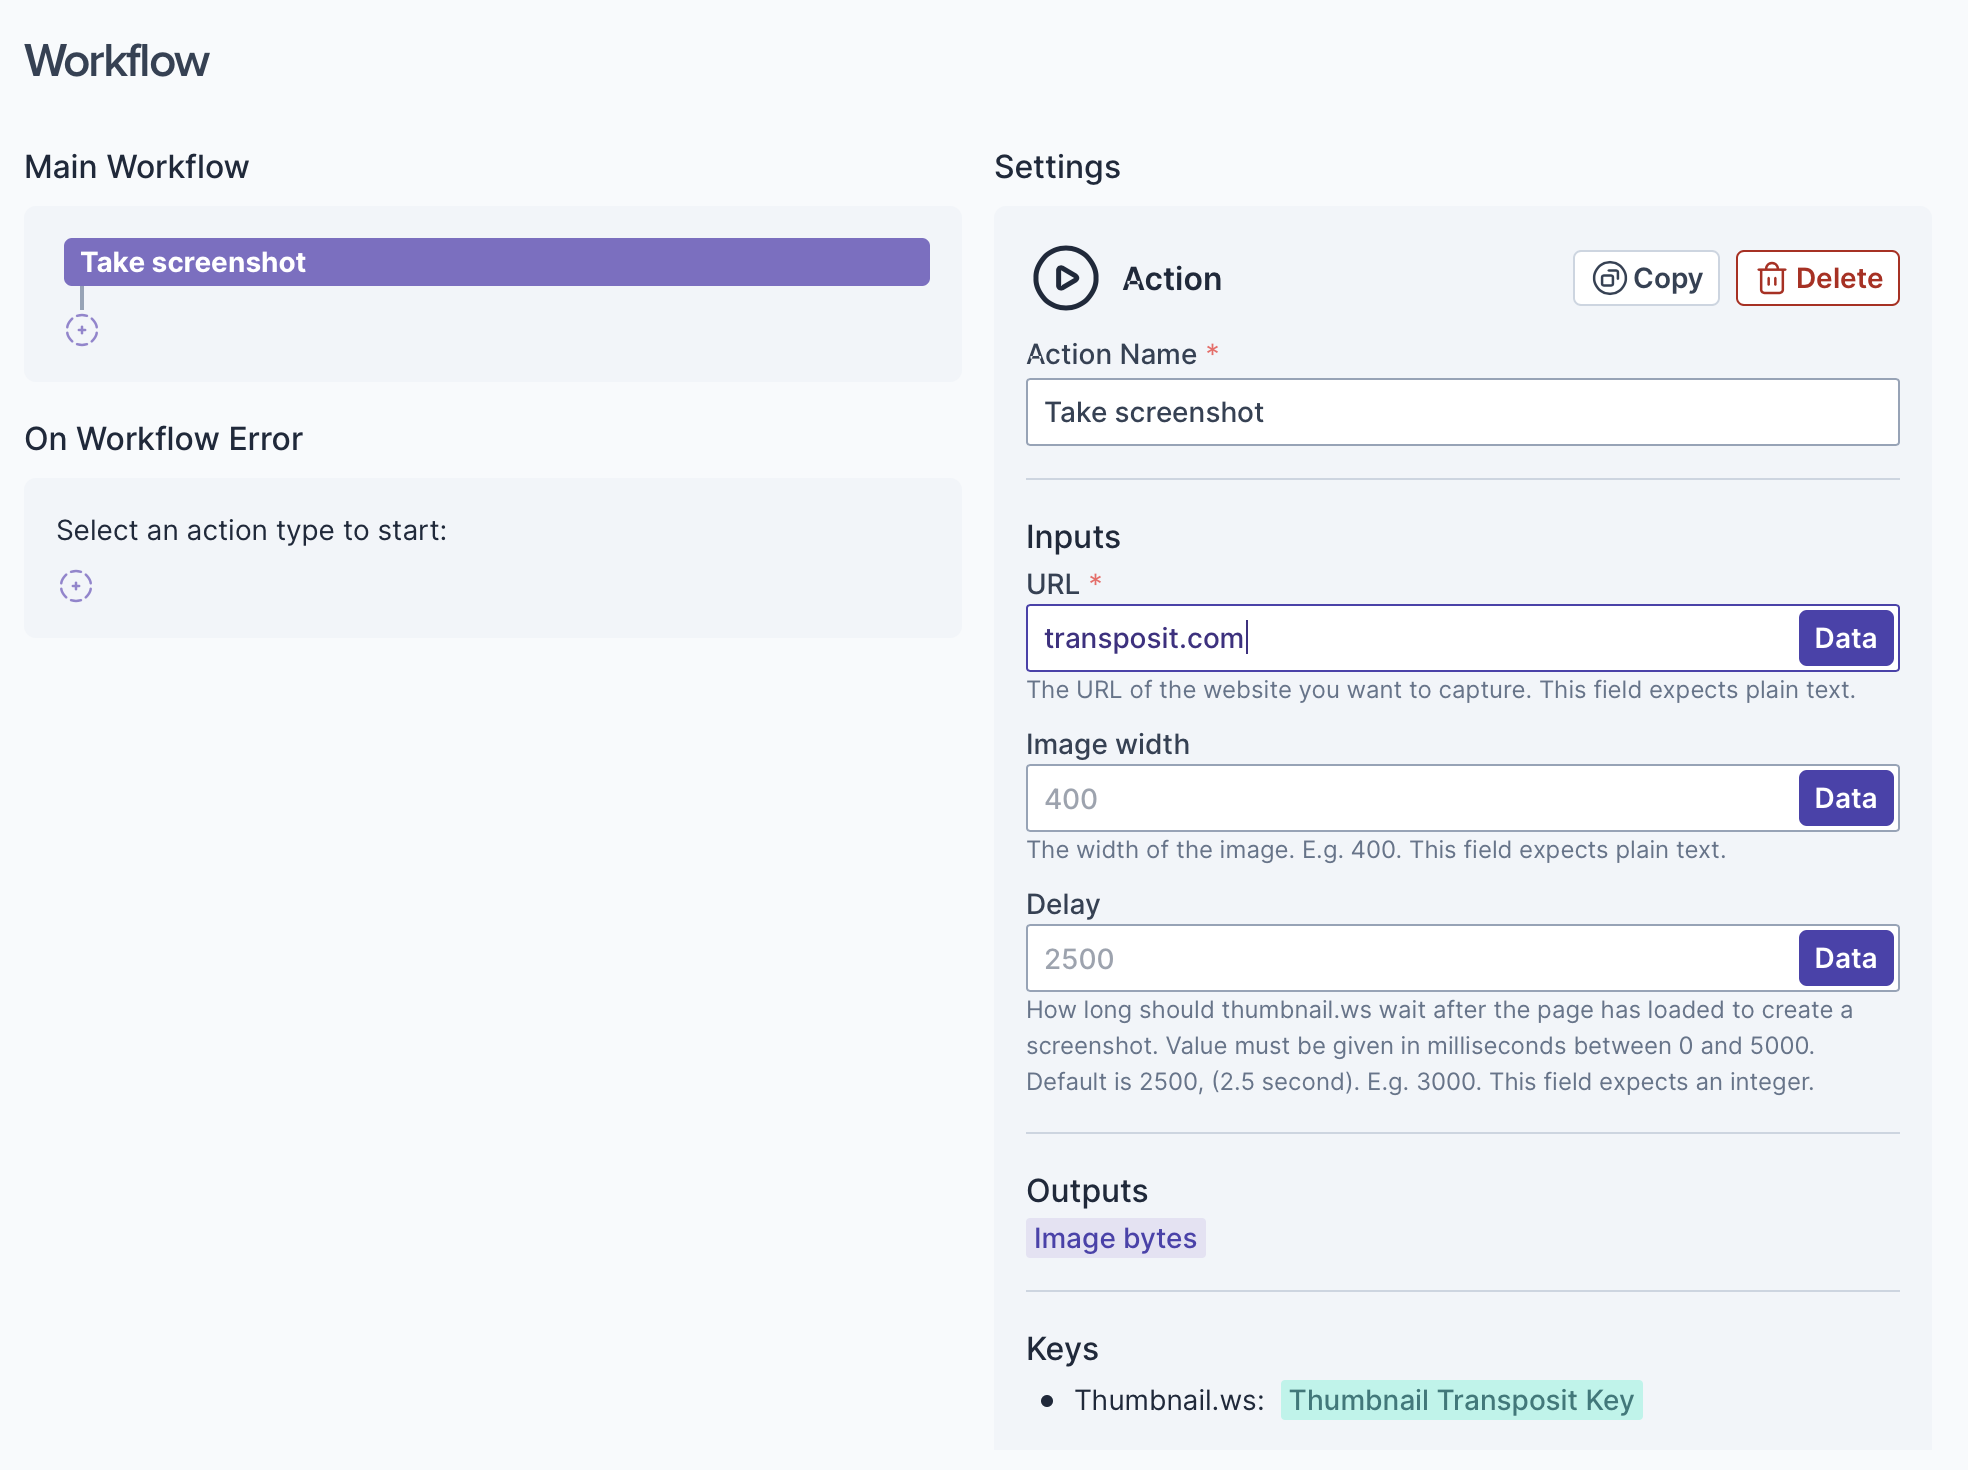
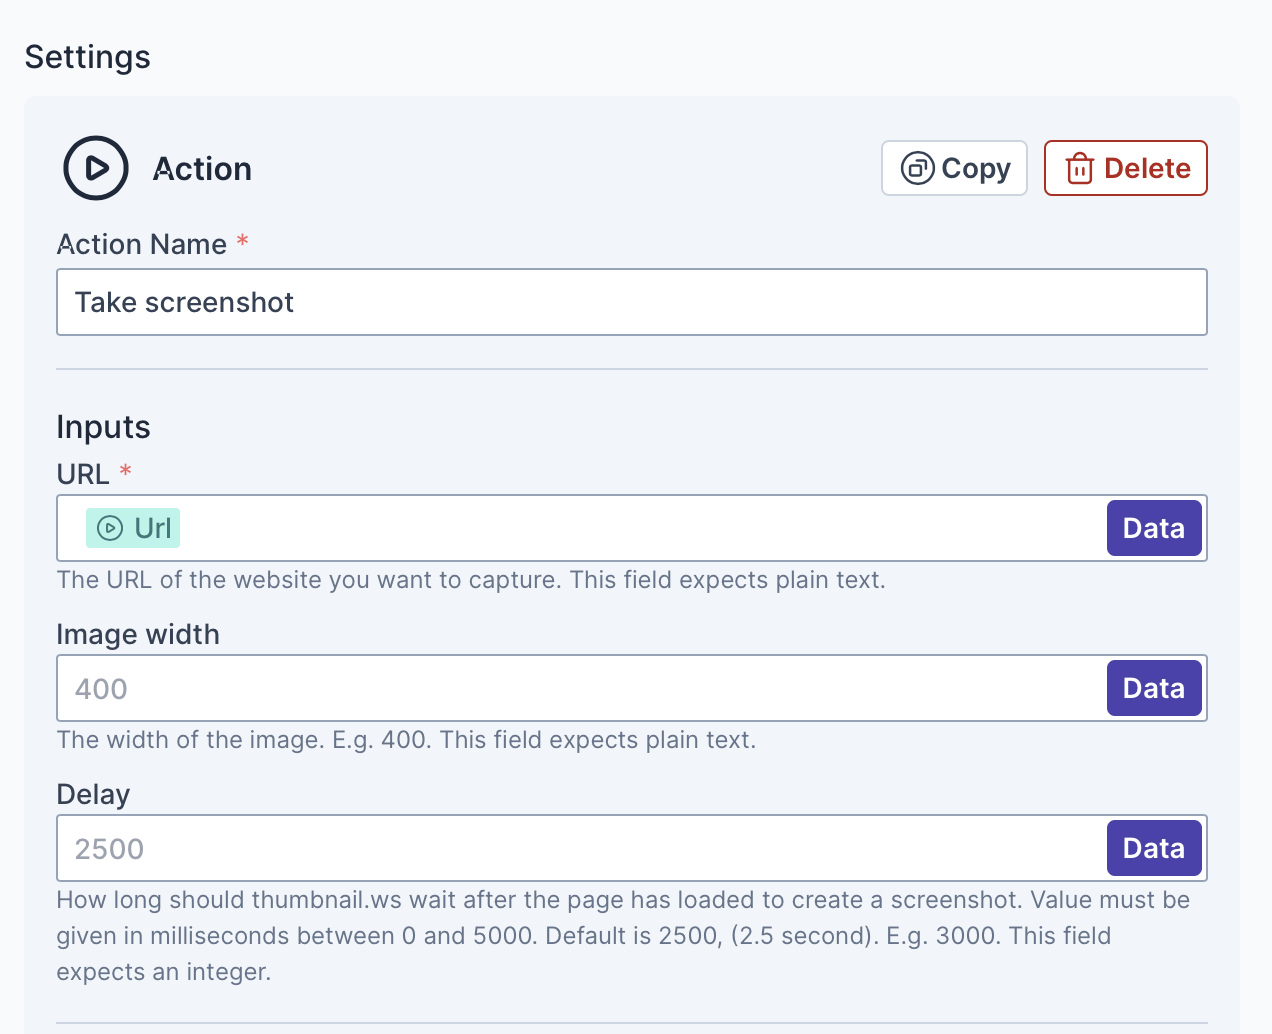
The Script Editor opens. In Main Workflow, click the purple circle icon, and choose Action.

Search for Take screenshot and click Add.

The Action is added to the workflow. Its Keys section shows that the related integration has not been configured, which we will do in the next section.
You've now added an action to your automation for taking a screenshot of a website of your choice.
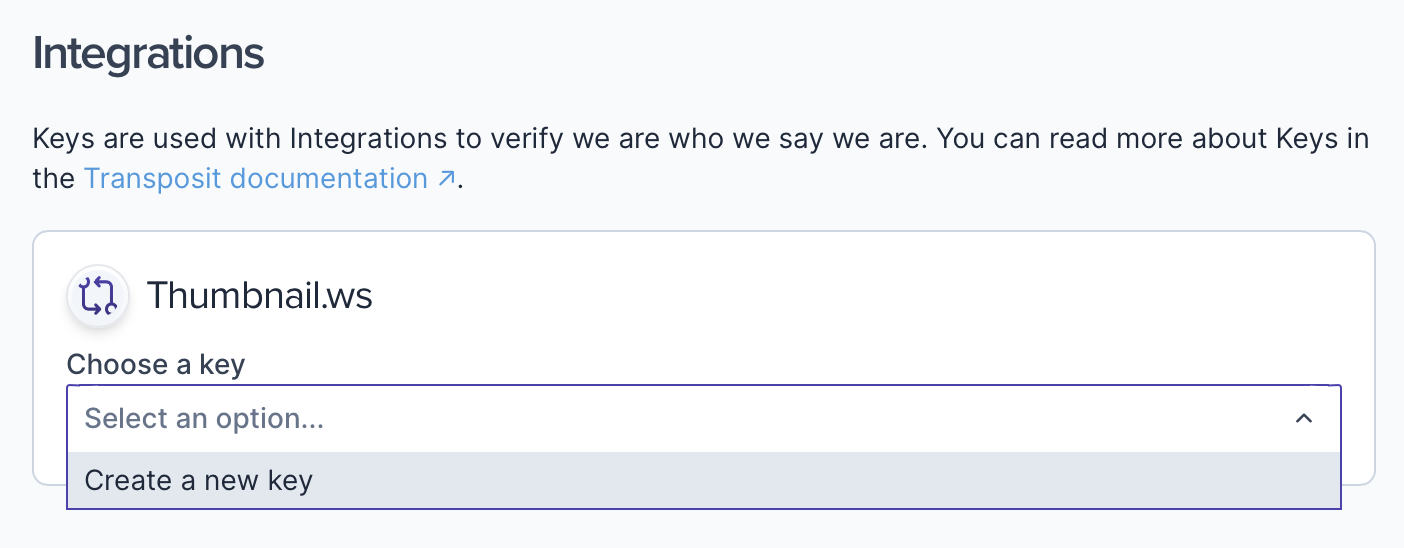
Configure the Integration
Now that you've added an action, let's authenticate usage of the thumbnail.ws service in Transposit.
Scroll down to the Integrations section and click Create a new key.
Define a name for your key.
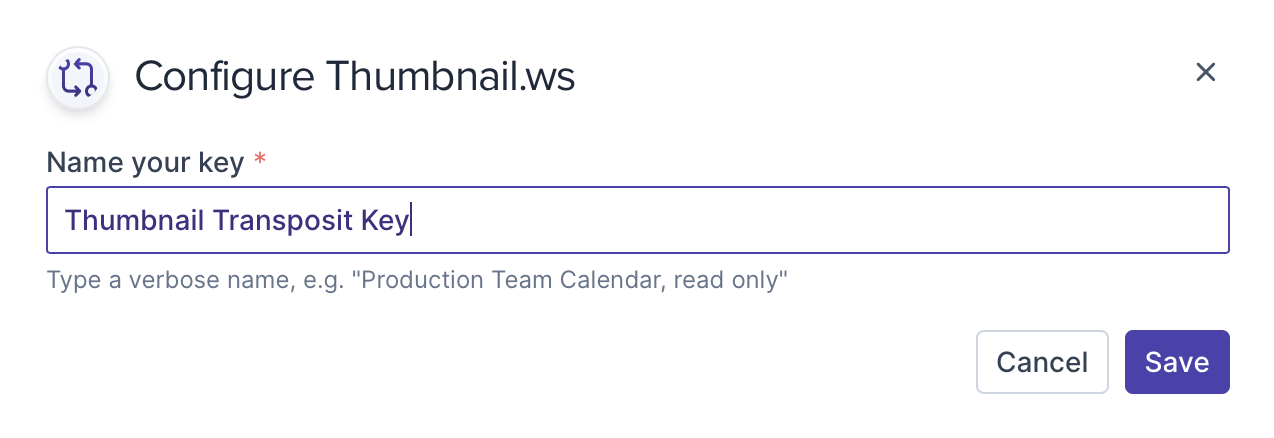
Click Authenticate.

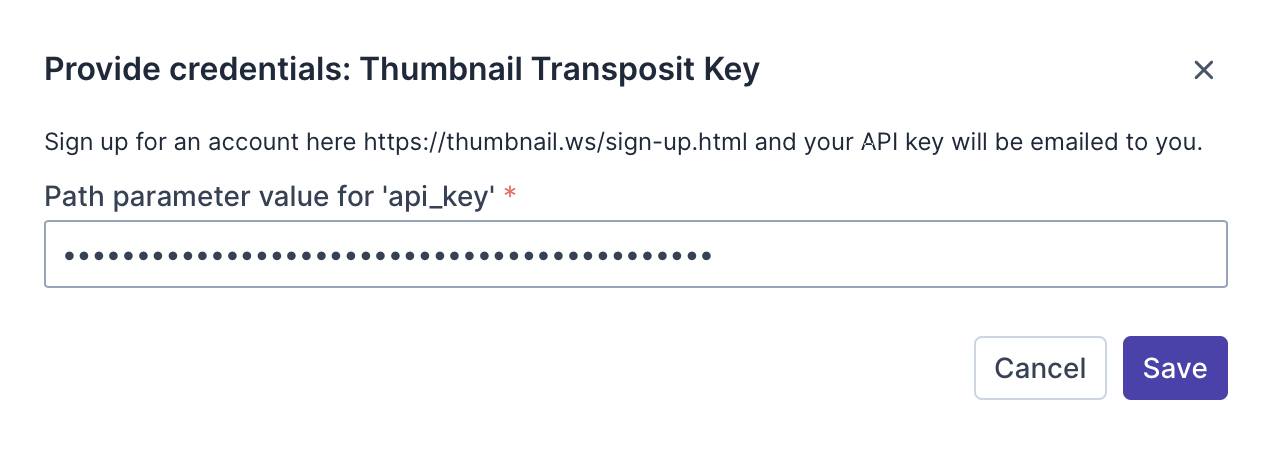
Follow the instructions on the thumbnail.ws Sign Up page and fill in the API key.
Scroll back to the Workflow section and notice that there is no longer a warning about keys needing to be set. In the URL field, type transposit.com, as shown below, which we will later replace with a value obtained from a User Input item.
You now have an Action together with the related integration and you're ready to test it before extending the automation further.
Test the Automation
Before using the automation in an incident, you can try it out to make sure it works exactly as needed.
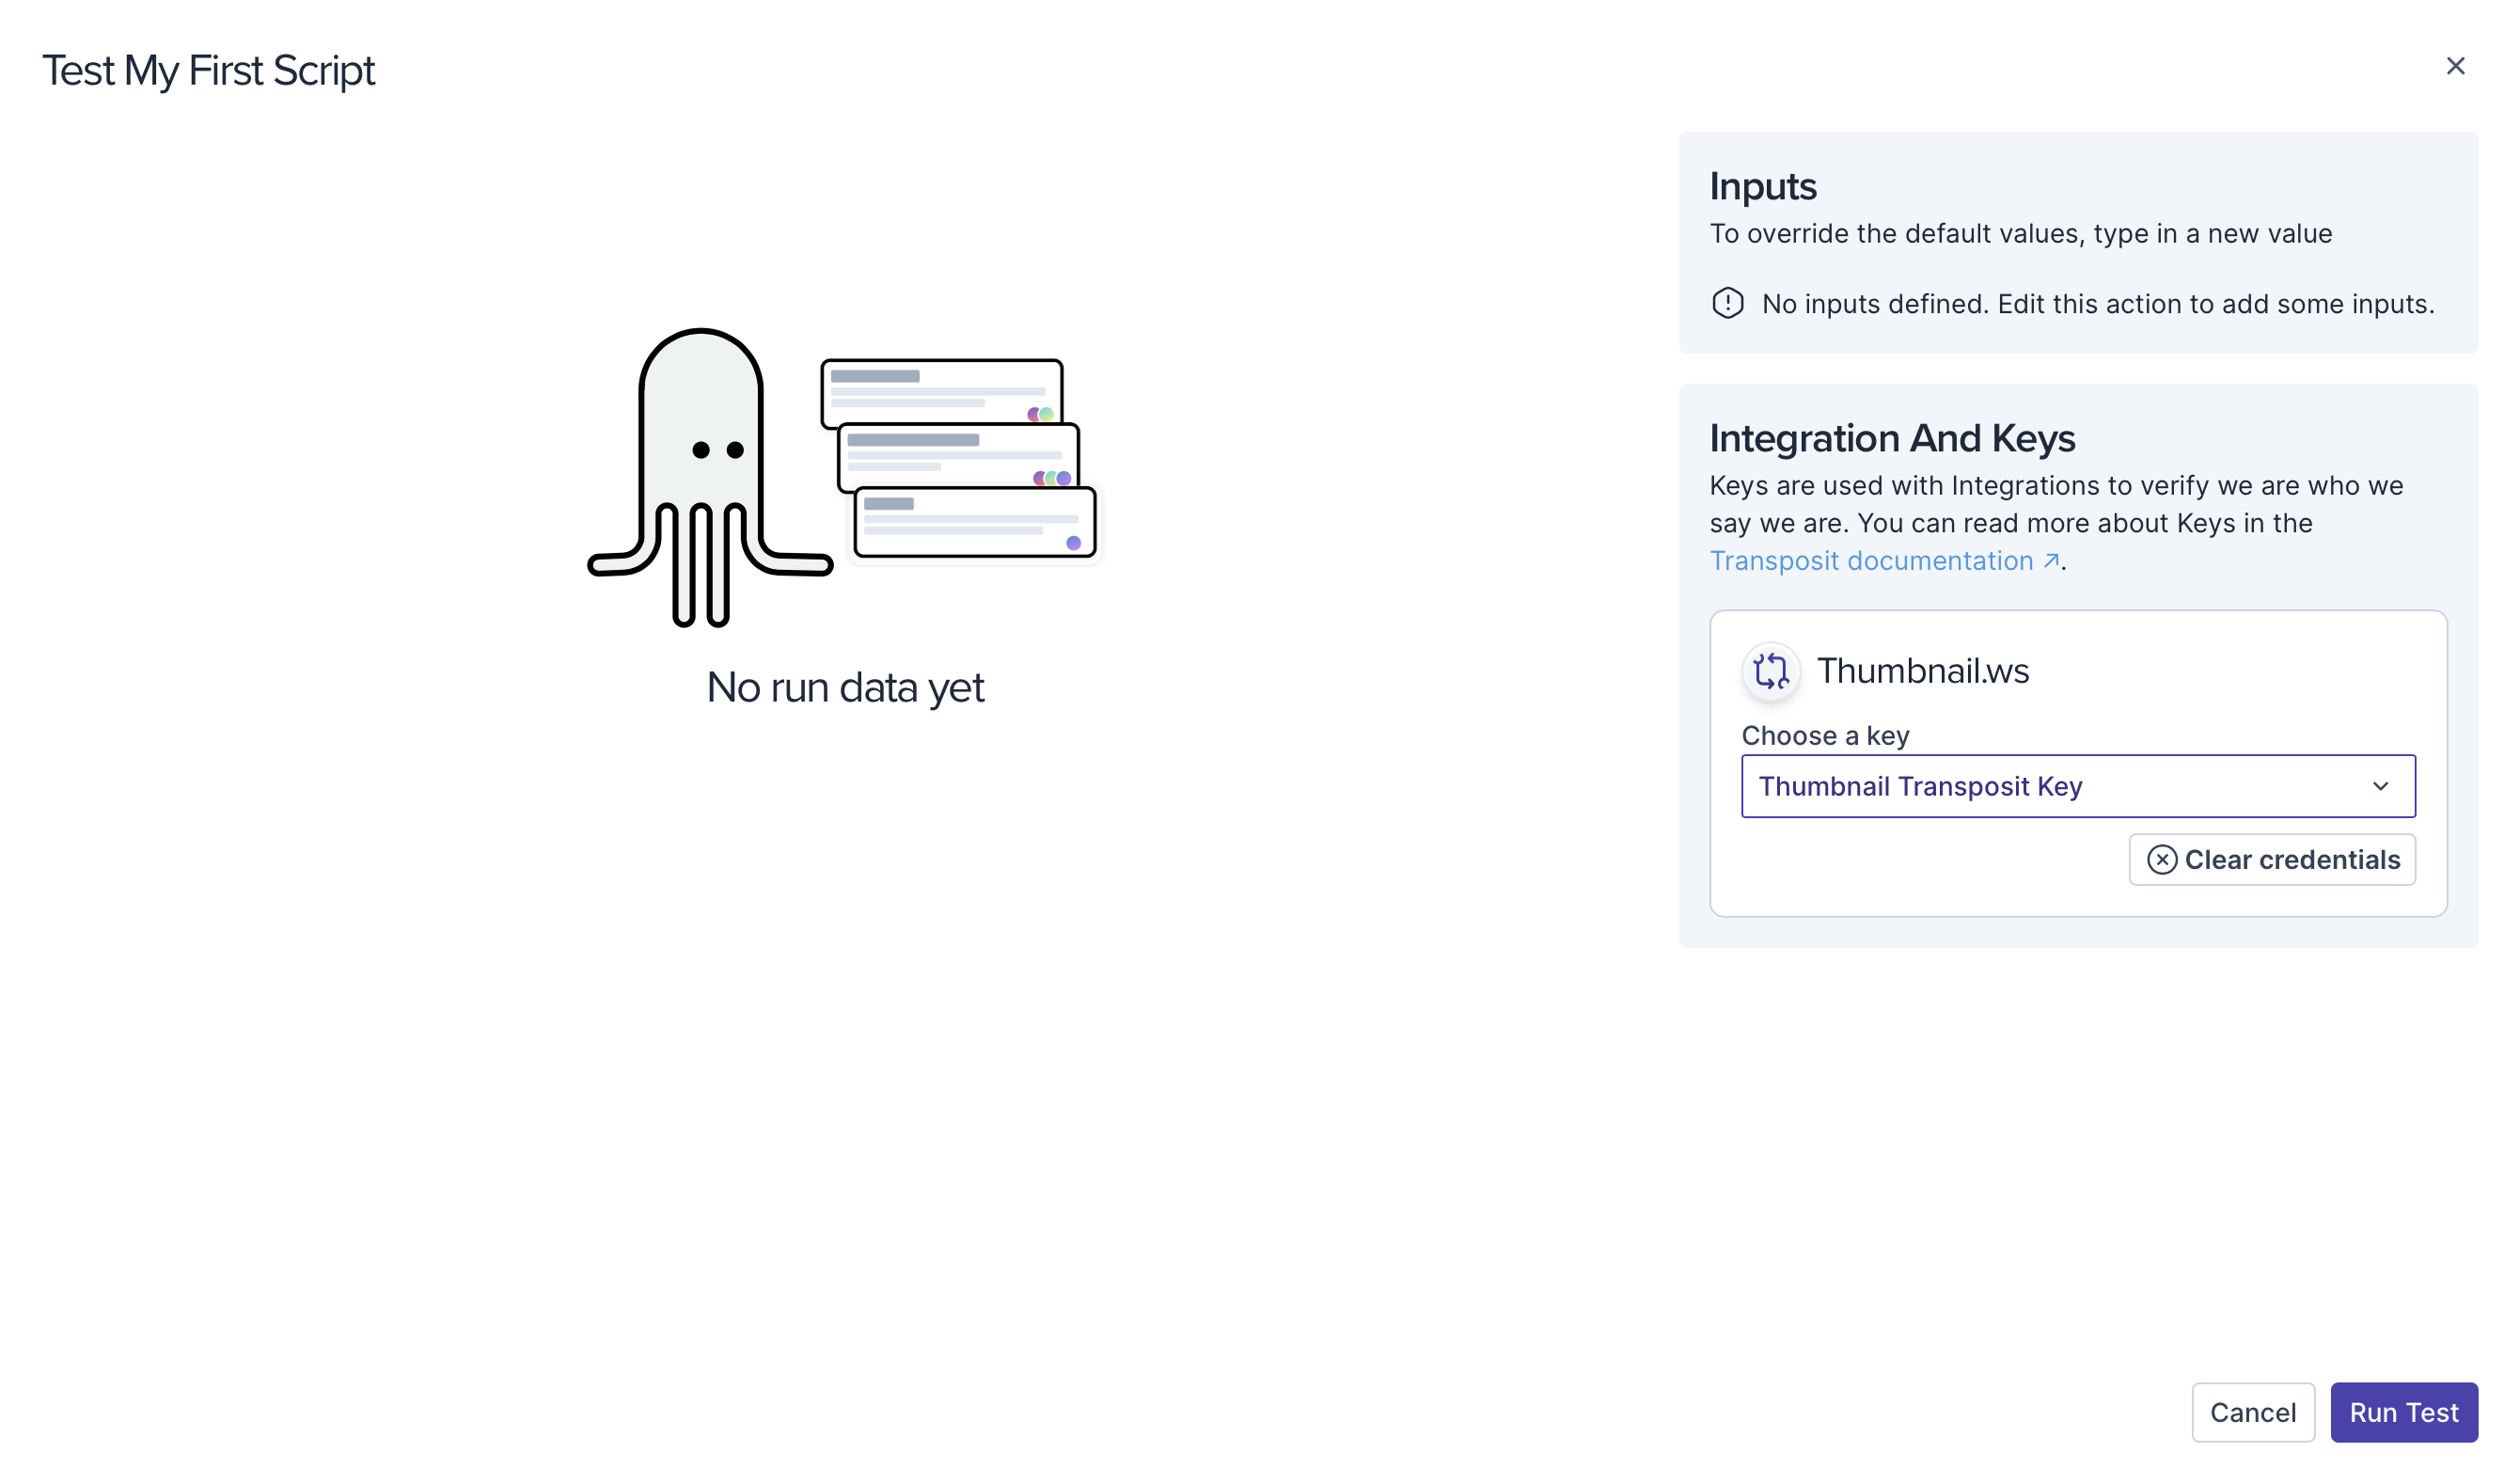
In the bottom right of the page, click Test. In the test page that appears, select your key, and click Run Test.
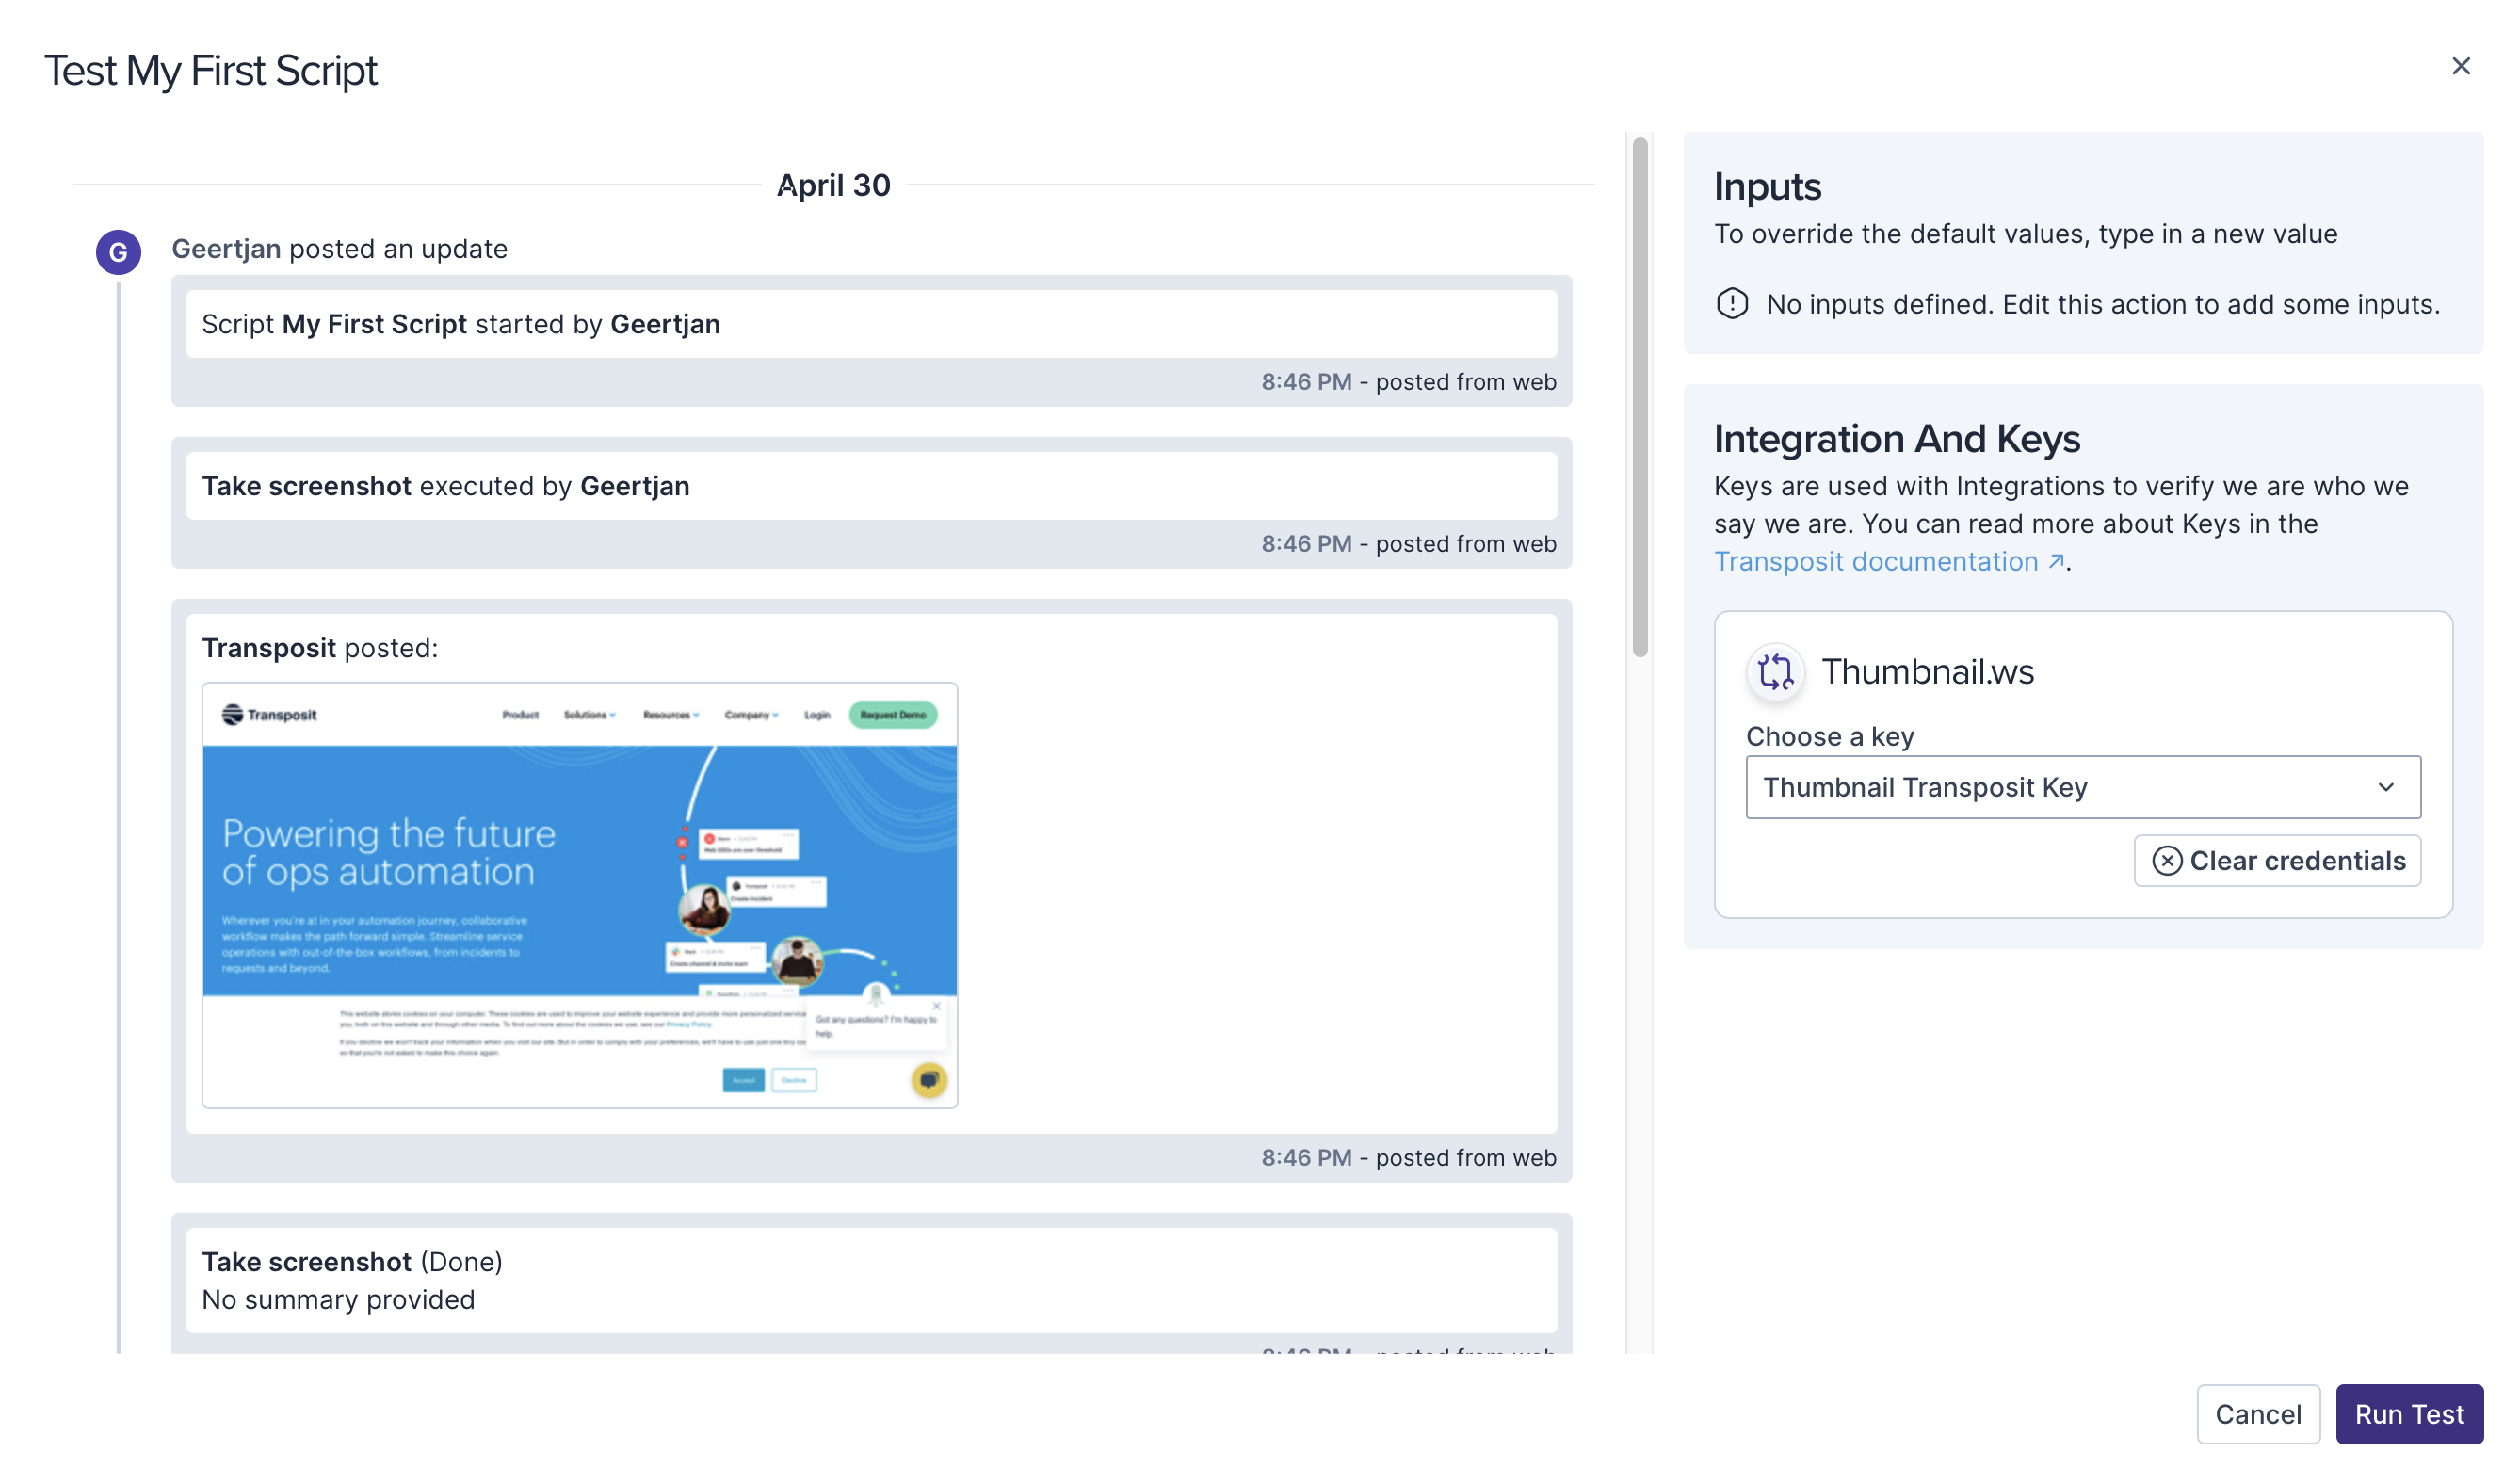
Notice that a screenshot is made of transposit.com, as shown below.
Now that our initial automation works, let's work on it some more, to make it more useful.
Optionally, Add User Input
Rather than providing a hardcoded URL, let's now let the URL be provided by the user.
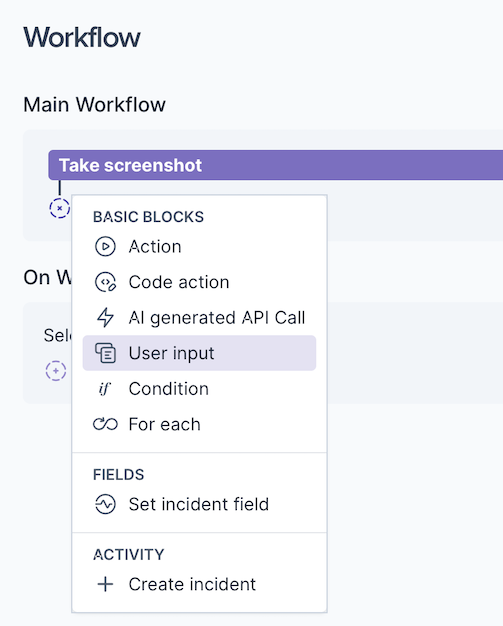
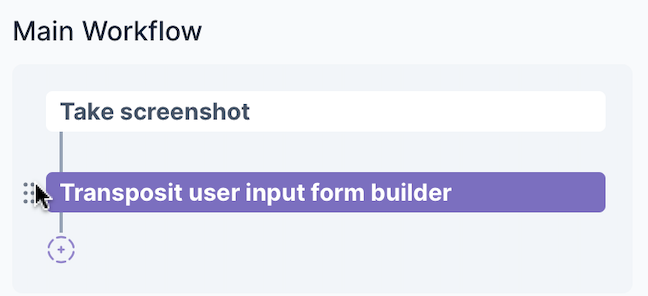
In the same way as you created an Action previously, now create a User Input item, as shown below.
Use the handlebar to the left of the User Input item to drag and drop it above the Action.
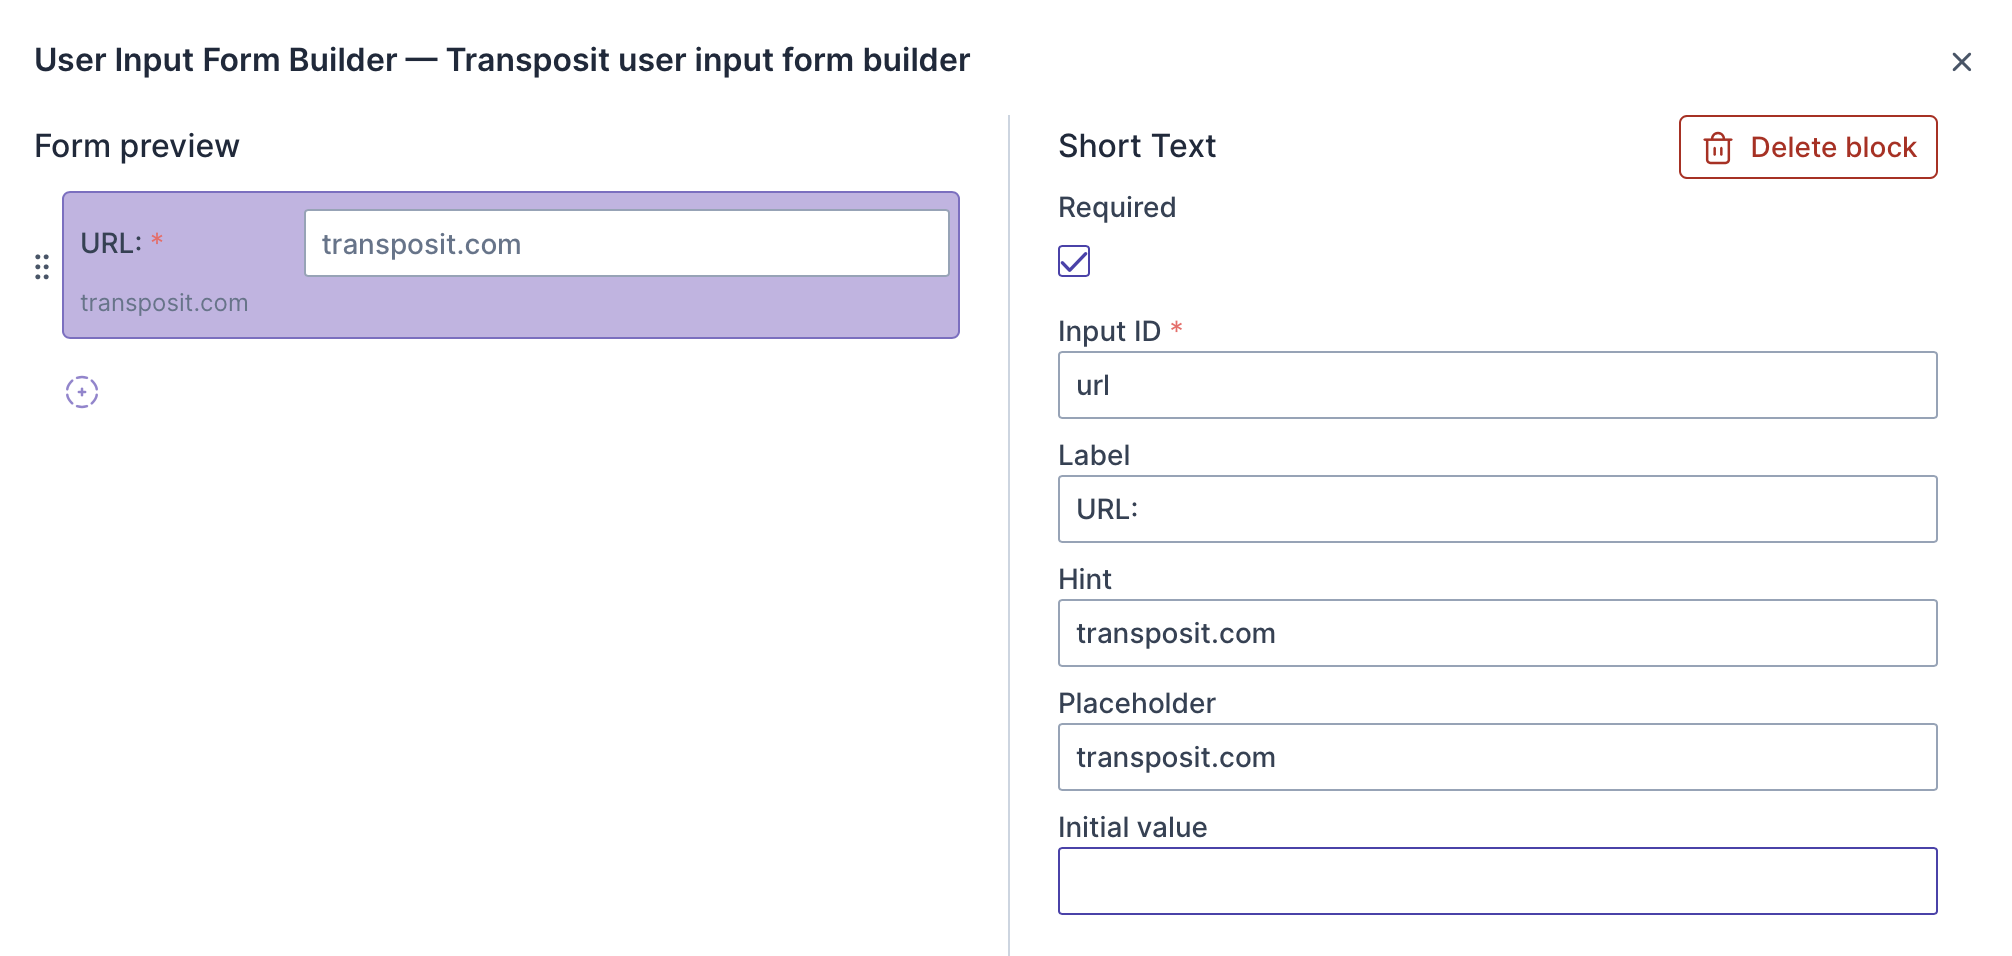
To the right of the User Input item, in its Settings section, click Edit Form.

In the Form Builder, customize the labels and variables so that the name of the variable is url, the display text is URL:, and hints are displayed for the value to be entered.
Delete the hardcoded transposit.com in the Action's URL field, click Data, select User Input in Source, Transposit User Input form builder in User Input Form, and url in Parameter.
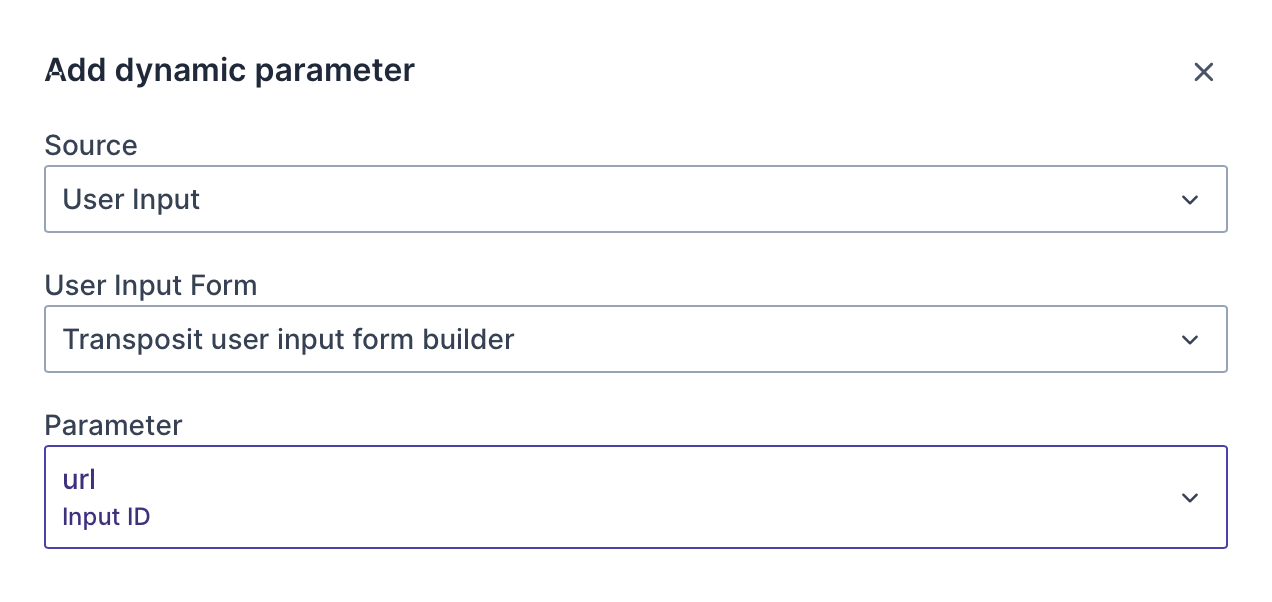
Notice that your url variable is generated, as shown below.
Test the automation as before and notice that now you're prompted for a URL to be provided. Provide a URL and click Run for the automation to be run again for a different website.

You now have an automation ready to be included in an incident type.
Add the Automation to an Incident Type
An incident type is a template that your team will use when defining their incidents.
In the navigation bar on the left, go to Settings > Incident Types.
Click Edit Type to add the automation to an existing incident type or click New Incident Type to create a new incident type from scratch.
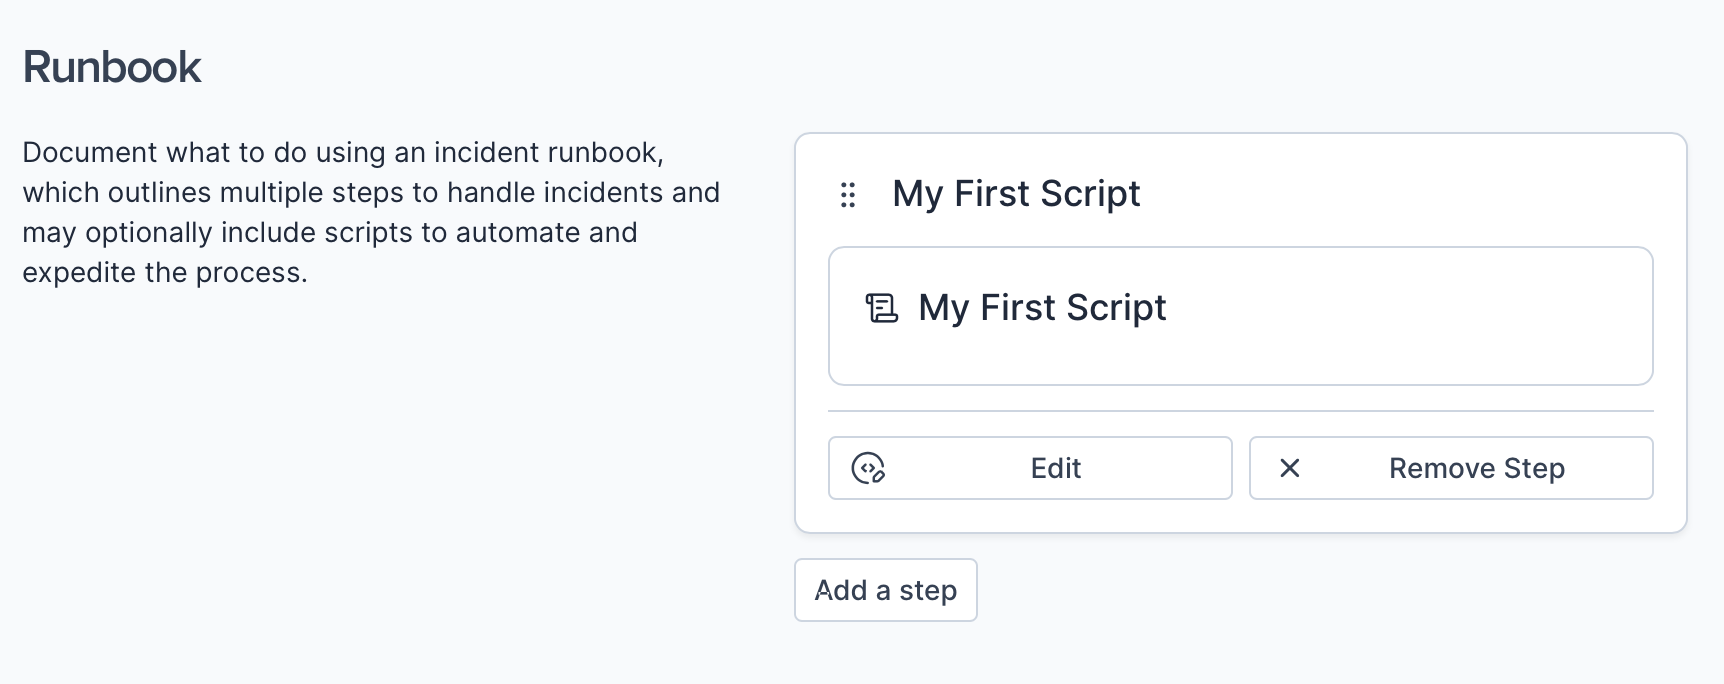
The Incident Type Editor opens. Scroll down to the Runbooks section, click Add a step, enter a title and description, and select your automation from the Attached script drop-down list. Click Save.
Wrap Up
You now have a simple workflow consisting of an Action that creates a screenshot of a website provided by the user via a User Input item.
When a member of your team creates a new incident from this incident type, a step is included in the runbook in the form of a button which, when clicked, runs the automation.
Next Steps
- Extend the automation of your processes and workflows. Go back to the Automation Hub to build out the library of automations to be added to your incident types.
- Enhance your automations with AI. Transposit makes it easier for incident responders to do their work by simplifying automation via built-in support for OpenAI. No need to know the underlying APIs to external tools and services, simply type the information you need and the API calls are generated for you.
- Integrate more of your team's Cloud services. While you're reusing and creating automations, you'll be integrating with external services and applications, including authenticating to them.
- Further define and customize your team's incident types. Once you have some new automations, continue to extend the list of incident types that may already be available, so that your team has starting points for their incidents, tailored to their specific needs.
- Begin setting up and integrating your team's webhooks. Register webhooks in your external services and applications so that their alerts can be received in Transposit. In some cases, you may want incidents to automatically be created as soon as an alert is received.