Prerequisites
- Create an Opsgenie account.
Available Actions
- Acknowledge alert - Acknowledge an Opsgenie alert
- Add note to incident - Adds a note to an Opsgenie incident.
- Add responder to alert - Adds a responder to an existing alert
- Add responder to incident - Add an Opsgenie user as a responder to an incident
- Close alert - Closes an Opsgenie alert
- Close incident - Closes an Opsgenie incident.
- Create alert - Creates an Opsgenie alert
- Create incident - Creates an Opsgenie incident
- Get oncall user - Gets the oncall user for a schedule
- List alert recipients - Find recipients who recieved an alert
- Select schedule - Selects an Opsgenie schedule
- Select services - Selects Opsgenie services
- Select teams - Selects Opsgenie Teams
Before working with individual actions, such as the above, go to the Explore Templates tab in the Automation Hub, and check if a template that suits your needs already exists.
Overview
Watch this quick screencast for an overview of the steps you'll take below.
Click here for more videos.
Set Up the Integration
Let's get started pulling data from Opsgenie into Transposit.
Make sure you're logged into Transposit, then click this link to open the Opsgenie settings dialog, enter a name, and click Save.
In the Integrations list, where your key is now included, click Authenticate.
Follow the instructions in the dialog to get your key.
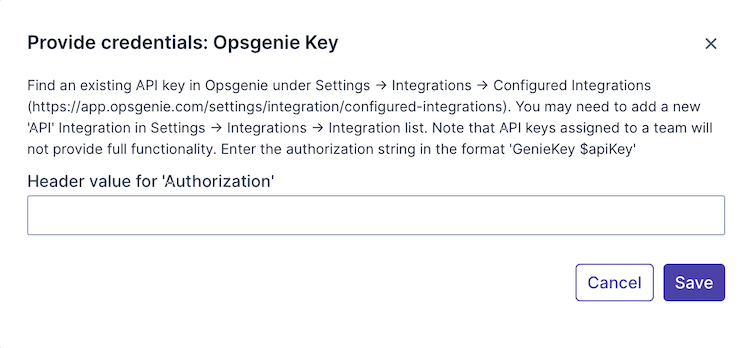
Useful links:
Enter the key received as described above, that is, type GenieKey (note the capital letter G and the capital letter K), followed by a space, and then the API key, so that the entered value should be something comparable to: GenieKey abcd12e3-123a-1a23-a123-12a3b4c5d67e
Click Save.
Use the Integration
Now that you've configured your integration, add one or more of the integration's actions to an automation, test the automation, and then add the automation to an incident type.